30 minute Honey Sesame Baked Salmon

30 min sesame honey baked salmon

This is a family favorite and you only need 30 minutes to get it done. We try to eat fish once or twice a week. Salmon is the kids and ‘hubs’ favorite fish. I’ve made baked salmon all sort of ways, but this is the winner.

The ‘Deal’:  Sprouts has this delicious super fresh Chilean salmon for $9.99 lb. this week.

Start by placing the salmon skin side down on a baking sheet lined with foil. Wipe the fish gently with a paper towel, removing excess juices and scales. Sprinkle 1/2  tsp salt over it and let it sit while you mix the sauce. Note: I used smoked sea salt from Trader Joe’s for extra flavor and I recommend having this delicious and super salty salt handy.

Baked Sesame Honey Salmon

Make the sauce

Sesame Homey Baked Salmon ingredients

For each 1 lb. of salmon you’ll need the following ingredients for the sauce:

  • 1 tbsp Liquid Aminos or 1/2 tbsp of soy sauce
  • 2 tsp honey
  • 1 tsp sesame oil (I used black sesame oil)
  • 1/2 tsp onion powder

Mix all the ingredients well and pour sauce over the salmon slowly, making sure all sides are cover.

Honey Sesame Baked Salmon 30 min

Here is the “dirty little secret” for this recipe. I added 1/2 tbsp of MAYO after fish absorbed the sauce for a couple of minutes to seal the taste and add some evilness to such a clean recipe (Mayo is optional but it tastes so much better with it. It’s only 1/2 tbsp but it’s worthy! Just sayin’)

Honey Sesame Baked Salmon 30 mi

Spread the Mayo like you mean it, until the fish is covered with a brownish homogeneous coat. Sprinkle toasted sesame seeds to taste and let it bake for about 20 minutes at 400-420F. The sauce around it will burn due to the honey at high temp, but don’t panic. The salmon should be cooked through, crispy on the sides and moist in the inside.

Honey Sesame Baked Salmon 30 min

To place salmon on a serving dish, gently run a thin spatula between the fish and the skin. The salmon skin should remain stuck to the foil and the spatula should run easily under the fish.

We ate our salmon tonight with a side of jasmine brown rice and steamed broccoli but we also love it with coucous and quinoa. If you happen to have any leftover, ad it to a salad. It tastes great cold too!

Happy Healthy Eating everyone (minus the MAYO)

Gluten Free Banana Peanut Butter Muffins

Gluten Free Banana Peanut Butter Muffins

Although I don’t seem to need a gluten free diet, I love to explore the paleo/gluten-free/primal/against all grains world. As I mentioned before here, I do believe that eliminating SOME gluten makes SOME difference on my energy, mood and craving levels. Also, my belly seems to be happier and flatter when I stay away from bread and all things deliciously glutinous.

These muffins turned out delicious. They were moist and not overly sweet. I decided to obey to my 7-year-old daughter’s wisdom and I topped the muffins with peanut butter chips from Trader Joe’s (probably NOT a gluten free food.) Perfect addition!

I don’t like baking (remember?) I suck at it. Interestingly, most of the gluten free baking recipes I’ve tried have worked so far…hum…except for the minute microwave mug cake that I ate anyway. So I’m going to listen to the coconut and almond flour universe more often and keep trying new gluten-free recipes. Happy chef and happy belly!

Gluten Free Banana Peanut Butter Muffins

Gluten Free Banana Peanut Butter Muffins

Dominique for DealiciousCooking

Ingredients
  

  • 4 bananas the riper, the better
  • 4 small eggs
  • 2 tbsp of unsweetened almond milk
  • 1/2 cup peanut butter I used Trader Joe's creamy salted PB
  • 2 tbsp coconut oil melted
  • 2 tbsp agave syrup can substitute for honey
  • 1 tsp vanilla
  • 1/2 cup coconut flour
  • 2 tsp cinnamon
  • 1 tsp baking powder
  • 1 tsp baking soda

Instructions
 

  • Preheat oven to 350 degrees F. Spray a muffin tin with Pam or vegetable oil. In a large bowl, using a hand blender, blend the bananas, eggs, almond butter, almond milk, agave/honey, coconut oil, and vanilla.
  • Add in the coconut flour, cinnamon, baking powder, baking soda, and salt. Blend into the wet mixture. Place the batter evenly into the muffin tins, filling each about two-thirds of the way full.
  • Bake for 20-25 minutes, until a toothpick comes out clean (I overcooked mines a bit but they still came out moist and delicious.)

Notes

Top with chocolate and/or peanut butter chips before baking for extra sweetness.


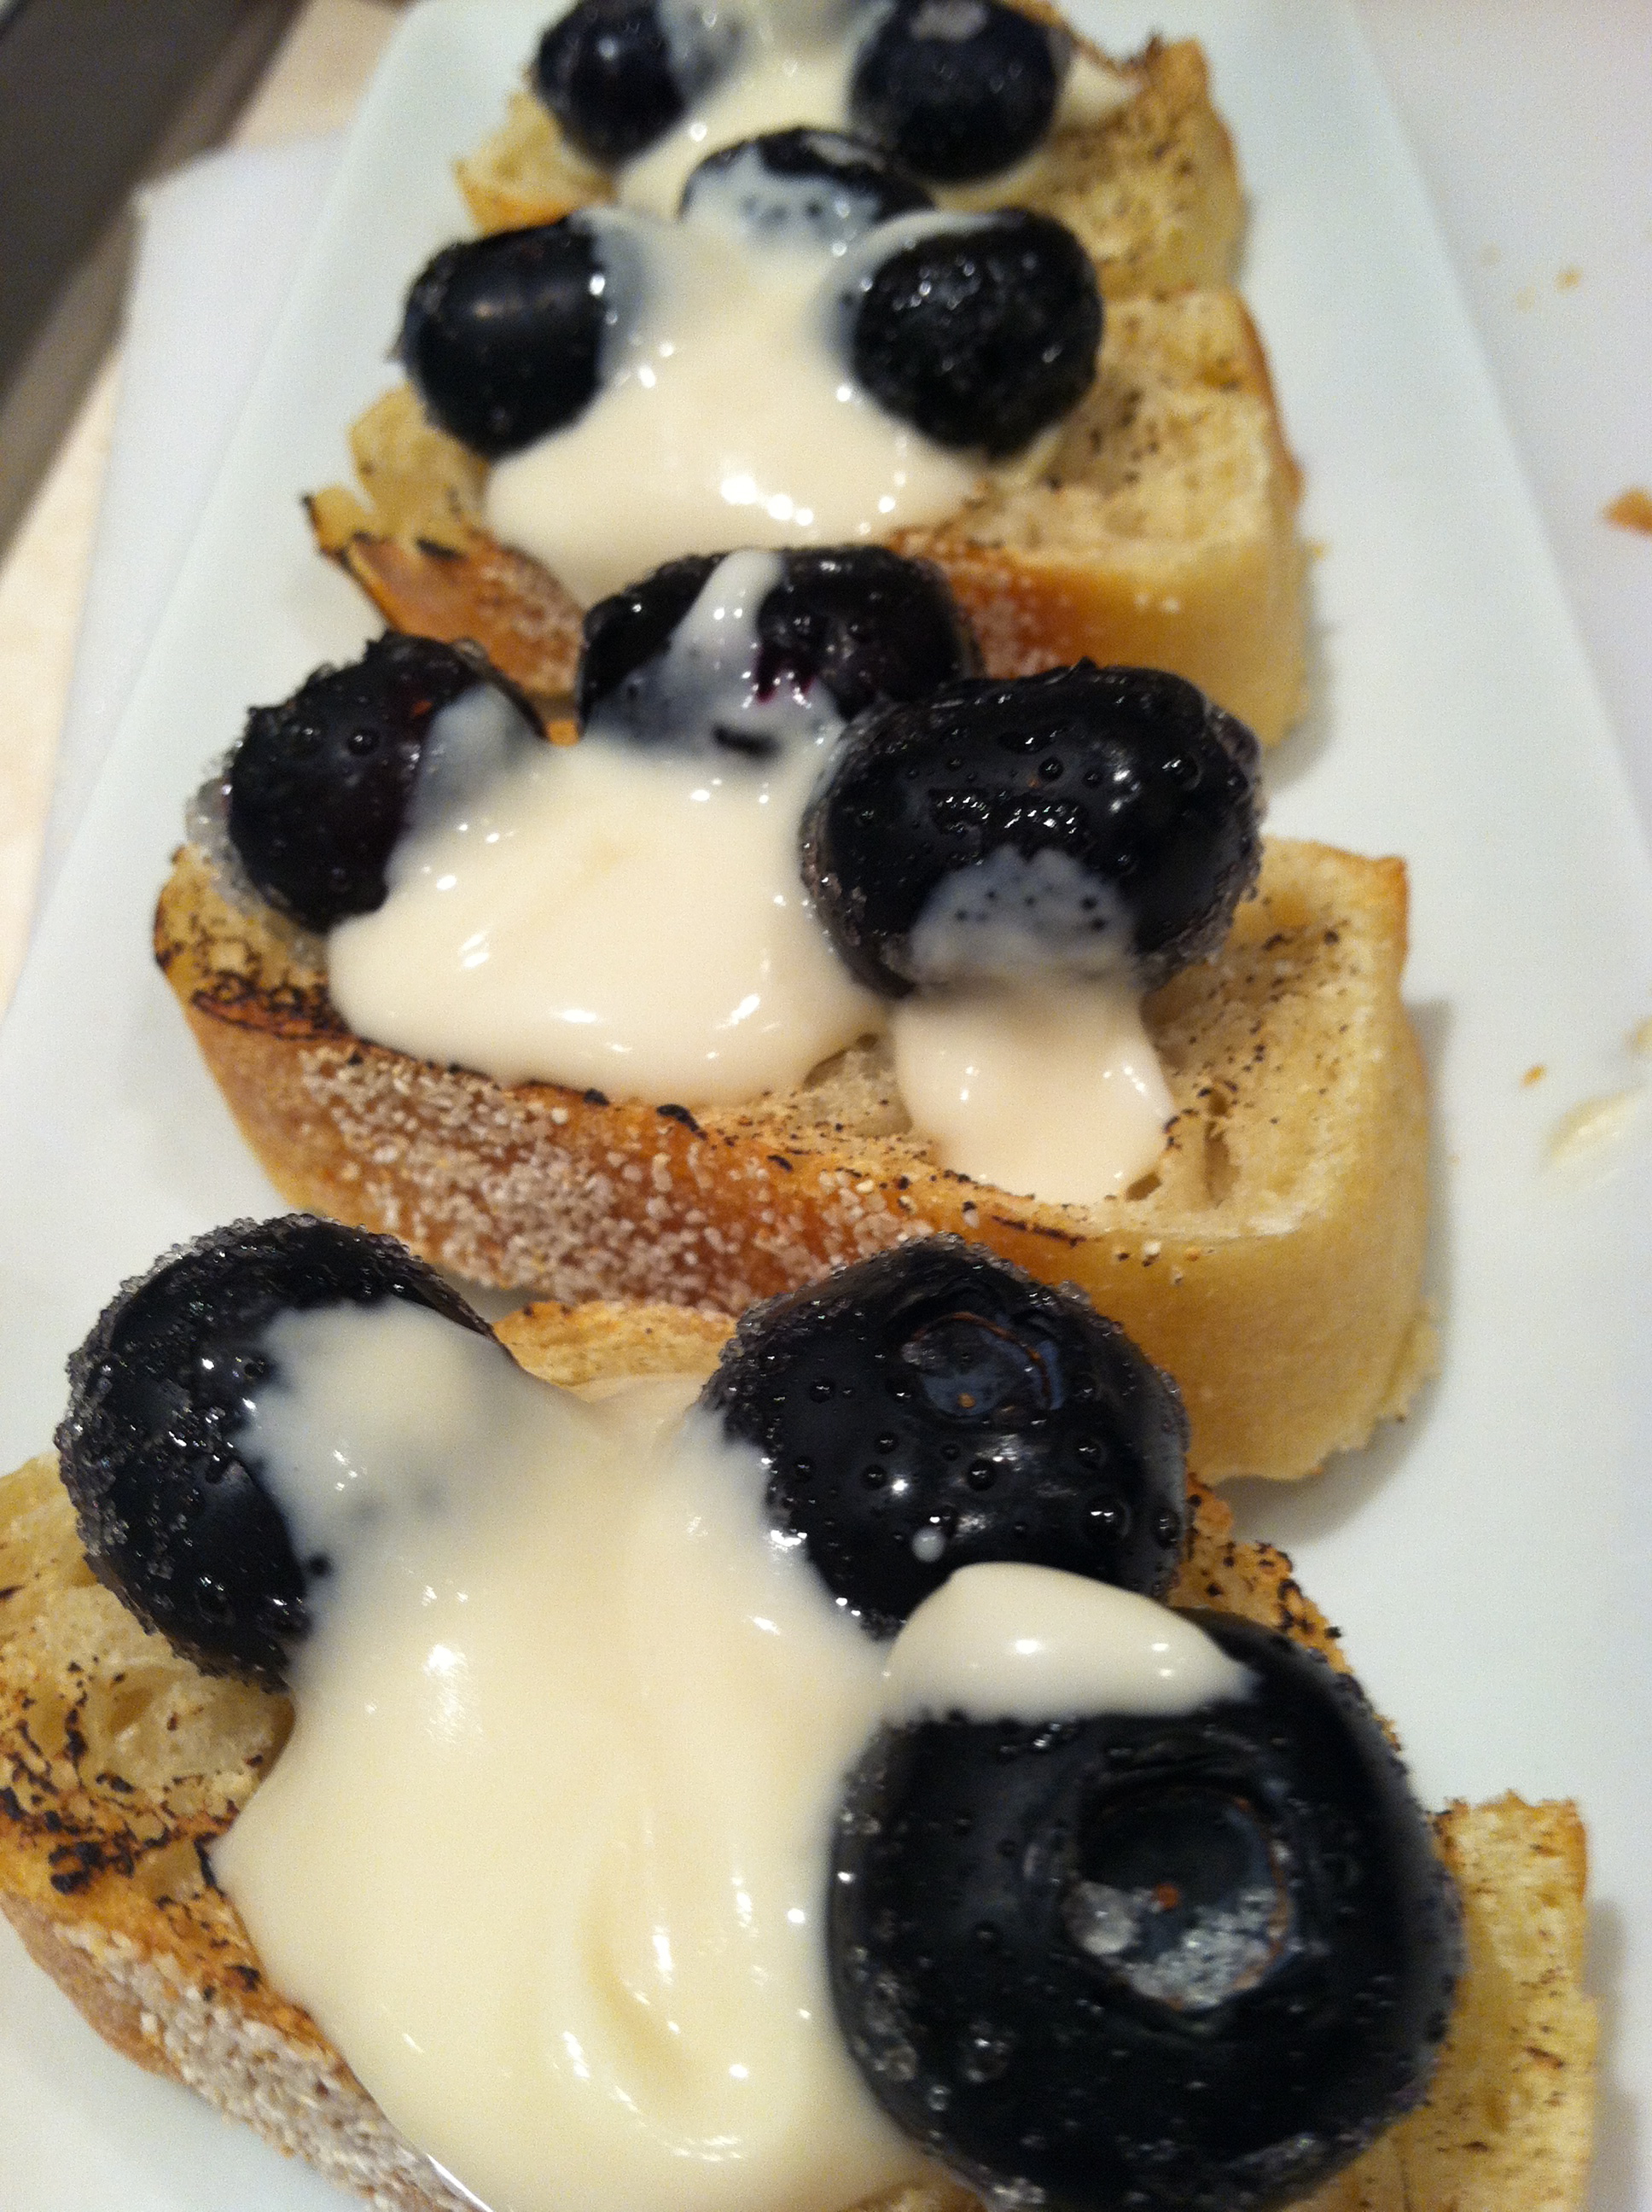
Fresh Blueberry Crostini with Lemon Honey Whipped Goat Cheese

Fresh Blueberry Crostini with Lemon Honey Whipped Goat Cheese

I’m going to spare everyone from the whole palate sensation description shenanigans. Next time I’m looking for an appetizer that is easy to make and delicious, I need to remember this recipe.

Fresh Blueberry Crostini with Lemon Honey Whipped Goat Cheese

Dominique for DealiciousCooking

Ingredients
  

  • 30 slices French baguette bread cut in ½ in. thick slices I used La Brea French Baguette
  • 4 tbsp olive oil
  • 8 oz. creamy goat cheese room temperature I used low fat goat cheese from TJs
  • 1 tbsp refined sugar
  • 1/2 tsp of sea salt
  • 3 tbsp of honey
  • 1 tbsp of fresh squeezed lemon juice
  • 1 small box of fresh blueberries

Instructions
 

  • Pre-heat oven to 400 degrees and line a baking sheet with foil. Brush bread slices with olive oil and bake it until golden brown. I happened to have the grill on and I grilled the bread instead of toasting it. Either way works.
  • In a separate bowl place washed and pat dried blueberries. Sprinkle the sugar and salt (yes!!! Salt) evenly. Reserve.
  • In a medium bowl whisk together manually or with a had mixer the goat cheese, lemon juice and honey until fluffy.
  • Assemble by spreading a little bit of the whipped goat cheese in each crostini (make sure crostini has time to cool off a bit) and top it with 2 or 3 blueberries. Add more whipped goat cheese if you have any left (or as many as you can make it fit).


Black Rice with Kale, Mushrooms, Marsala Wine and Feta Cheese

Heirloom Forbidden Rice Package

This ‘black rice’ came in my Easter basket and to tell you the truth I thought it was just wild rice. I was not excited. Disappointed even.  As I put the bag in the pantry, I briefly read the package description…which led to Google search…that proved I live under a rock. As it turns out this Heirloom forbidden rice is NOT wild rice and it’s the healthiest rice in the world.  How haven’t I heard of it?

Down to the facts. Heirloom forbidden rice (aka black rice) has high level of minerals, antioxidants, is rich in a class of flavonoid antioxidants called anthocyanins, which are potent anti-inflammatories and have specifically been linked to a decreased risk of heart disease and cancer as well as improvements in memory.

Best of all, black rice taste a zillion times better than white or brown rice. It’s nutty, slightly sweet and it looks way sexier than any other rice.

This rice is not cheap so if you want to make it ‘dealicious’ keep checking the Whole Foods bulk section (it goes on sale sometimes) or try Cost Plus World Market where the one I got seems to come from.

There are good recipes out there for black rice but I had to use the kale and mushrooms in the fridge, so I came up with this recipe. It was the perfect side for our baked salmon.  Any type of kale would work for this recipe, but I used Earthbound Organic Baby Kale from Costco. Broccoli rabe (Rapini) or spinach would work too.

Black Rice, Kale, Mushroom with Marsala rice and Feta


Black Rice with Kale, Mushrooms, Marsala Wine and Feta Cheese

Dominique for DealiciousCooking

Ingredients
  

  • 1 cup uncooked heirloom forbidden rice
  • ½ medium purple onion chopped
  • 2 cups crimini or white mushrooms sliced
  • 4 cups of raw baby kale
  • 1 1/2 tbsp olive oil
  • 2 tbsp Marsala wine
  • 1/4 cup of crumbed goat cheese or feta cheese
  • 2 3/4 cups of beef broth or water to cook the rice
  • 1/4 tsp salt
  • black pepper

Instructions
 

  • Start by cooking the rice with the beef broth in the rice cook. If you don’t have a rice cook, simply follow the directions in the package replacing the water with beef broth. If you don’t have directions (bought it in bulk) bring beef broth to a boil and add the rice. Cover and cook for 20-30 minutes in medium heat. Remove from heat and let stand covered. Reserve.
  • On a separate pan, sauté the onion in the olive oil until it becomes translucent. Add mushrooms and Marsala wine. Cook for about 3 minutes and add kale, salt and some pepper. Cook until kale reduces its size and looks fully steamed. Turn heat off. Add the cooked black rice mixing it well. Taste and adjust with more salt and/or pepper. Cover and let it stand for a few minutes, allowing the rice to absorb the kale/mushrooms/Marsala wine juice. Sprinkle the cheese over the rice before serving.


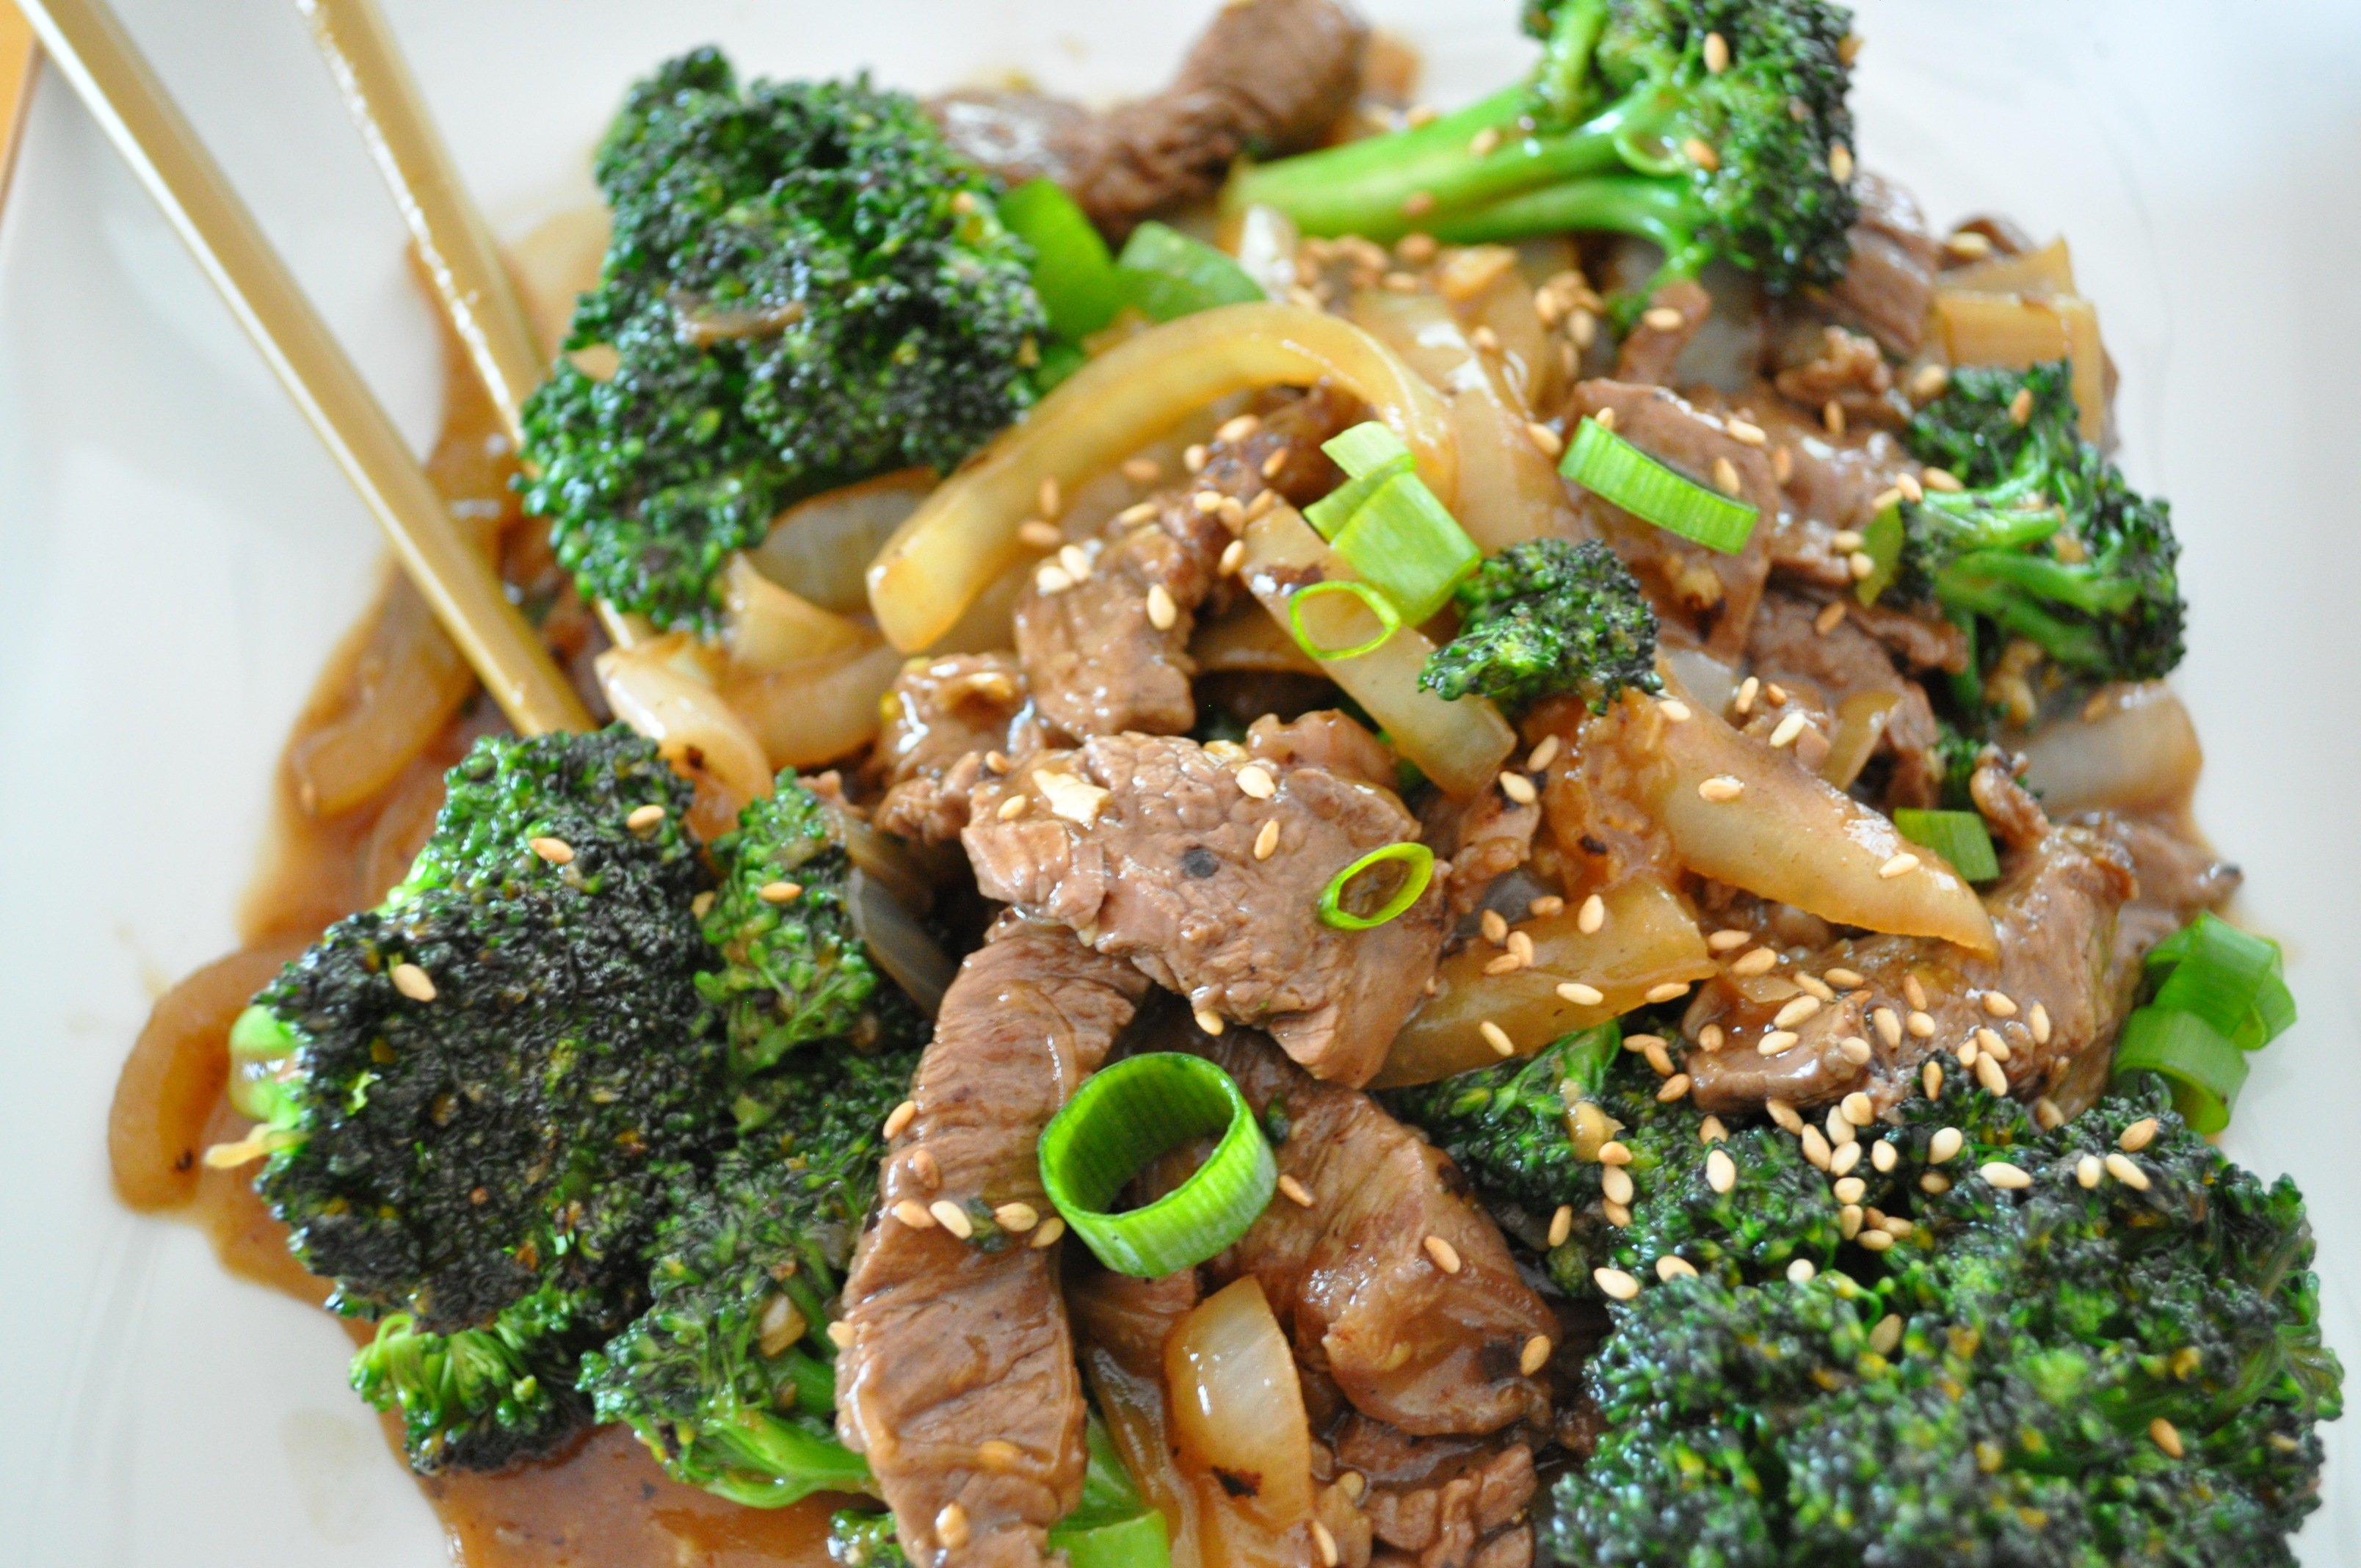
Quick Mongolian Beef with Broccoli

Quick Mongolian Beef

I’m so excited that this Mongolian Beef was a winner! This was such an easy and quick fix that I was able to make it in less than 30 minutes.  The kids really enjoy it and seeing my ‘flexitarian child eating chunks of beef was priceless.

I used Filet Mignon for this recipe (don’t judge me yet) because my daughter would not eat even the slightest chewy meat.  I got a great deal on tenderloin steak today at my local Ralph’s ($5.57 for 0.62 lb.). It was a manager’s special. You can judge me now!

The manager’s special section is never a sure bet for me. Most of the time I don’t see anything I’m interested in cooking, but today almost everything in the Ralph’s meat shelves had the “manager’s special” sticker including filet mignon. There is really nothing wrong with “manager’s special” meats except their bad reputation. Usually “manager’s special” meats are set to expire within 2-3 days and as long as the meat is cooked or even frozen the same day as purchased it should be totally safe and hopefully ‘dealicious’.


Quick Mongolian Beef with Broccoli

Dominique for DealiciousCooking

Ingredients
  

  • 1 tablespoon canola oil
  • 1/2 medium onion sliced thinly
  • 2-4 cups of broccoli florets
  • 1 pound steak sirloin, flank or tenderloin, sliced thinly
  • 3 tablespoons soy sauce
  • 1 tablespoon hoisin sauce
  • 1 tablespoon brown sugar
  • 1 teaspoon chili sauce I used Sambal Oelek
  • 2 clove garlic grated
  • 1/2 tablespoon ginger grated
  • 1 tablespoon cornstarch
  • 1/3 cup beef broth I used TJs
  • 1 teaspoon sesame oil
  • 1/4 cup green onion sliced
  • 1 teaspoon toasted sesame seeds

Instructions
 

  • On a separate bowl start by mixing the soy sauce, hoisin sauce, beef broth, chili sauce, brown sugar, ginger, and cornstarch. Make sure the cornstarch is completely dissolved. Reserve.
  • Heat up the canola oil and sesame oil on a wok or large pan. Add the onion and garlic. Sauteed at high temperature until slightly brown. Add the steak. Cook for approximately 3 minutes and add the broccoli. Cook 3 more minutes until steak looks cooked. Remove from wok to a separate container.
  • Using the same wok/pan add the sauce and cook at low temperature whisking it until sauce thickens.
  • Place the sauteed beef and broccoli back on the wok/pan mixing it well with the sauce. Add the green onions and sesame seeds. Cook at medium heat for additional 2 minutes.
  • Serve over brown rice, jasmine rice or even couscous.

Notes

This is a kid friendly version but if you like more heat fell free to add another tsp of chili sauce or chili flakes.


The Costco Paradox and another Sweet Potato recipe

Oh…Costco. I dread going in and I fight to get out EVERY TIME! The crowds are unbearable, the parking dance, the sneezing, the rude and the cruisers. I won’t even mention the samples because I’m a victim of them as well.  However, there’s no other place I can get a heart attack wrapped in tin foil (aka Chicken Bake. It’ll kill you) and endless organic eggs as cheap as it gets.

Costco is a paradox and I love to hate it.

Costco Healthy Dinner fix

This was yesterday’s quick dinner fix from Costco.  I’m not sure how “clean”  their rotisserie chicken really is but it’s delicious and convenient.

This pre-packed salad is so tasty, surprisingly low calorie and only $4.49.

Pre-packed kale salad

And because sweet potatoes are super food, I’ve committed to a 6lbs. bag of Organic sweet potatoes for $6.49 (seriously cheap.) The kids better start liking it because that’s a whole lotta sweet potato. I made this quick Chipotle Honey Sweet Potato Hash to go with dinner and turned out pretty good (recipe below).

Here is to a ‘Costcosized’ happy and healthy weekend!

Honey Chipotle Sweet Potato Hash

Dominique for DealiciousCooking

Ingredients
  

  • 2 tsp. of Ghee butter olive oil OR coconut oil
  • 1/2 cup diced shallots or red onion
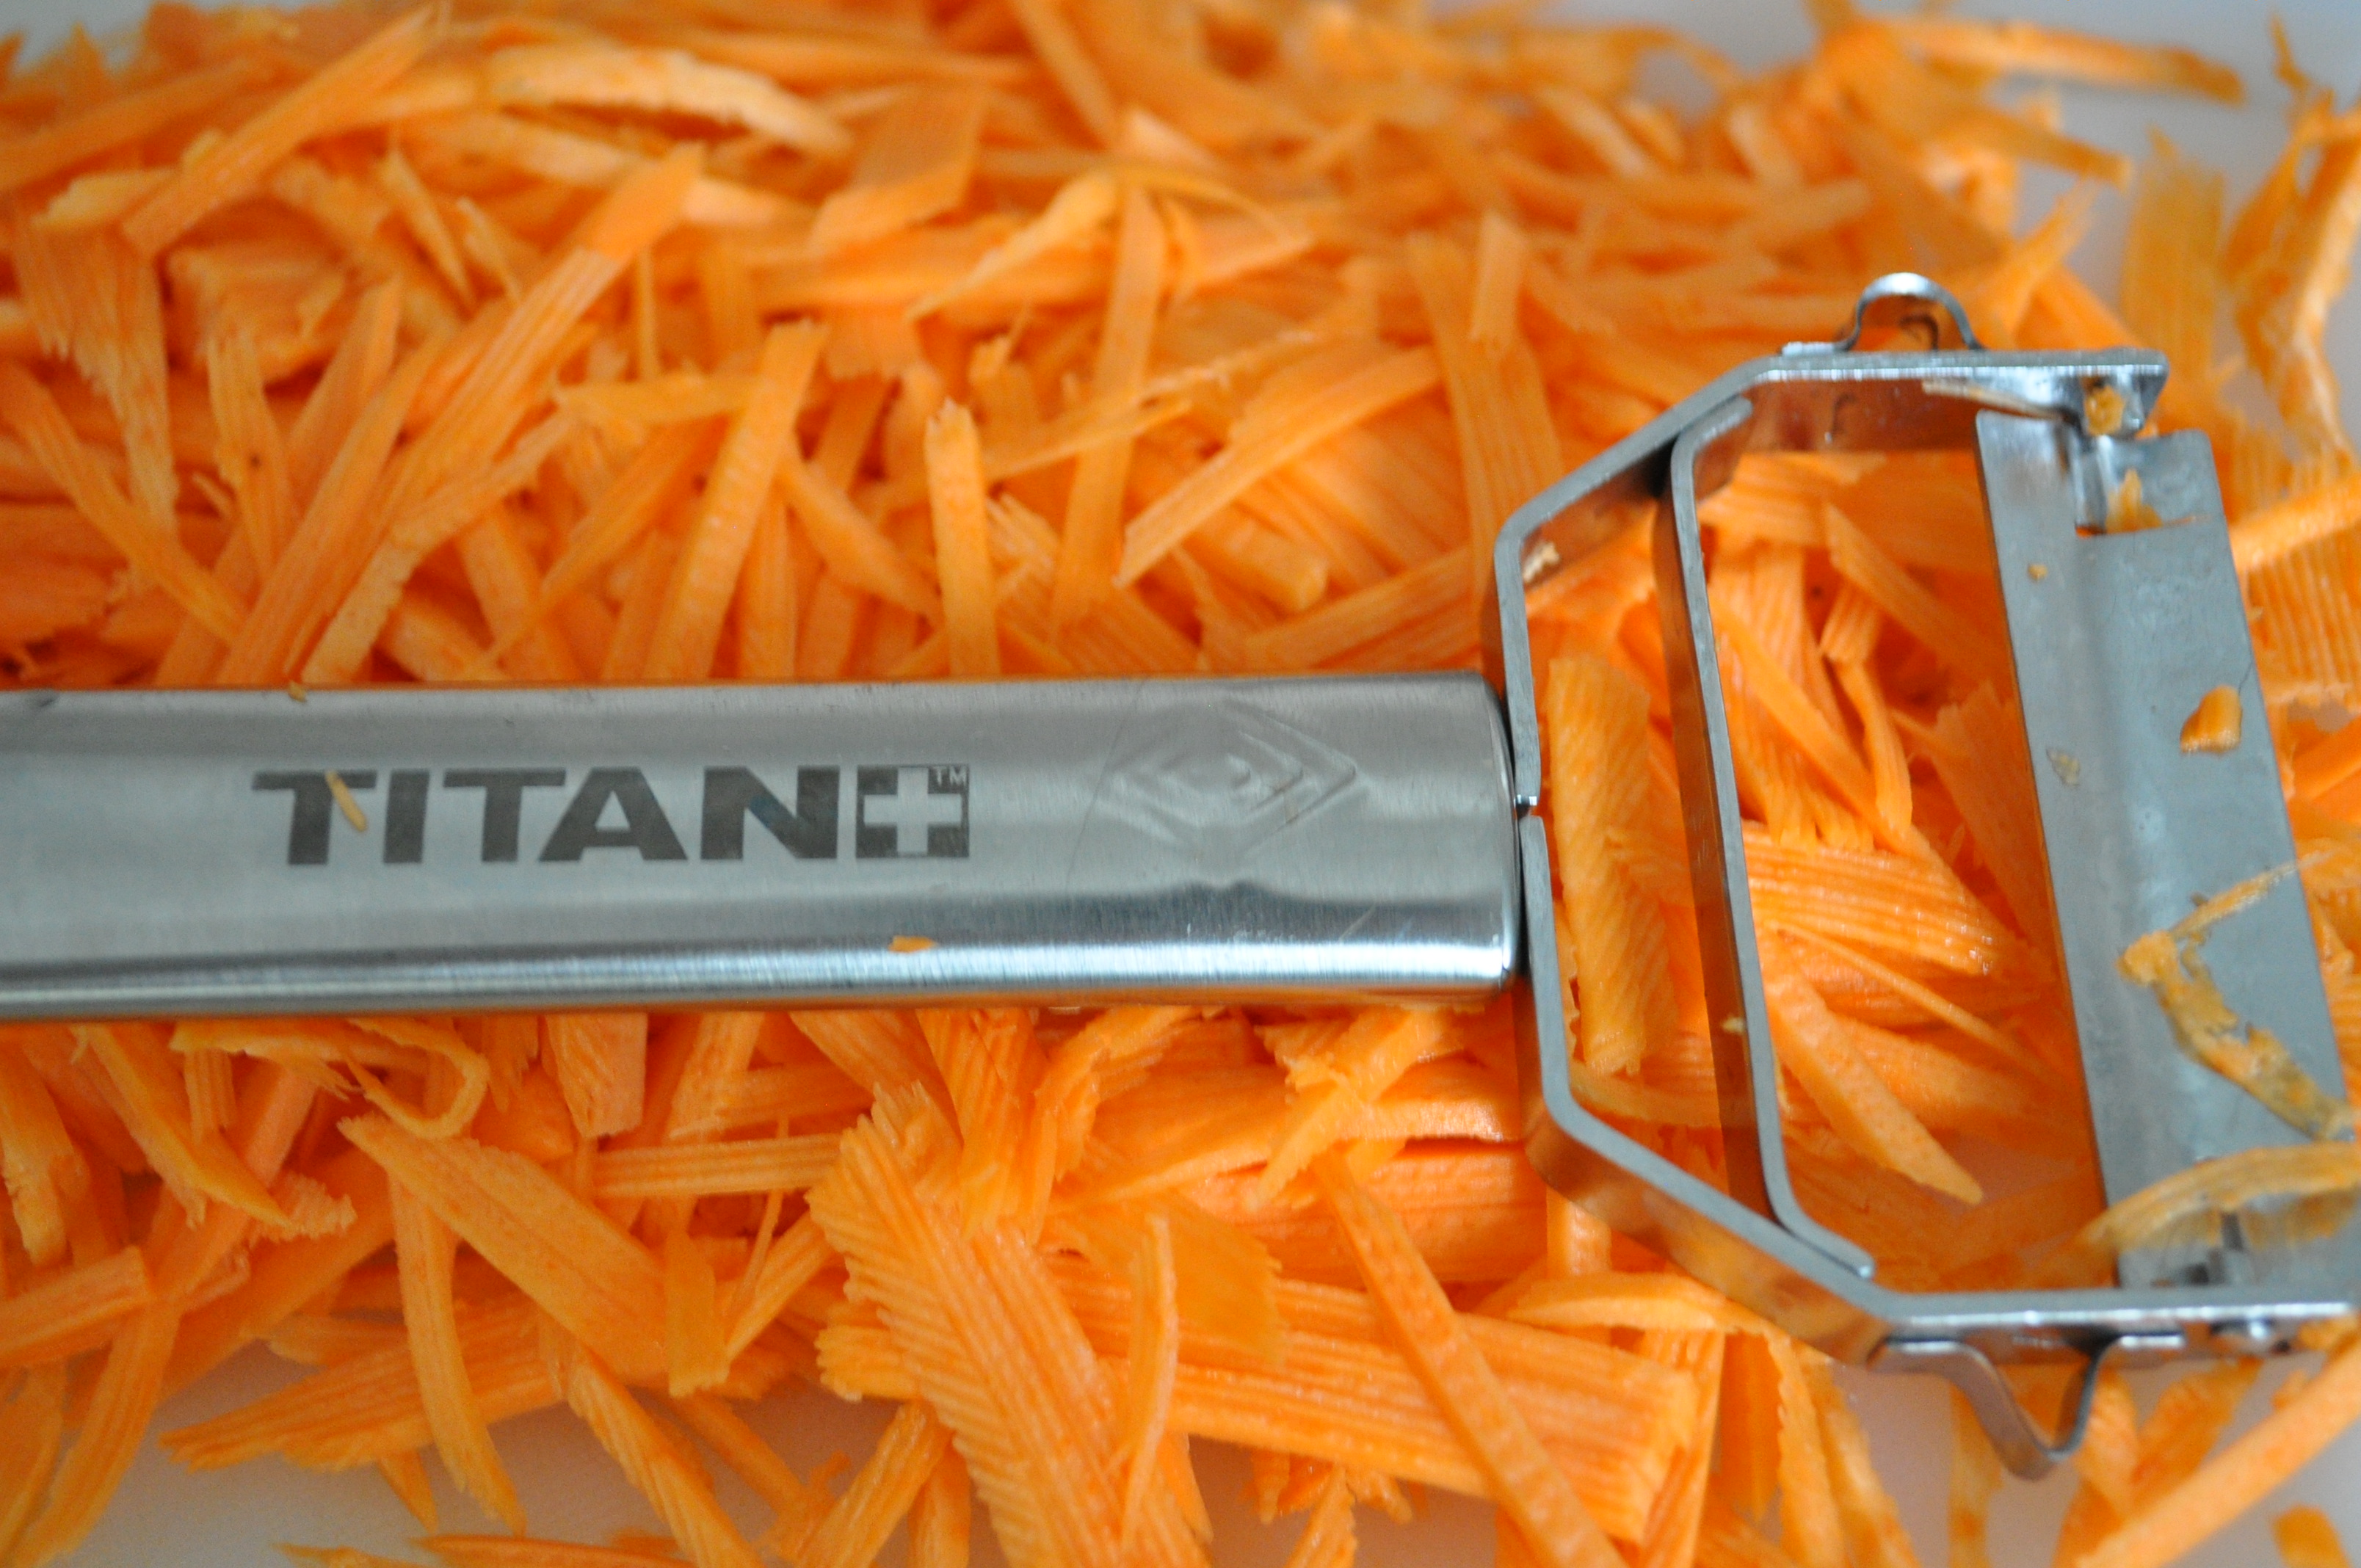
  • 2 cups of shredded sweet potatoes I used the Titan Julienne peeler or cut it into ½” cubes
  • 1/2 cup of diced yellow or red bell pepper optional
  • 1/2 tbsp. of chipotle powder
  • ½ tsp. cumin
  • 2 tbsp of honey
  • Salt to taste I used about 2 tsp to star with and add some more after cooked

Instructions
 

  • In a large pan, heat the Ghee butter (or oil of preference) over medium. Add the onions (and bell peppers if using it) and sauté until they became translucent. Add the sweet potatoes, chipotle powder, cumin and salt. Cook for 10-12 minutes, moving it around to cook evenly.
  • Cook the hash until the sweet potatoes are soft but not 'mushy'. Once hash is cooked add the honey, mix and serve.

Notes

Do not cover the hash while cooking. It'll sag the sweet potatoes. Substitute honey for maple syrup for a more breakfast friendly taste. Add sausage or bacon to it! This is a really simple and versatile dish. Have fun with it!


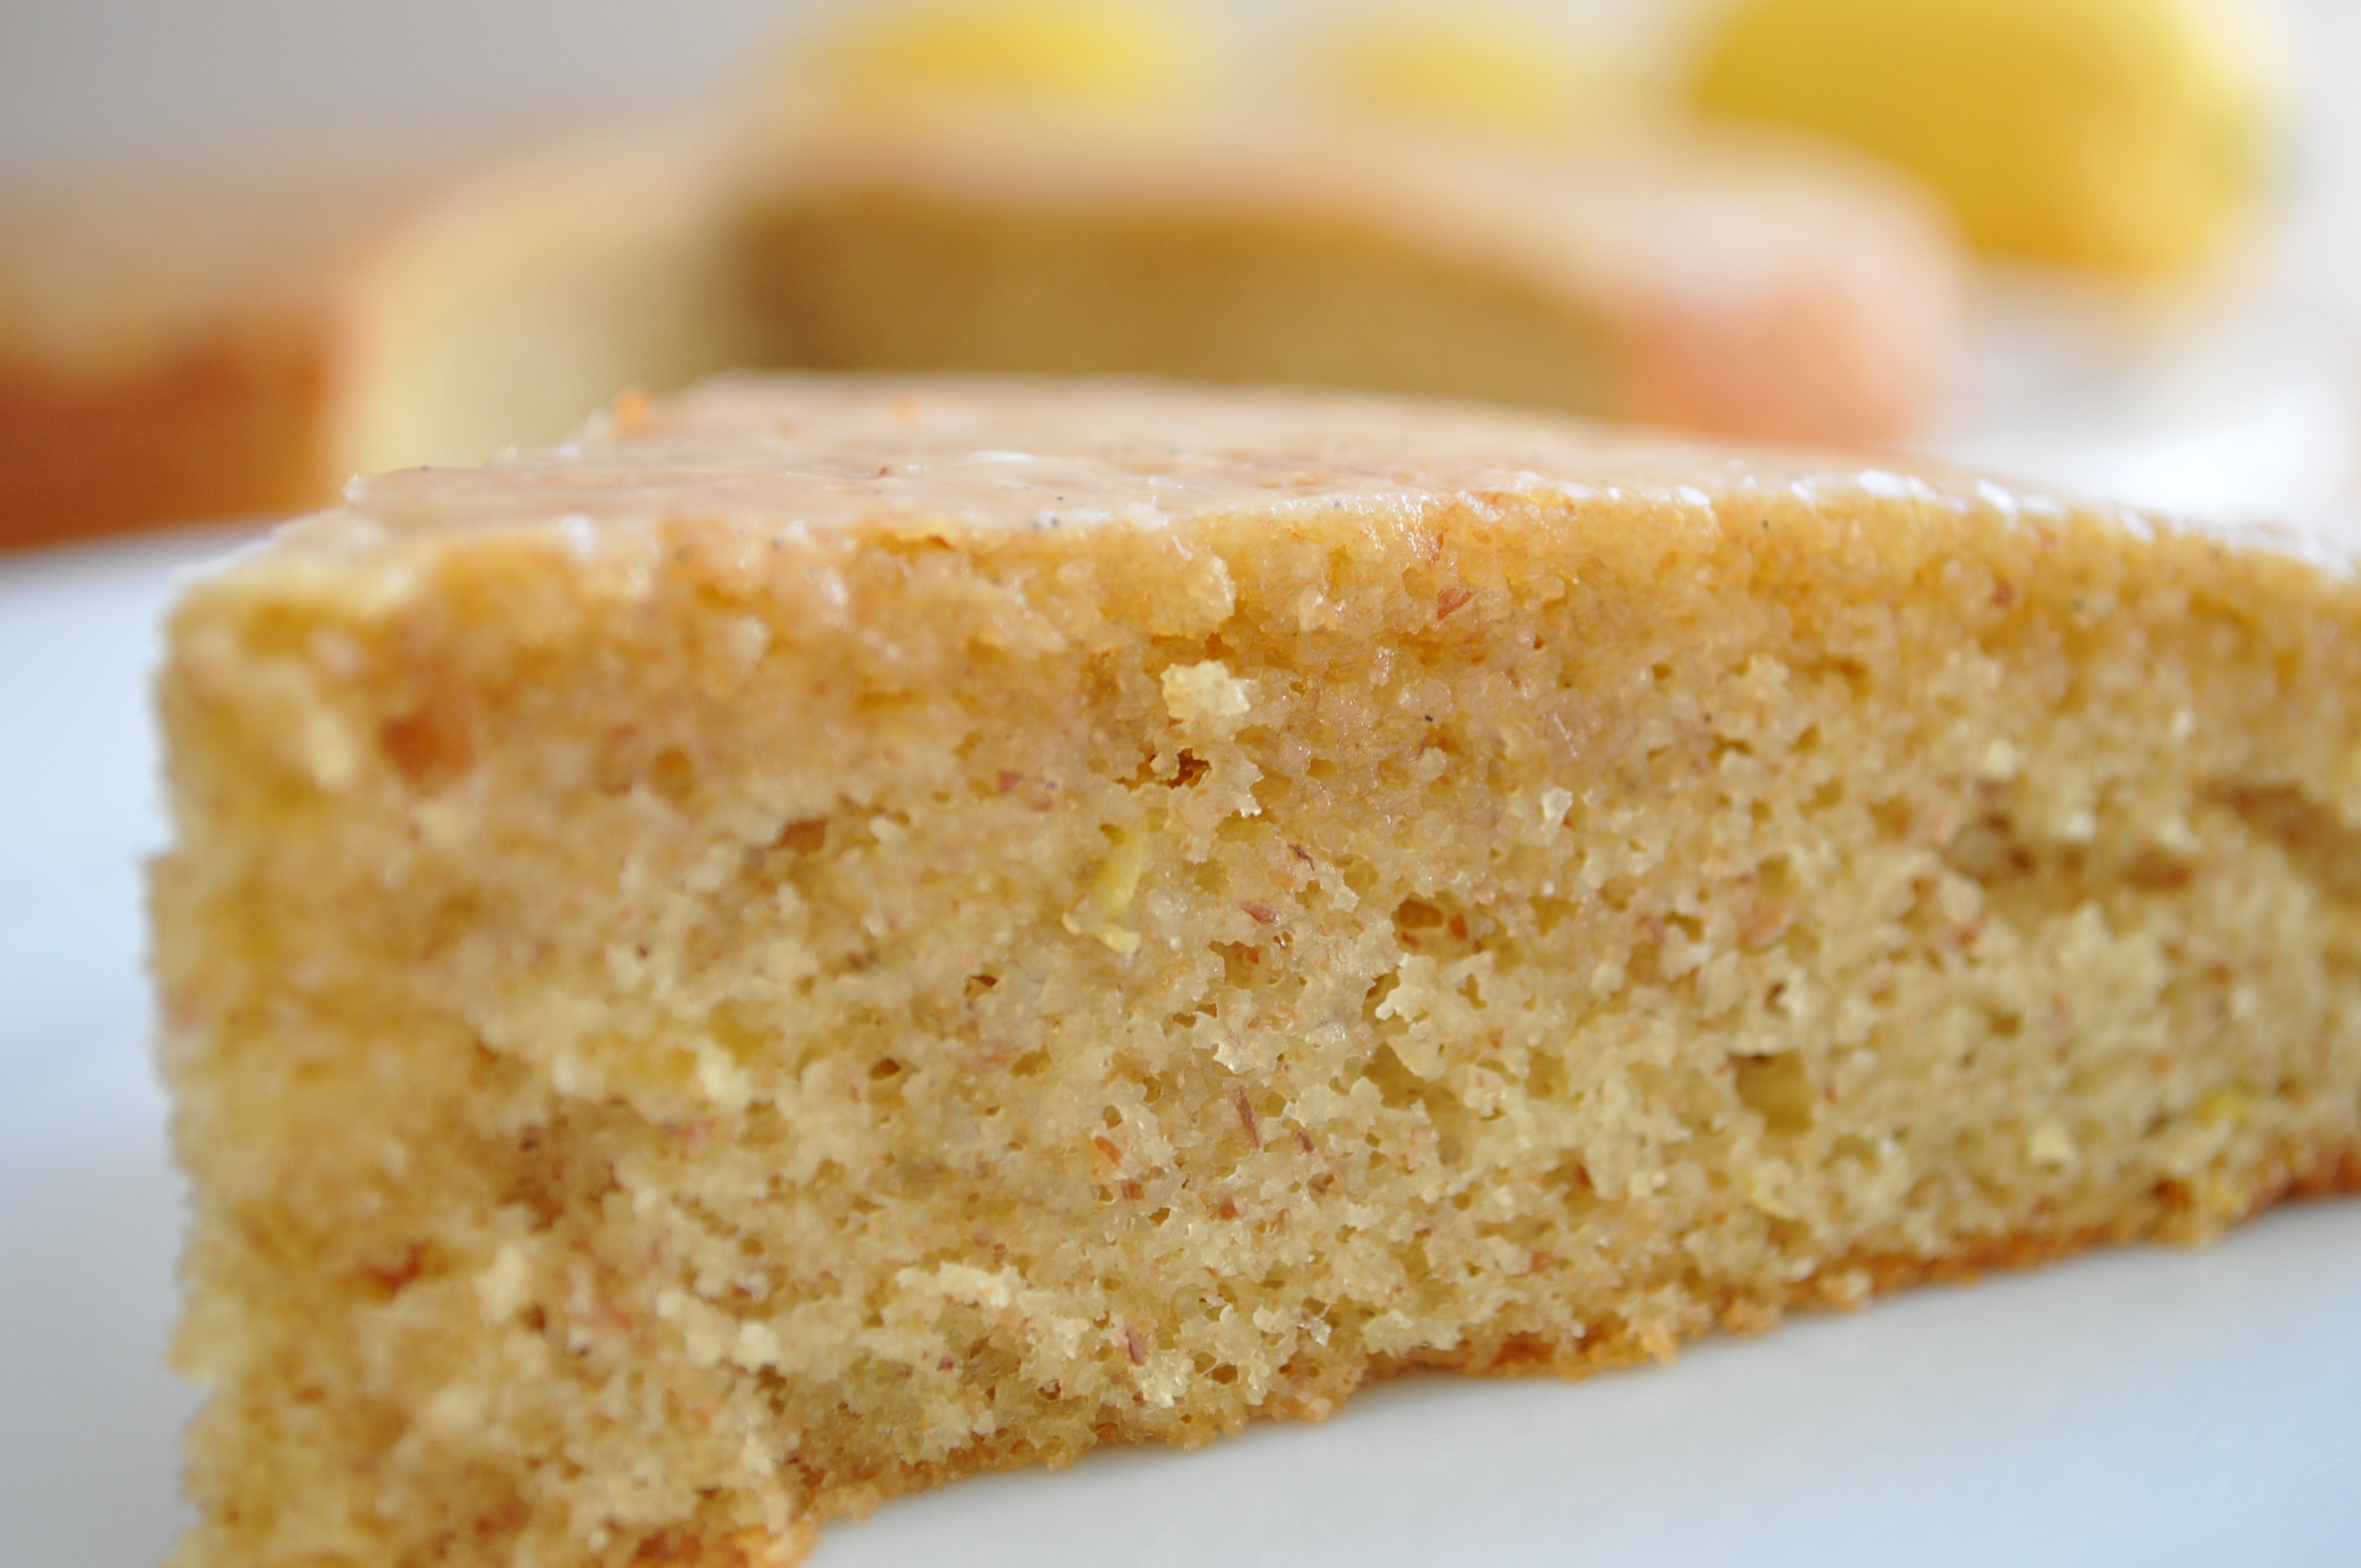
Lemon Almond Olive Oil Cake

LemonAlmond Olive Oil Cake

Since there is no baking talent or skills to be found in the cook in me, I try to pick baking recipes that are there rather simple. I’m baking ignorant…I really am. I used to believe that baking was like cooking- a little dash of this, a pinch of that and ordinary becomes extraordinary. Many baking atrocities later, I have tamed the cook in me when it’s time to bake.

The first time I came across this Lemon Cake recipe on Food 52 , I knew it was a winner. I couldn’t resist tweaking it in a risky way. The original recipe is GLUTEN FREE and calls for millet flour which I replaced with whole-wheat flour and coconut flour. The result is a cake rich in protein and low in bad carbohydrates. It tastes delicious and it’s absolutely perfect for a baking-challenged person like me.

I was very excited to have little helping hands today! For some magical reason every time my baby girl helps in the baking department things turn out good for the most part…and if they don’t we at least can lick the bowl together.

Before we started whipping it up, here is what we did:

Preheat the oven to 350°F. Trace the bottom of an 8-inch (20cm) pan onto parchment paper and cut out the circle. Sharpie was the only pen that worked in the wax/parchment paper so make sure you cut inside the circle and no sharpie marks are left in the paper circle.  Grease the pan, then lay the paper circle back into the pan again.

Little Helping Hands/Lemon CakeLittle Helping Hands/Lemon Cake

Little Helping Hands/Lemon CakeLittle Helping Hands/Lemon Cake

These were the most complicated steps in the whole process. I’m glad my 7-year-old took it over. The actual cake baking process was super easy and quick. Here is the recipe. Happy baking!


Lemon Almond Olive Oil Cake

Dominique for DealiciousCooking

Ingredients
  

  • 4 large eggs
  • 1/2 cup sugar
  • zest of 1 lemon
  • 1/4 cup freshly squeezed lemon juice
  • 1/2 cup extra virgin olive oil
  • 1/2 teaspoon pure vanilla extract
  • 1 cup almond flour
  • 1/2 cup of whole wheat flour can substitute for millet flour for gluten free version
  • 1 teaspoon baking powder
  • 1/2 teaspoon baking soda
  • 1 tablespoon of coconut flour

Instructions
 

  • Using an electric mixer beat the eggs and sugar until they are light and fluffy. Add the lemon zest, lemon juice, olive oil and vanilla extract. Beat well...really well!!!!
  • Mix all the dry ingredients in a separate bowl. Add dry ingredients little by little in low speed just until combined and pour into the prepared pan. Bake for 45 minutes, or until the top no longer feels jiggly to the touch and a toothpick inserted in the center comes out with crumbs attached.
  • Let it cool of a bit. Remove cake from pan (turn it upside down) and peel parchment paper off. Place cake on a plate/platter and drizzle with the glaze (see notes for recipe.)

Notes

Top the cake while hot with this simple lemon confectioners' sugar glaze (1 cup of confectioners' sugar+juice of 1 lemon+1 tsp vanilla extract or a pinch of vanilla beans.)


Tofu and Spinach Crustless Quiche Gluten Free

Easy Tofu and Spinach Crustless Quiche Gluten Free

This is the first recipe I’ve created using coconut flour.  Normally, I’d use regular flour or whole-wheat flour but I wanted to make a wheat free side dish for our vegetarian dinner tonight. It turned out really good for such a easy and healthy dinner fix. The coconut flavor it’s really noticeable but the kids didn’t mind. They actually really enjoyed it so I’ll be packing some in their lunch boxes tomorrow.

The more I learn about wheat and gluten the more I feel like banning it it from our diet. Also, I’ve been noticing that the less gluten I have on a daily basis the better I feel – less bloated, more alert, less cravings, etc.

Here is what got me really fired up about coconut flour: it’s gluten, grain free, high in fiber and low in carbohydrates. Though it is free from gluten proteins, coconut flour contains an impressive number of other proteins.

I’m still researching and learning about cooking and baking with coconut flour but for this recipe I knew I’d need more eggs and almond milk because coconut flour is very dry and substituting other flours with it doesn’t exactly work. Ditchthewheat has this quick tips & tricks post on dealing with coconut flour.

Coconut flour is way more expensive than regular flour but that’s ok because it goes a long way and it’s healthier. Sprouts sells it in bulk ($3.99 lb. ) so I got a small amount to experiment with.

Here is to a healthy week!

TOFU & SPINACH CRUSTLESS QUICHE – Gluten Free

  • 4 cups of fresh spinach
  • 2 eggs
  • ½ cup of grated Parmesan cheese
  • 1 ½ cup of almond milk
  • ¼ coconut flour
  • 1 half of Trader Joe’s Organic Sprouted Tofu (Extra Firm) or ½ of one Extra firm tofu block (water drained)
  • 1 tbsp of salt
  • 1 tbsp of onion powder
  • ½ tbsp of garlic powder
  • 1 tsp of Paprika
  • 1 tsp of cayenne pepper

Chop spinach slightly and quickly sautéed it in a little bit of olive oil OR cook it in the Microwave for 1 minute (reserve). Blend all the wet ingredients until smooth. Add everything else except for spinach. Blend it well, stopping a couple of times to mix and scoop unmixed ingredients from blender cup walls (coconut flour can get really lumpy.) Lastly, mix spinach with the blended mixture. Spray a small Pyrex or oven dish with spray oil or coat the dish with olive OR coconut oil (use your hands or a sheet of paper towel to spread the oil). Pour the mixture and top with shredded cheese (totally optional). Bake it at 400F for about 20-30 minutes or until top is firm, brown and crusty. Let it cool off before cutting.

Tofu and Spinach Crustless Quiche Gluten Free


Carrot Cake Overnight Oats with Chia Seeds

Carrot Cake Overnight Oats with Chia seeds

When it comes for lunch and dinner it’s easy for me to come up with something new, old or borrowed.  Breakfast is not that easy. I’m a bread and butter type of girl. If I didn’t know any better I’d still have everyday the same breakfast I had growing up; warm French bread with butter and a cup of coffee with milk.

Growing up in Brazil there were “padarias” (bakeries) in every other corner, which sold fresh bread every hour. Like most Brazilian babies of my generation, I transitioned from the bottle to the coffee and milk, and from the baby cereal to the French bread with butter as recommended by grandma and arguably the pediatrician.

Although I may not be exactly a “caffeine junkie” I’ve no desire or reason to give up my coffee. Now, the bread might be a different story. I love bread too but I’ve been trying to replace it with healthier and more nutritious choices especially at breakfast time.

So… here I’m again posting yet another breakfast recipe. This carrot cake overnight oats is delicious and really filling.  Although the carrots and raisins add a natural sweetness to it I still drizzled a little maple syrup and it made this oats breakfast to taste like dessert! I can almost argue that it tastes better than French bread and butter…at least for the moment.

Here are the steps:

Cook the carrots with a cinnamon stick and star anise (optional)

Carrot Cake Overnight Oats how to

Blend the cooked carrots with almond milk (can substitute for regular milk or other nut milk)

Carrot Cake Overnight Oats how to

In a separate bowl mix oats, nuts, chia, cinnamon, salt, raisins and coconut.

Carrot Cake Overnight Oats how to

Mix wet and dry ingredients and let it refrigerate overnight.

Carrot Cake Overnight Oats


CARROT CAKE OVERNIGHT OATS

  • 6 medium carrots (peeled)
  • 1 cinnamon stick
  • 2 cups of unsweetened vanilla almond milk (substitute w/ any type of milk that comes from nuts or cows or ????)
  • 2 cups of rolled oats
  • 1/3 cup of walnuts or pecans slightly chopped (I used both)
  • ¼ of raisins
  • 1/8 cup of chia seeds
  • 1/8 cup of shredded coconut
  • 1 tsp of cinnamon
  • pinch of salt

Start by cooking the carrots with approximately 2 cups of water and the stick of cinnamon (and the optional anise). Blend the cooked carrots with the almond milk (use a hand mixer or a blender). In a separate bowl mix all the dry ingredients. Add blended mix. Stir and put in a large container or individual portions.  Let it stand in the refrigerator overnight (or at least 6 hours).  Eat as is or drizzle some honey or maple syrup.


Easy Oats Banana Bread Pancakes

Easy Oat Banana Bread Pancakes

Not a glamorous weekend here and I confess I’m glad tomorrow is Monday! I’m not so proud of my Sunday. It got ruined by completely dementing, time consuming and tedious 4th grade Science Fair Project. But it started good! It actually started GREAT with this super tasty, healthy and easy to make pancakes.

After that it was all down hill. In&Out for lunch, pizza and wine for dinner, and a whole lot of science.

Since I can’t erase this Sunday from my existence I’ll hang on to the magic of  those 40 something minutes of pure glory that happened this morning as I made and ate this yummy pancakes.

EASY OATS BANANA BREAD PANCAKES 

(inspired by Mynewroots.org)

  • 1/3 cup walnuts
  • 3/4 cup rolled oats
  • 1 tsp. baking soda
  • ½ tsp of salt
  • 1 ripe banana or 1 frozen banana
  • 1 tsp. vanilla extract
  • 1 tsp. canola oil or olive oil
  • 1 egg white
  • 2/3 cup of milk or almond milk (I used unsweetened almond milk for this batch)

In a food processor or blender, pulse oats until it turns into a somewhat chunky flour. Add all the other ingredients EXCEPT for the walnuts.  Blend to combine. Add walnuts to the mix and PULSE a couple of times until walnuts are incorporated. Take a look at the mix and if you still see big walnuts chunks pulse a couple of more times.

Heat a little canola oil (or Pam, coconut oil, butter) in a skillet and drop in the desired amount of batter. I cooked this pancakes thin and small, so I dropped just a little bit of batter at a time. Cook them slightly longer than you’ll cook regular pancakes (it’s preferable if you cooked in lower/medium heat allowing more time to cook them, specially if you are making them in a large size.)

Serve with honey (that’s how I ate mine), maple syrup, fresh fruit slices, yogurt, chopped walnuts, and anything you think it’s a good match.

Here is to a happier & healthier week ahead!