Veggie Szechuan noodles

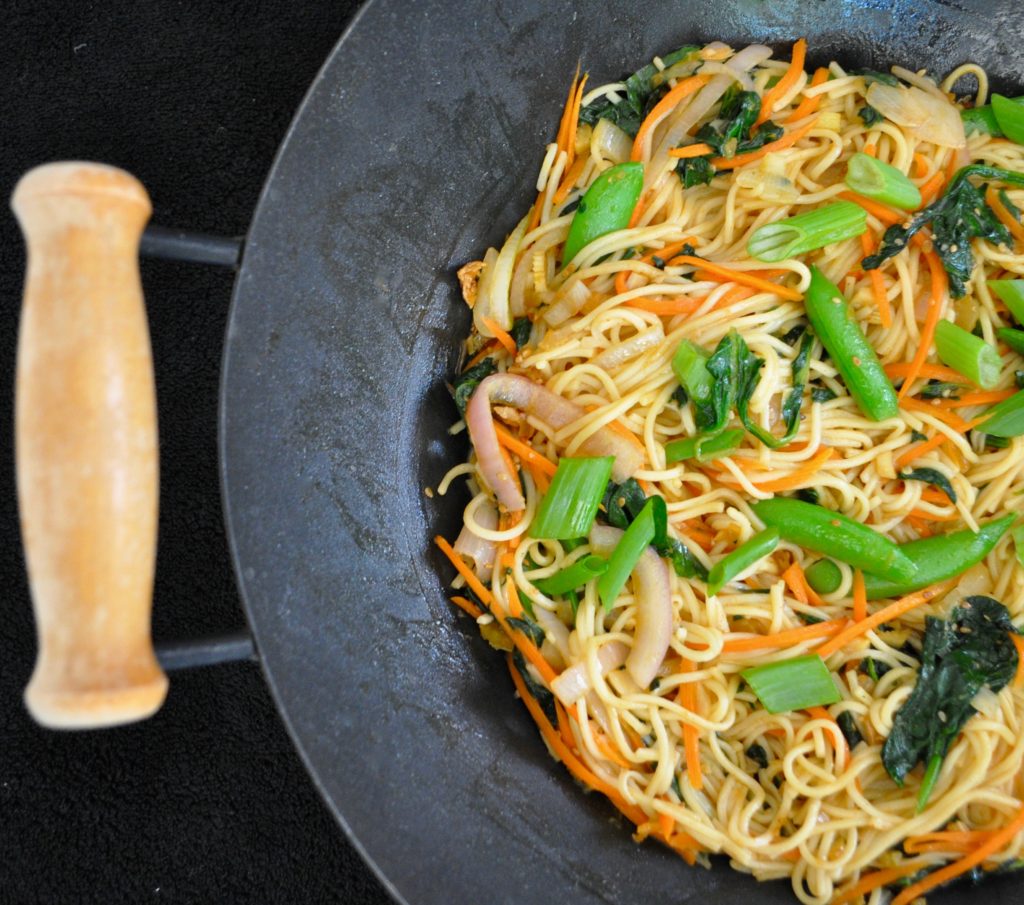
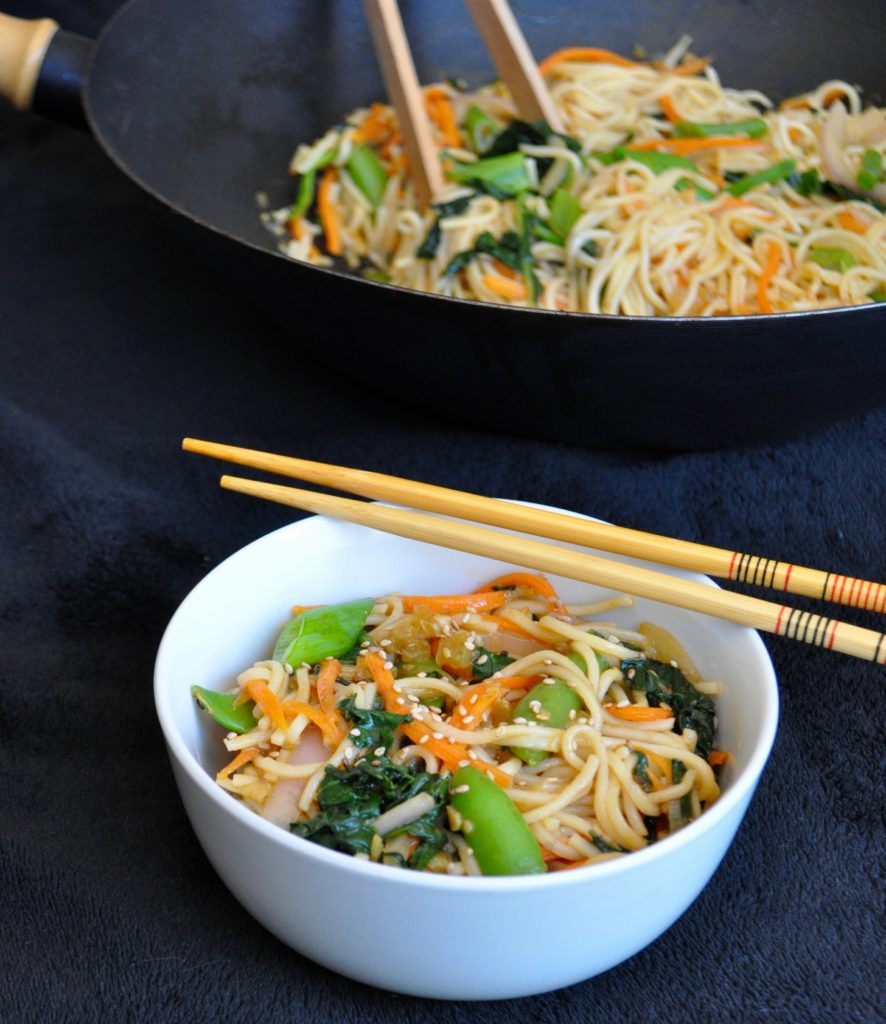
This veggie Szechuan noodles is perfect for those nights when all you can think is noodles, but don’t want to wait for take-out. Indo Chinese Szechuan noodles with sweet-tangy chili sauce, plenty of vegetables, and perfect texture noodles. These quick and healthy vegetable loaded noodles can be made and ready in just about not 30 but 33 minutes. These veggie Szechuan noodles taste better than my go to Chinese take-out!

For a family that loves Chinese food like ours, we don’t have it that often. Our go to Chinese restaurant and take-out is not exactly a bucolic hole-in-the-wall family owned chow-chow place. The food is ok, and the price has gone up recently. The last time we ordered from them I promised myself never ever do it again. That was almost a year ago!

I’ve decided not to break that promised and, since we haven’t found a Chinese take-out place we like, I make some Chinese dishes here and there. And because we normally crave Chinese take-out when we are overly hungry, I end up making Chinese dishes that are quick and easy to throw together.

These Szechuan noodles are seriously the easiest thing ever to make, especially if you have all the ingredients on hand.

Here’s what I did: cooked the noodles to a perfect bite and soaked them in cold icy water so they won’t get soggy. Made the Szechuan sauce in a large wok and reserved it. Lightly fried the veggies in the same wok, drained the noodles, and sautéed with the veggies for about 3 minutes. Seasoned with the Szechuan sauce mixing really well, added chopped green onions, and ATE them! Done and done!

Note: Check my Instagram highlights to see the making of these Szechuan noodles. I hope you try this recipe and if you do, be sure to leave a comment here or on the Instagram post!

Veggie Szechuan noodles

Veggie Szechuan Noodles for those nights when all you can think is noodles, but don’t want to wait for take-out. Indo Chinese Szechuan noodles with sweet-tangy-sesame spicy sauce, plenty of vegetables, and perfect texture noodles. These quick and healthy vegetable loaded noodles can be made and ready in just about not 30 but 33 minutes. 
Prep Time 13 minutes
Cook Time 20 minutes
Total Time 33 minutes
Course Entree
Cuisine Chinese
Servings 4 servings

Ingredients
  

For the Szechuan sauce

  • 2-3 tbs vegetable or canola oil
  • 3 cloves garlic, chopped or smashed
  • 1 tbsp grated fresh ginger
  • 1 tbsp sesame seeds
  • 3-4 tbsp soy sauce
  • 2 tbsp rice vinegar
  • 1 tsp sugar
  • 1-2 tbsp red chili paste
  • 3 medium green onions (used only the white bulb (chopped) for the sauce and reserve the green for garnish)
  • 1 large celery stalk finely chopped
  • sal to taste

For the noodles

  • 12 ounces Chinese egg noodles OR spaghetti
  • 1 tbsp vegetable or canola oil
  • 1 small red onion, sliced
  • 3-5 cups chopped spinach or baby spinach
  • 1-2 cups sweet peas
  • 3 green onions chopped (the green part unused in the sauce)
  • 2 medium carrots, julienned
  • red chili flakes to taste

Instructions
 

For the Szechuan sauce

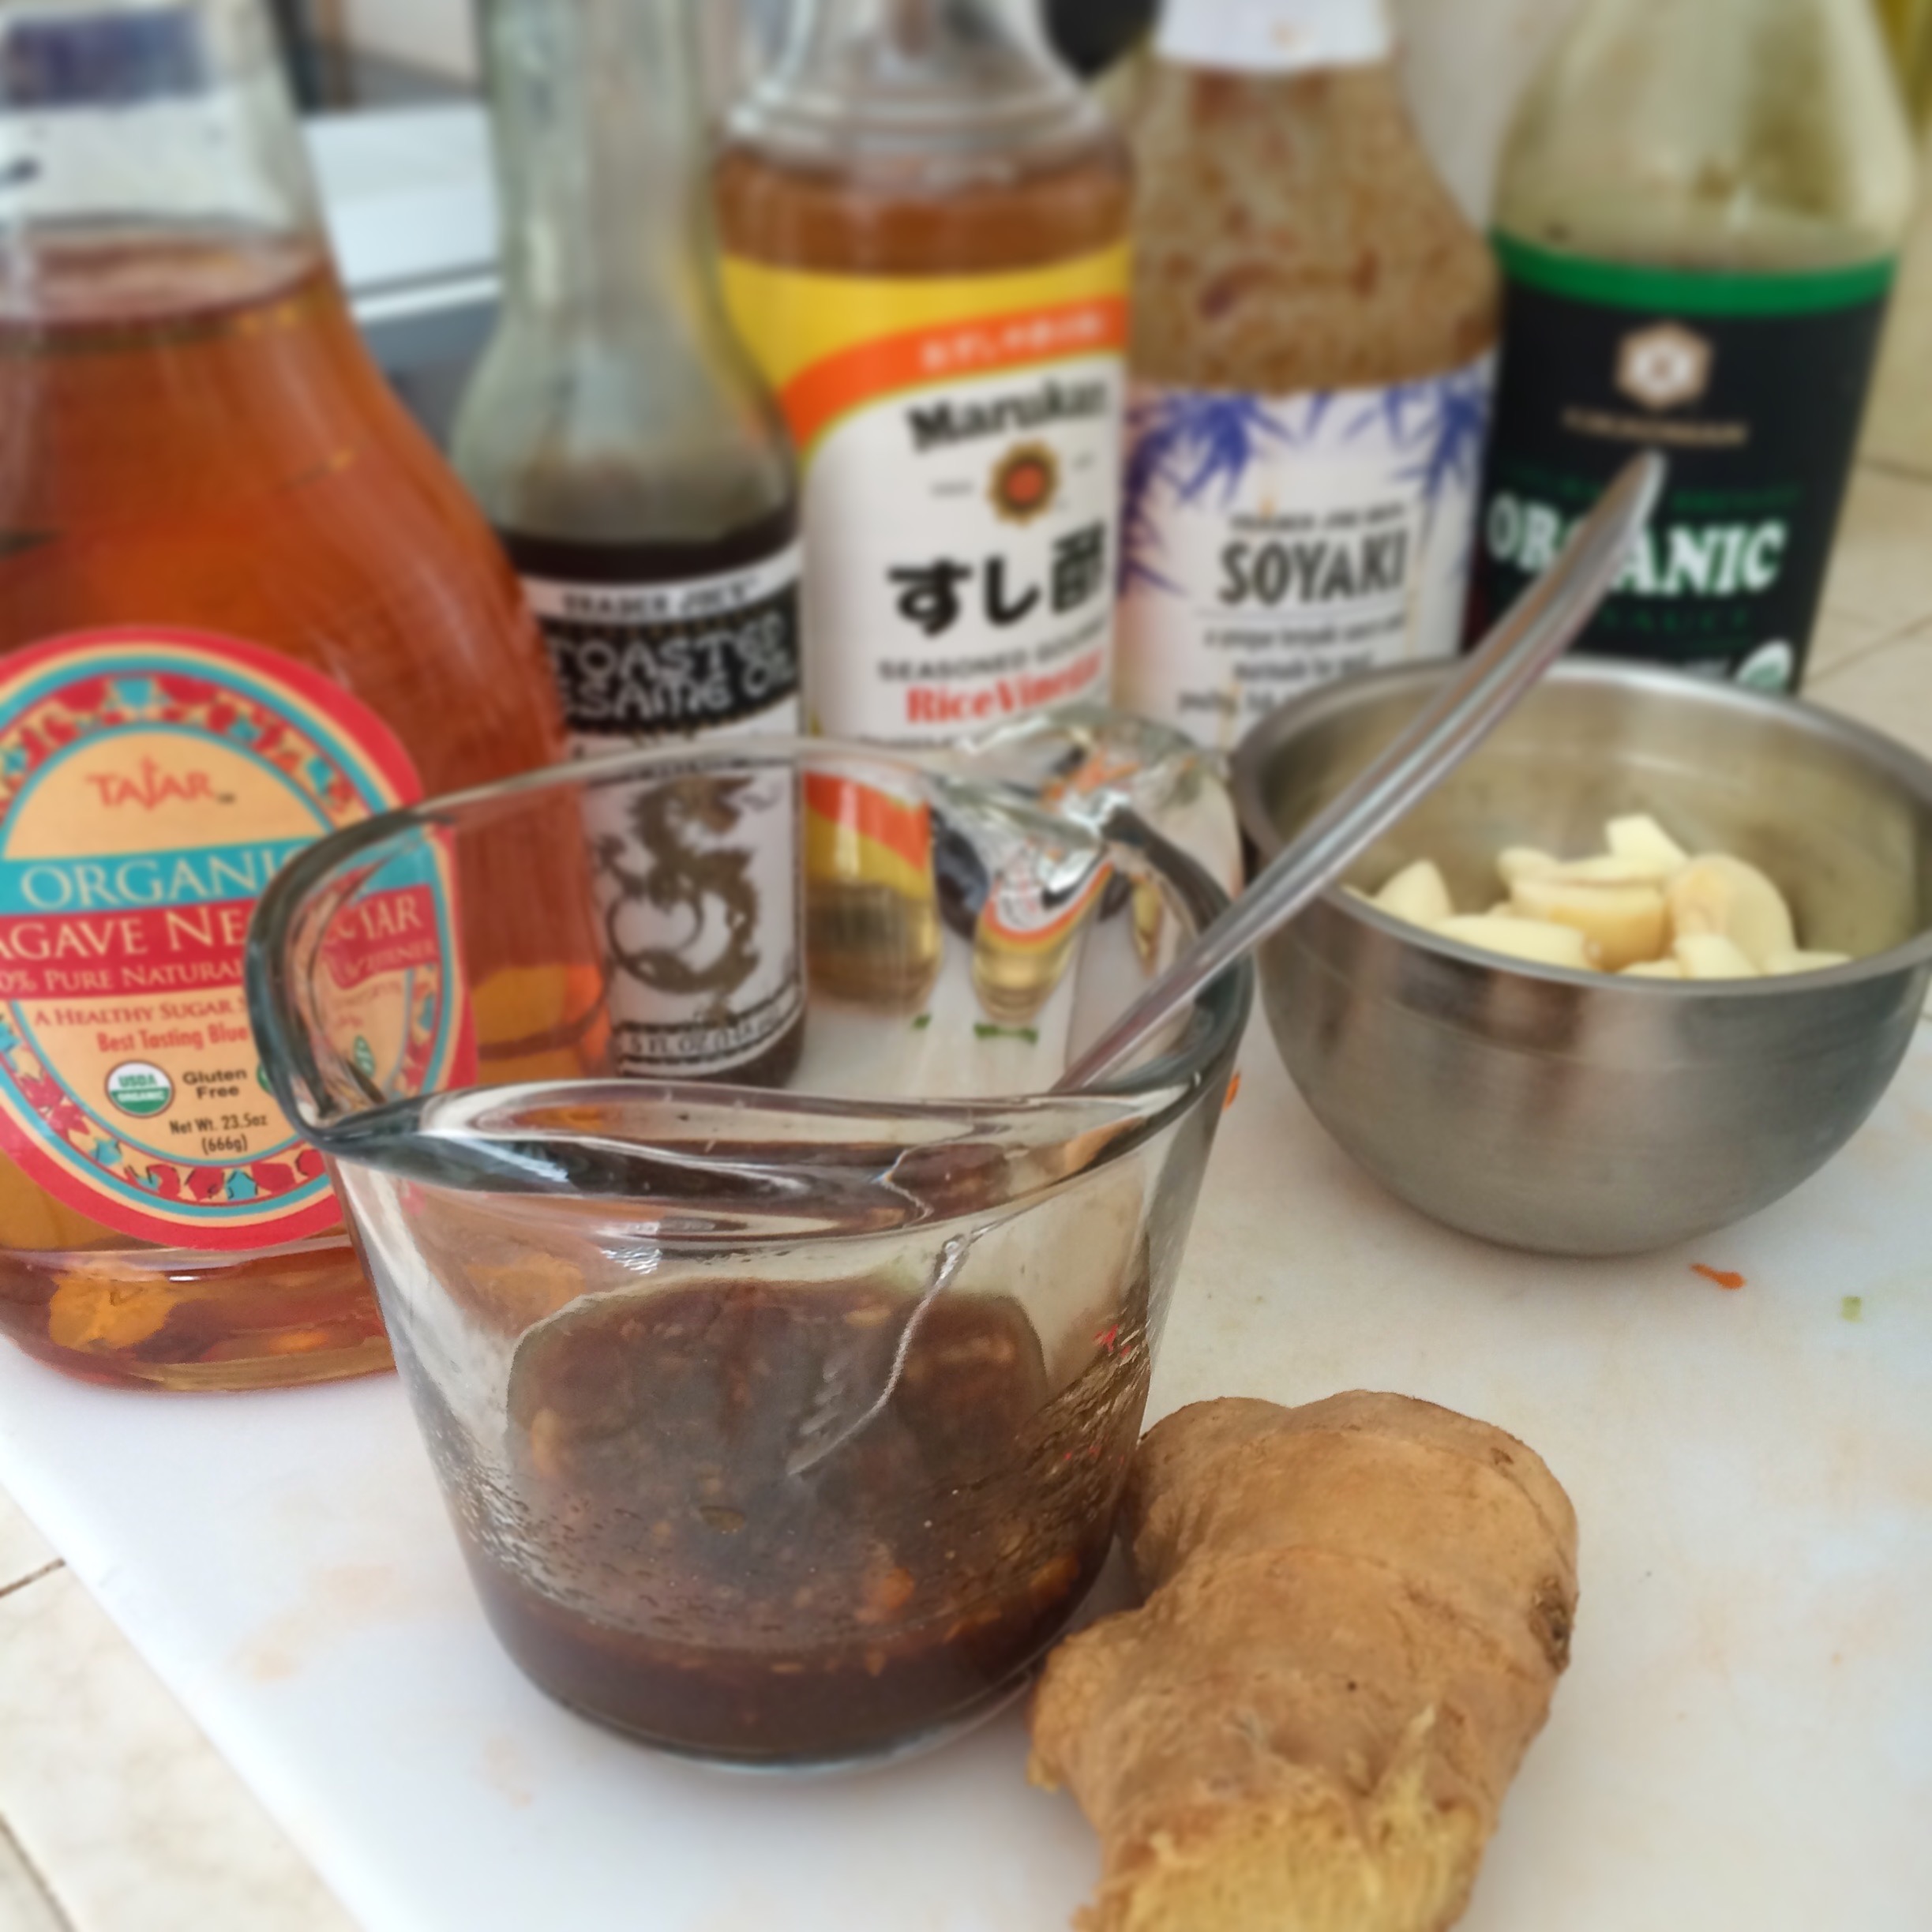
  • Start by mixing the soy sauce, vinegar, chili paste, and sugar in a separate container. Heat a large skillet or wok over medium heat. Add the oil, garlic, ginger, and green onion whites. Cook, stirring occasionally until the garlic is fragrant, 5 minutes. Stir in the sesame seeds and celery, cook 30 seconds more. Add the liquid mix to the wok, stir for 20 seconds, and reserve in the same container you first prepared the liquid mix.

For the noodles

  • Meanwhile, cook the noodles according to package directions. Drain and rinse well with cold water. Soak noodles in icy water if necessary, to avoid overcooking.
  • Return empty wok/skillet to medium-high heat. Heat the oil until smoking and flash sauté the vegetables 2 minutes. Stir in the noodles, turn heat down, and pour in the sauce mixture. Bring the mixture to a simmer and cook until the sauce coats noodles, about 2 minutes. 
  • Remove from the heat. Serve the noodles warm, topped with the green onions. Enjoy! 
Keyword Chinese, Indo Chinese, Szechuan Noodles

Chana Masala

This Chana Masala recipe defines almost entirely the purpose of this blog; to make and spread easy, healthy, flavorful, and $reasonable$ meals. I know, I know…adjective overload but let me break it down for you.

Easy: I’m constantly scouting for meals that can be made ahead and simply re-heated for those busy weeknights. This Chana Masala is easy to make under 40 minutes, takes almost no effort, and tastes even better after a couple a days.

Heathy: Chana Masala’s main ingredient is chickpeas which are naturally low in fat, high in fiber, and rich in vitamins and minerals. Need say NO MORE!

Flavorful: The sauce is beyond good. It’s a perfect blend of spices, tomato, cream, and butter. Silky, tangy, and spicy. And it works perfectly with chickpeas.

Reasonable: Either you choose to buy them uncooked or in a can, Chickpeas are cheap. It is definitely a great deal for the amount of protein and nutrition that they offer.

Ok, so here are some notes about this recipe.

I used dry chickpeas, which I soaked in water overnight, rinsed and drained, and continued to rinse until it was time to cook them. Soaking reduces the cooking time and helps with digestion as it removes anti-nutrients common in legumes. But, of course, this recipe works with can chickpeas as well which eliminates those steps.

There are cleaner and healthier Chana Masala recipes out there. This one is as clean as my family and I can handle. YES I used heavy cream and butter and NO I don’t know if alternatives could provide the same deliciousness.

If you are crazy busy and want a meal to come home to, I would use the slow cooker. Just add in all the ingredients to the slow cooker in the morning (except for the cream that you can add right before serving.)

Chana Masala

This spicy and hearty Chana Masala recipe is easy to make and perfect as a make-ahead meal. 
Prep Time 10 minutes
Cook Time 20 minutes
Total Time 30 minutes
Course Entree
Cuisine Indian

Ingredients
  

  • 1 tbsp olive oil
  • 1 tbsp butter
  • 1 large onion, chopped
  • 1-2 garlic cloves, minced
  • 30 ounces cooked chickpeas or two 15- to 16-ounce cans chickpeas, drained and rinsed
  • 1 medium potatoes (cubed)
  • 2 tsp garam masala powder
  • 1/2 tsp turmeric
  • 1 tbsp grated fresh ginger
  • 1 can of stewed tomatoes (whole or diced and NOT drained)
  • 1/4 cup heavy cream
  • salt to taste
  • Hot cooked grain (rice, quinoa, or couscous), optional
  • Minced fresh cilantro to taste

Instructions
 

  • Melt butter with the oil in large pot (or saucepan) over medium-high heat. Add onions, a pinch of salt, and sauté for about 5 minutes, until translucent, stirring every so often. Add garlic and sauté for 1 minute, until fragrant.Add ginger and all the spices and sauté for 30 seconds. 
  • Add the can of diced tomatoes and chickpeas. Bring to a low simmer, and cook for 10-12 minutes, stirring every now and then until liquid evaporates a bit. Remove from heat.
  • Add the heavy cream and simmer for further 5 minutes stirring carefully, until the sauce starts to thicken.
  • Take a taste and adjust seasoning as needed.
  • Sprinkle with chopped fresh cilantro (or parsley) and serve on its own or over hot cooked grain.
Keyword clean, makeahead, quickmeal, vegetarian

Kimchi pancakes with soy dipping sauce

Fact: There’s very little kimchi doesn’t improve. Try adding it to fried rice, plain rice, omelets, tacos, and-my favorite- quesadilla. Dealicious!

I had tried Korean pancakes before, but this was my first time making and trying kimchi Korean pancakes. I love kimchi and pancakes, so absolutely nothing could’ve gone wrong with this recipe.

There are many recipes out there and they are all very similar. Flour, egg, water and, obviously, kimchi. I had all the ingredients for the recipe and played around with the amounts. I could have added more kimchi to the batter but I used all it was left. If you are a kimchi lover like me you know there no such a thing as too much kimchi!

Here is the recipe for now. I’m working to add a video so you can see how ridiculously easy they are to make.

Categories

Miso sesame glazed eggplant

This Japanese eggplant recipe is all about that miso sesame glaze. The glaze is good on all varieties of eggplant (carrots, and Japanese sweet potato too). This recipe is incredibly easy to make and as promised on Instagram, I’m sharing it here.

Here is how it goes. I roast the eggplant first, then coat it with the glaze and run it under the broiler. The trick is getting the timing right so the glaze caramelizes but doesn’t burn. Most recipes called for eggplant halves. I like mine in cubes, so the glaze gets everywhere. Either way this dish is totally dealicious: a.k.a. easy to make and affordable.

Categories

How-to: Crispy baked sweet potato fries

I’m a sucker for sweet potato fries. Way too obsessed with them. And so are my kids. Although we all know, let me assure you that there is NO tastier way to eat sweet potato fries than fried! However, baked sweet potato fries is by far a “better for you” way to enjoy them.

There’s no bigger disappointment to a sweet potato fries lover than soggy-limp fries. No matter if they are fried or baked. You want the crunchy-crispy-loud-to-the-bite fries. That’s it. More importantly, they need to be sturdy enough to be able to hold whatever you choose to dip them in!

The moisture content in sweet potatoes gets in the way of crisping the fries up in the oven. So, the first step to achieve perfect baked sweet potato fries is to adjust your expectations. These are baked fries—perfectly delicious—but, again, they are baked!

Now, the secret for perfect baked sweet potato fries can be narrow down to these steps:

Cut the potatoes evenly–1/4-inch thickness ideally—or you end up with uneven results like these…

Toss the fries with cornstarch as soon as you done cutting them. The idea is to get a thin coating of starch on the potatoes so it helps to absorb the moisture and create a crispy coating.

Use refined coconut oil. These fries need to bake at high temperature and refined coconut oil has a high smoke point. Use enough to coat the fries until they are somewhat shinny.

Season them with whatever your taste buds are ready for (cinnamon and sugar has happened here before.) My go to spice combo is paprika+chipotle powder+cumin+salt. Once seasoned, spread evenly on a lined baking sheet—I used a Silpat but heavy-duty foil works too.

The oven should be pre-heated at 400F degrees on a ‘roast’ setting if you have that option. If you only have a ‘bake’ option then crank the temperature to 420F.  Flip them once—and once only—after 25 minutes. Bake/roast other side for 20-25 minutes more.

Don’t wait too long to eat them. These sweet potato fries are best eaten right out of the oven. We love to dip them in chipotle ranch (3 parts ranch dressing to 1 part chipotle tabasco.)

I’ve endured many soggy attempts before I came to this. The cornstarch–more than any step– is the game changer here. Maybe you already knew the secrets to crispy baked sweet potato fries but, if you didn’t, I hope you give these a try.

Cheers and happy cooking!

From Root to Leaf: Roasted Rainbow Carrots with Carrot Top Chimichurri

Why carrot tops are not eaten in our country has been a mystery to me. I grew up eating them in soups, stews and who knows what else. I was not a fan, but I ate them. A lot! And contrary to what some people may think, carrot tops aren’t toxic. I’m happy I lived to tell you about it!

Now, carrot tops texture and strong flavor may be a challenge to some people’s palates. It’s not the kind of greens I would use on a plain salad. However, when used as a herb–such as parsley or cilantro–it can add texture and flavor to any dish.

There are plenty of carrot top chimichurri recipes out there. All are pretty much the same with slight variations. Is what you do with your chimichurri that matters most. And because I believe on ‘what grows together goes together’, I topped roasted rainbow carrots with it. It tasted so good. Perfect combination of sweet, smoky and tangy flavors.

Roasted Rainbow Carrots with Carrot Top Chimichurri

Dominique for DealiciousCooking

Ingredients
  

  • 1 bunch of medium rainbow carrots
  • 1 cup carrot tops chopped fine
  • ½ cup minced fresh cilantro
  • 1 tablespoon minced fresh oregano can be replaced by 1 teaspoon of dry oregano
  • 2 garlic cloves minced
  • 1 small shallot minced can be replaced with regular or purple onions. Approximately 2 tablespoons
  • ½ teaspoon of chili garlic sauce optional
  • ½ cup red wine vinegar
  • ¾ cup extra-virgin olive oil
  • 1 teaspoon ground paprika
  • 1 teaspoon kosher salt
  • Some fresh ground pepper

Instructions
 

  • For the carrots: Preheat the oven to 400 degrees F. Cut the green top and reserve for the Chimichurri. Wash and peel the carrots. Place them on a baking sheet. Toss the carrots with some olive oil and salt. Roast for 20 minutes or until tender.
  • For the Chimichurri sauce: Wash and dry your carrot tops well before chopping them as they tend to have lots of dirt. Combine all the ingredients in the order they appear leaving the vinegar and olive oil for less. Taste and adjust seasonings.

Notes

Serve with roasted carrots, toasted bread, or over grilled flank steak.


Falafel Stuffed Eggplant with Yogurt Mint Sauce

I love falafel and I love eggplant. Putting them together this intimately was one of the best things it ever happen in my kitchen. No exaggeration here. And topping it all up with a creamy and tangy yogurt sauce makes this combo even better. Sounds like vegan porn to me.

Here is how you make it:

Wash and dry 2 medium eggplants. Slice the eggplants in half lengthwise and score cut sides with a crosshatch pattern. Drizzle some olive oil and salt on the eggplant halves. Place them cut sides down, on a baking sheet lightly coated with olive oil. Bake at 475° for 7 minutes or until slightly tender.

While the eggplant halves are baking prepare the falafel mixture according to box directions–I used a whole box of Cashab Falafel Mix for this recipe and it was almost the perfect amount of stuffing. I overfilled mine halves and, if you love falafel as much as I do, you should overfilled yours too!

Remove from oven and carefully scoop out pulp, leaving a 3/4-inch shell. You can reserve the pulp for another use or you can shamelessly eat it right away just like it did!


Spoon the falafel mixture into each eggplant shell. Bake at 450° for 25-30 minutes or until the falafel is browned and crispy.

To make the Mint Yogurt Sauce, follow the recipe below. You can serve the sauce on the side or drizzle it all over the eggplant. Why not do both?

Since I made this recipe I keep thinking what else can I possibly stuff with falafel. I’m obsessed!

Yogurt Mint Sauce

Dominique for dealiciouscooking.com/blog

Ingredients
  

  • 1 cup plain yogurt I used whole milk yogurt. No regrets!
  • ¼ cup minced mint
  • ½ clove garlic finely diced or grated
  • ½ teaspoon ground cumin
  • ¼ teaspoon cayenne pepper
  • 1 teaspoon lemon juice
  • Salt to taste Start with a little and add as much as you like, always tasting in between. I'm horrible when it comes to salting my recipes. Still learning!

Instructions
 

  • Place yogurt, mint, garlic, lemon juice, cumin, and cayenne in a small bowl and stir to combine. Season with salt and pepper to taste. It'll be best to let sit for 30 minutes but it can be served right away. Store on an airtight container in the refrigerator for up to a week.


Hot weather calls for cold noodles

Oriental Cold Noodles for dealiciouscooking.com

It’s searing hot and it has been that way for a while. The kids are perpetually cranky, the dog doesn’t know what to do with himself and even my tropical self can take this weather anymore.

Cold noodles are just perfect for lunch or dinner when the last thing you want to do is stand over a hot stove. They’re easy to cook, delicious eaten straight out of the fridge and the perfect leftover to pack in the kid’s lunchboxes.

For these recipe I used the veggies I had available (spinach, celery, tomatoes and green onions) but anything goes. The noodles were regular Barilla angel hair but it can be done with any type of noodles oriental or not.

Start by chopping the veggies and mixing it in a large bowl.

Cold Oriental Noodles for dealiciouscooking.com

Prepare the dressing while the noodles are cooking.

Cold Oriental Noodles for dealiciouscooking.com

Rinse the cooked noodles with water until cold. Mix noodles, veggies and dressing. Refrigerate for at least one hour allowing the noodles suck in all the flavors. Eat it straight out of the fridge. Repeat!

Cold Oriental Noodles

Dominique for dealiciouscooking.com
Cuisine Fake Asian

Ingredients
  

  • For the noodles:
  • 4 cups chopped fresh raw vegetables: spinach celery,snow peas, bell peppers, scallions
  • 16 ounces Chinese egg noodles or long pasta like linguine or angel hair
  • For the dressing:
  • 1 small garlic clove minced or crushed
  • 2 tablespoons dark sesame oil
  • 2 tablespoons agave syrup or 1 tbsp sugar
  • 3 tablespoons soy sauce
  • 2 tablespoons of water
  • 1 teaspoon minced fresh ginger
  • 1 tablespoon rice vinegar
  • Sriracha or Tabasco sauce to taste optional

Instructions
 

  • Bring a large pot of water to a boil and salt it. Prepare the vegetables: wash, trim, peel as necessary and cut into sizes and shapes of your choice. Mix in a large bowl.
  • Cook the noodles in the boiling water until tender but not mushy. When they’re done, drain and rinse with cold water. Reserve.
  • Whisk together the dressing ingredients.
  • Toss the cold noodles and veggies; top with sauce and stir to coat.
  • Refrigerate for one hour before serving.

Notes

This dressing goes wonderfully with chopped salads too!


Slow roasted tomato relish and whipped lemon truffle ricotta crostini

Roasted Tomato Relish and whipped truffle ricotta crostini

This idea is all about the whipped ricotta. It really doesn’t matter what the topping is, because this creamy and tangy base can handle anything. I just happened to have a fresh batch of Roasted Tomato Relish and it was a dealicious topping to this easy to make appetizer. Other toppings that may work well with the whipped ricotta are: roasted pears with basil, fresh figs and walnuts, prosciutto and arugula or even smashed green peas and bacon.

This “whipped ricotta recipe” is hardly a recipe and just requires a few steps for a fluffy. I used truffle salt, lemon zest, lemon juice and  pepper with the ricotta.

Roasted Tomato Relish and whipped truffle ricotta crostini

I placed the ricotta cheese, lemon juice an truffle salt in the food processor and whipped until smooth – about 1 minute. I manually mixed the lemon zest to the whipped ricotta and started to assembled the crostini. For the crostini I used pre-sliced ciabatta bread, brushed with some olive oil and baked for 15 minutes at 380F.

Topped with the roasted tomato relish, balsamic glaze and baby basil leaves and flowers from our garden bed.

Dealiciouscooking.com

Whipped lemon truffle ricotta

Ingredients
  

  • 1 cup whole milk ricotta
  • 1/4 truffle salt
  • 1/4 lemon juice
  • dash of lemon zest

Instructions
 

  • See post for details.


Roasted Curried Cauliflower Steaks

Roasted Curried Cauliflower Steaks

Although there’s no better way to eat cauliflower than deep-fried or swimming in a creamy cheese sauce, this roasted cauliflower recipe is pretty satisfying and ‘dealicious’ (yup, this unpopular veggie is usually affordable and I’m totally surprised that it didn’t make the Gwyneth’s SNAP challenge list.)

This recipe is more of a ‘way to prepare’ than an exact recipe. If you like heat, I recommend using a hot curry powder like Madras. Try it with a splash of lime juice. The citrus highlights all the flavors and adds the perfect zing!

Start by preheating the oven at 400F. Wash the cauliflower and remove some or all of the leaves. Slice the cauliflower into 1/2 inch thick slices. And yes, you’re seeing right, I didn’t core the cauliflower and you don’t have to do it either. The core holds the florets together and tastes as good as the rest of the cauliflower to me.

Cauliflower Steaks

In a small bowl, mix the curry powder, turmeric, cardamom and salt.

Cauliflower Steaks

Place the cauliflower steaks on a non-stick baking sheet (or a baking sheet lined with foil.) Coat the steaks with refined coconut oil (it can be substituted with olive oil or any oil of your choice) on both sides. Sprinkle the spice mix on both sides.

Cauliflower Steaks

Roast it 15-20 minutes each side. I broiled each side an additional 2 minutes just to give the florets a bit of a sexy tan. This step is totally optional.

Roasted Curried Cauliflower Steaks

Dominique Fry

Ingredients
  

  • 2 tablespoons refined coconut oil
  • 1 tablespoon mild curry powder
  • 1/2 teaspoons salt
  • 1/2 teaspoon cardamom
  • 1/4 teaspoon turmeric
  • 1 large head cauliflower

Instructions
 

  • Preheat oven to 400°. Wash the cauliflower and shake it dry.
  • Cut the cauliflower in long slices, about 1/2 inch thick.
  • In a small bowl, whisk together the spices.
  • Spread steaks in a single layer in a large non stick baking sheet or a baking sheet lined with foil.
  • Coat the cauliflower steaks with the coconut oil on both sides and sprinkle the spice mix generously also on both sides.
  • Bake until cauliflower 20 to 30 minutes. Stir after 15 minutes, flipping the slices over.

Notes

Served with a splash of lime.