Not feeling kneady

No Kneading Bread www.dealiciouscooking.com

There’s a lot that happened in my kitchen & table between the last post and this recipe, but I’m running short of time these days. But I had to stop and write this down because it’s too good to keep it to myself. I tried NO knead bread and it worked…it works!!!!!! I’m in absolute bread nirvana and I hope  you will be too. Here is my ‘NO knead bread’ story:

  • 3 cups all purpose flour (I used Gold)
  • 1½ teaspoons salt
  • ½ teaspoon instant yeast
  • 1½ cups room temperature water

No Kneading Bread www.dealiciouscooking.com

I combined flour, yeast, and salt in a bowl. Added water and stir gently. Allowed to sit overnight (over 12 hours) in a airtight container. This is how it looked like after sitting in my counter for 13 hours…sticky and bubbly.

No Kneading Bread www.dealiciouscooking.com

Shaped/folded into a loaf gently. I had to remind myself it’s a NO knead bread because I was still skeptical!

No Kneading Bread www.dealiciouscooking.com

I think the most important part of this process is how you bake the bread. It has to be baked in a covered dutch oven type of pot AND it has to be preheated at a high temperature for at least 20 minutes. I drizzled a bit of olive oil on the bottom after I preheated at 500F. Dusted the loaf with some whole wheat flour and dropped in the pot. Baked covered for 30 minutes, uncovered for 12 minutes (still 500F) and this is how it came out.

dealiciouscooking.com

Outside…Crisp, crackly, bread with a crust that pops as it cools. Inside… tender, moist and chewy texture. I’ll be definitely making this again, and again, and again.

dealiciouscooking.com

Buffalo Chicken Balls

Buffalo Chicken Balls

You’ve probably seeing this finger food many times before, but I came across this recipe idea for the first time EVER and I had to give it a try right away. How come I have never thought of this before? Although I love the taste of Buffalo Wings I’m not a fan of the “wing” part. These chicken balls are the perfect twist to an American classic. They are so easy to make and eat–no fry (haha), no bones, no skin, no mess!!!!

Now, there are lots of recipes out there for Buffalo Chicken Meatballs, but I came up with this one inspired by Skinny Taste recipe.

Chicken Buffalo Balls

Ingredients:

  • 1 pound ground chicken (I used white meat)
  • 1 large egg (beaten)
  • 1 celery stalk minced (about 1/3 cup)
  • 1/3 cup minced carrots
  • 3/4 cup bread crumbs (or Panko)
  • 2 tablespoons minced onions (or green onions)
  • 1 teaspoon salt
  • 1/2 teaspoon ground black pepper
  • 1/2 teaspoon garlic powder
  • 1 tablespoon wings sauce of your choice

Preheat oven to 400 degrees. Coat a large baking sheet with olive oil and set aside.

On a large mixing bowl, beat the egg lightly adding the hot sauce. Add all the ingredients living the chicken and breadcrumbs for last. Using your hands, mix until combined. Roll chicken mixture into firm, 2 or 3-inch round balls (get your hands lightly wet if the mix is sticking to it) and place on baking sheet. Bake until cooked through, about 20 minutes.

Place the chicken balls in a bowl, add approximately 1/3 of  buffalo sauce and toss to combine. Arrange the chicken balls in a plate and drizzle ranch or blue cheese dressing to finish. Serve with celery, carrot sticks and a side of dressing.

Buffalo Chicken Balls

Let’s pretend it’s fall. Coconut Mango Curry Butternut Squash Soup!

Coconut Mango Green Curry Butternut Squash Soup

Right now, I’m sipping hot coffee, and it’s like 90F outside. I have a tank top on and I’m about to bring the fan out of its very short retirement in the garage.

This Coconut Mango Green Curry Butternut Squash Soup (try saying that in one breath) is good all year long. However, squashes are in season and I bought a Costco size tray of precut organic butternut squash (I do not enjoy peeling and cutting those monsters.)

It doesn’t look like fall weather is upon us anytime soon. So let’s just pretend it’s fall in Southern California and make some soup!

100% good for you ingredients. Coconut oil, butternut squash, mango, and coconut milk. The mango brings even more the sweetness of the butternut squash and adds texture to the soup. I added Sriracha to my serving to save the kids from the heat, but a teaspoon or two can be added to the recipe. I also added some of the last green leaves of thai basil from my almost dead herb garden. [sigh]

Coconut Mango Green Curry Butternut Squash Soup Coconut Mango Green Curry Butternut Squash Soup Coconut Mango Green Curry Butternut Squash Soup Coconut Mango Green Curry Butternut Squash Soup

Coconut Mango Curry Butternut Squash Soup!

Dominique
Prep Time 15 minutes
Cook Time 30 minutes
Total Time 45 minutes
Cuisine American Thai

Ingredients
  

  • 1 tablespoon coconut oil
  • 2 cloves garlic minced
  • 1 small yellow onion diced
  • tablespoons Thai green curry paste
  • 2 cups chicken or vegetable broth
  • 1 2 lb. tray of precut butternut squash got it @ Costco OR 4 cups butternut squash, peeled, seeded, and cut into cubes
  • 2 cups of mango chunks fresh or frozen
  • 1 15-ounce can whole coconut milk (can be sub. for light)
  • 1 teaspoon salt
  • ½ teaspoon Sriracha optional
  • 3 or 4 Thai basil leaves optional

Instructions
 

  • Start by reserving the frozen mango (if using frozen) and letting it thaw while you work on the soup.
  • Heat the oil in a large soup pot over medium heat. Add in the garlic and onion, and saute about 3 minutes.
  • Add in the raw butternut squash cubes, pour in the broth, and add the curry paste plus salt stirring to combine. Cook for 3 more minutes, stirring often. Bring to a boil and then reduce heat to a simmer and cover. Cook for 20 minutes, or until butternut squash is tender. Remove from heat and let cool for a few minutes.
  • Add the mango to the soup. Use a handheld mixer to blend the soup directly in the pot or pour the soup into a blender in batches and blend until smooth. Pour the blended soup back into the soup pot over medium heat.
  • Before serving, remove from heat and mix in the coconut milk slowly. Mix well. Pour into bowls and top with some Sriracha sauce.

Notes

The coconut milk is added last, after the soup has been blended. That way you can control the thickness of the soup.


Cooking with kids plus Thai Curry recipe

Cooking with Kids

Here is the raw truth. I cook but I don’t cook well with others. Especially when they are my own children. So I’ve decided to make a great effort to face my cooking selfishness and share this skill with my kids. I do it once in a while and require a lot some wine prior to the cooking commences.

Cooking is a life skill on the verge of extinction. I want my kids to know how to cook—not to impress but just to survive…not in the wild…just in the real world. Maybe I’m just too optimistic, but if they can throw some fresh ingredients together without losing any fingers and getting burnt I’ll be happy. Apart from that, there’s always cereal and milk.

I poured a glass of wine and got cooking with my 12-year-old son. He loves Thai food. So do I. Since my 9-year-old daughter (the picky eater who hates Thai food and seafood) was out on a sleepover we decided to make Thai Shrimp/Squid Curry. It may sound fancy, but it’s easy and quick. We finished the dish before I could finish my second glass of wine. Check it out!

Thai Shrimp Curry with kids

This recipe was for two so it only required one pound of shrimp and squid combined. My son chopped the onion and sliced the bell pepper with my supervision. I sipped my wine when he was done. Big sips. He also washed the shrimp+squid and gathered the ingredients. I chopped the lemongrass, a totally optional ingredient.

The real challenge was watching him try to open the can of coconut milk. O.M.G. More wine, please. How many of you out there have taught a kid to open a can? Specifically a boy? It wasn’t going well for us so I gave up. I opened the can myself. The “how to use a can opener” lesson would have to wait.

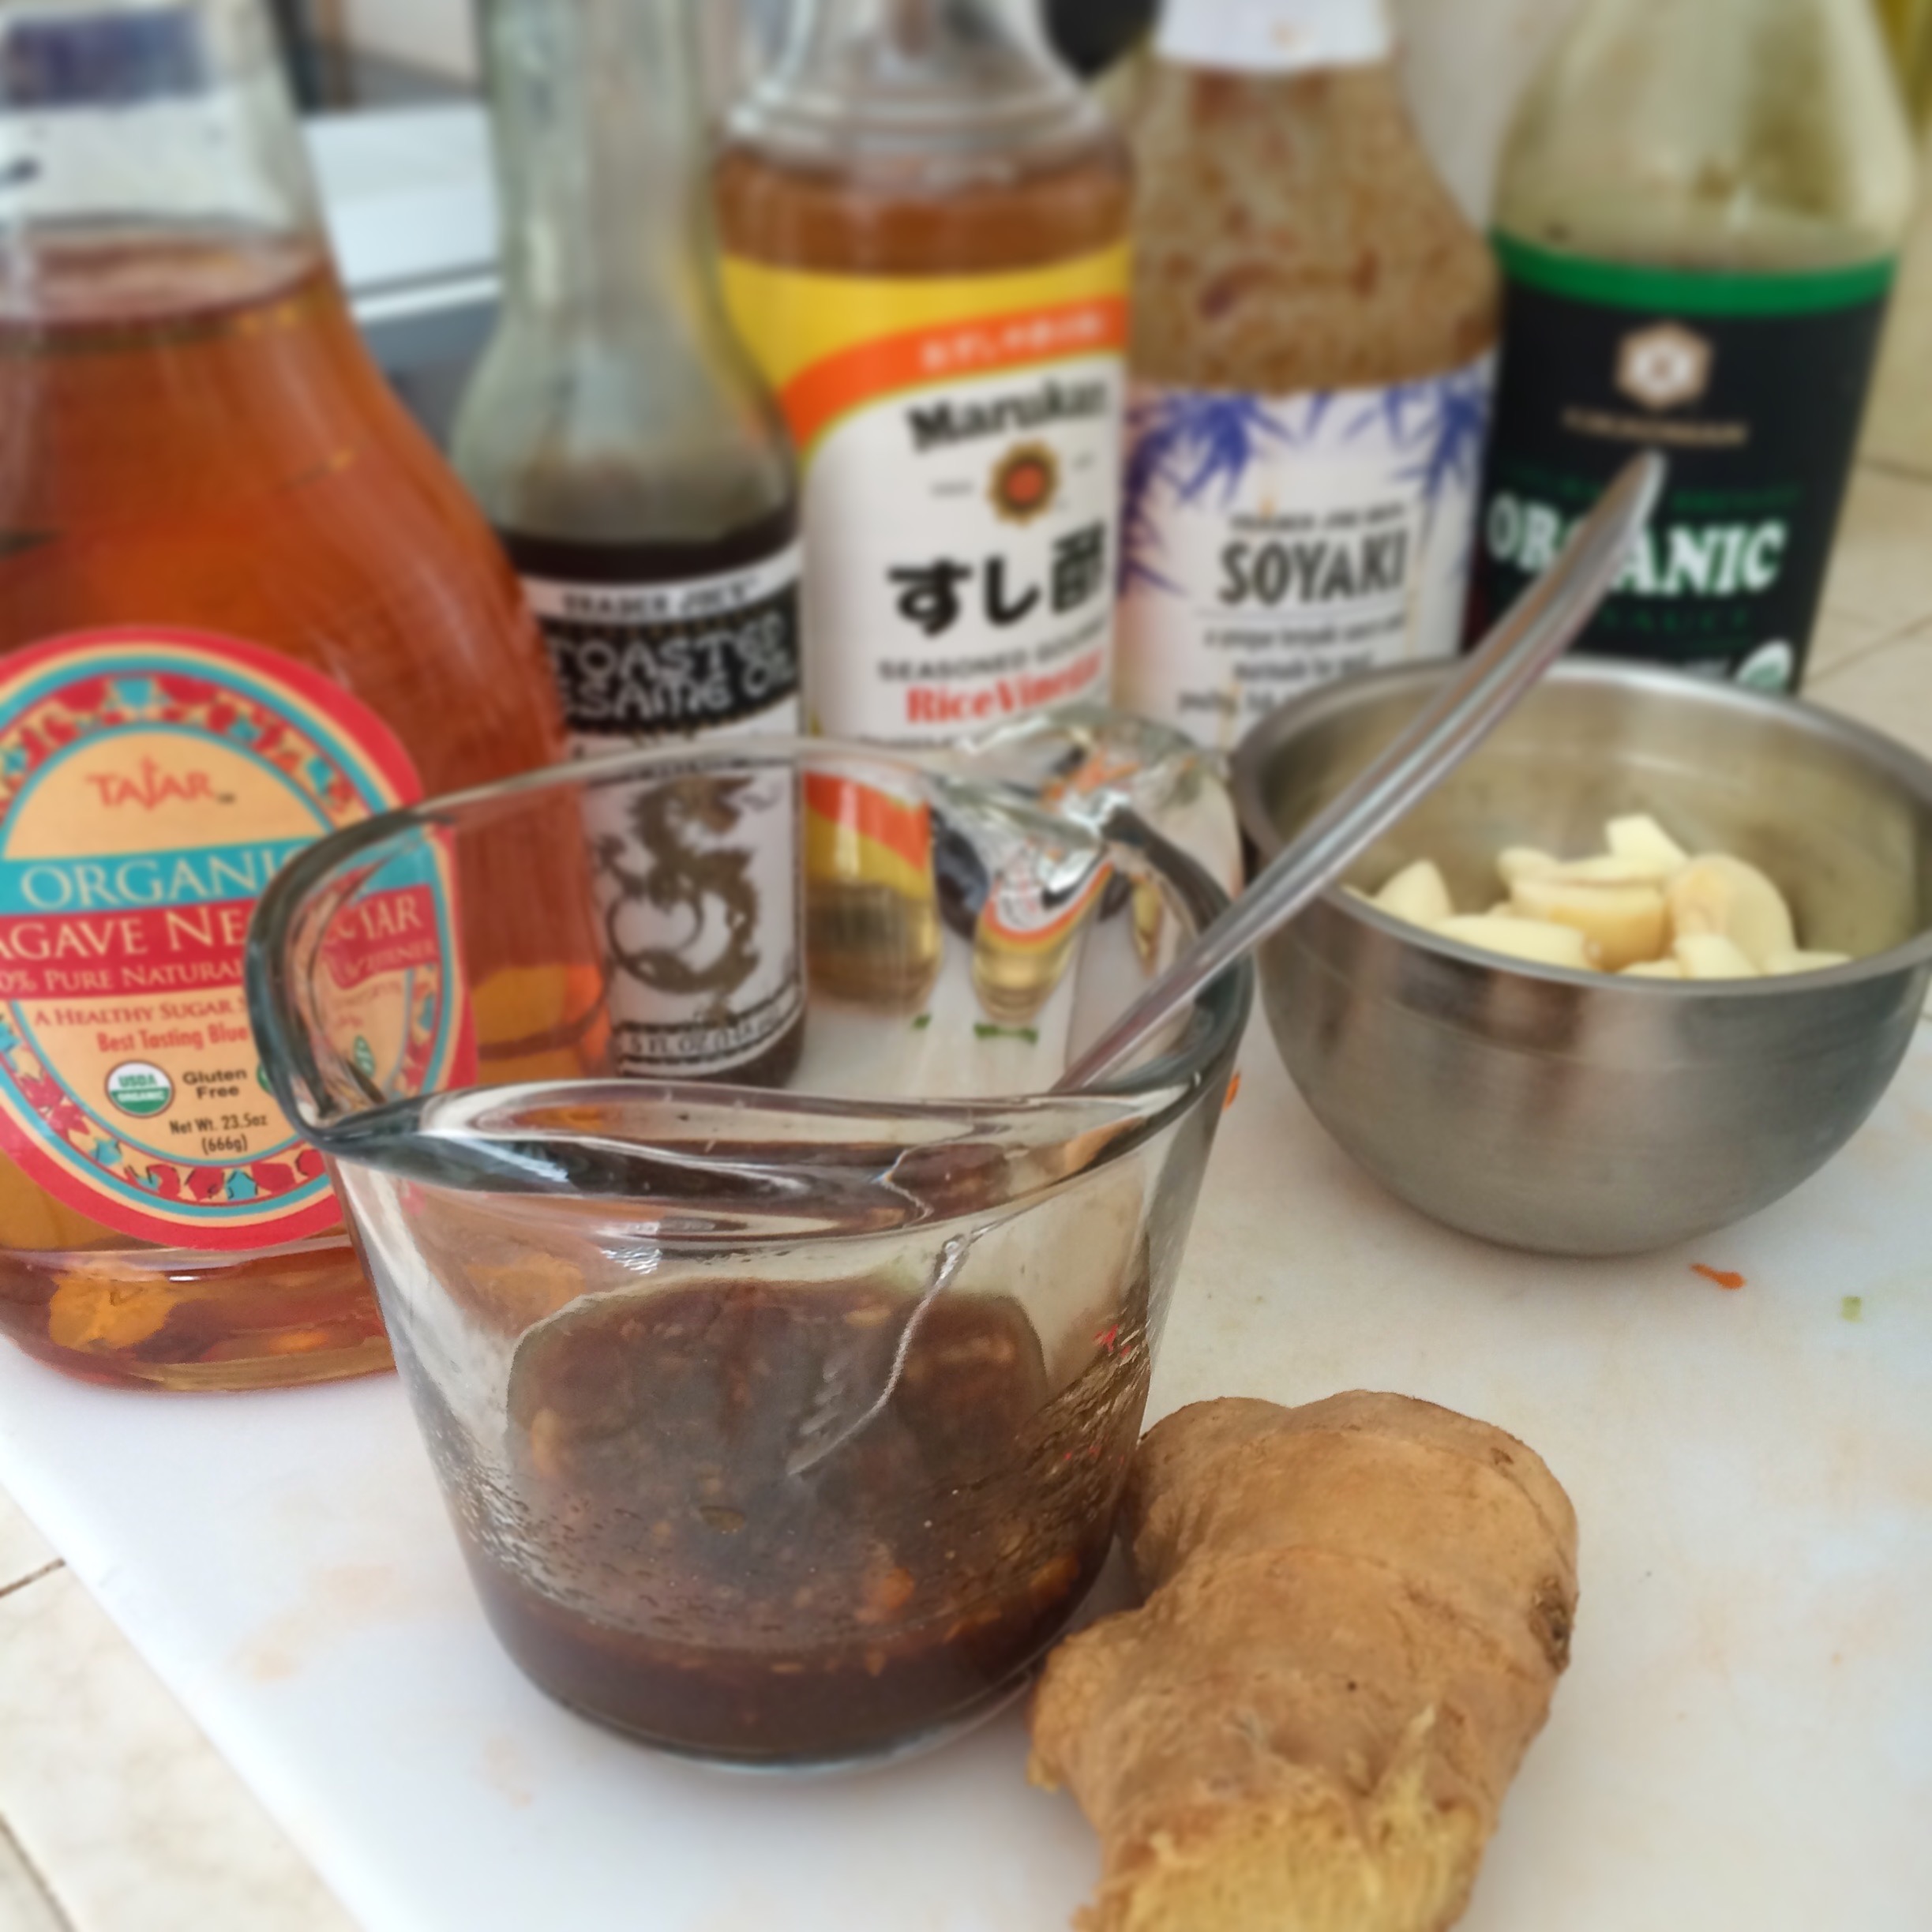
We started by sautéing the onions, bell peppers and lemongrass in hot coconut oil for about 3 minutes. Next, we added the shrimp+squid which let out some liquid. We used the liquid as a base to dissolve the curry paste and peanut butter. Then we added coconut milk, salt, and some sugar. We tasted. Not sweet enough. More sugar, a dash of pepper flakes and some basil leaves.

Thai Shrimp Curry

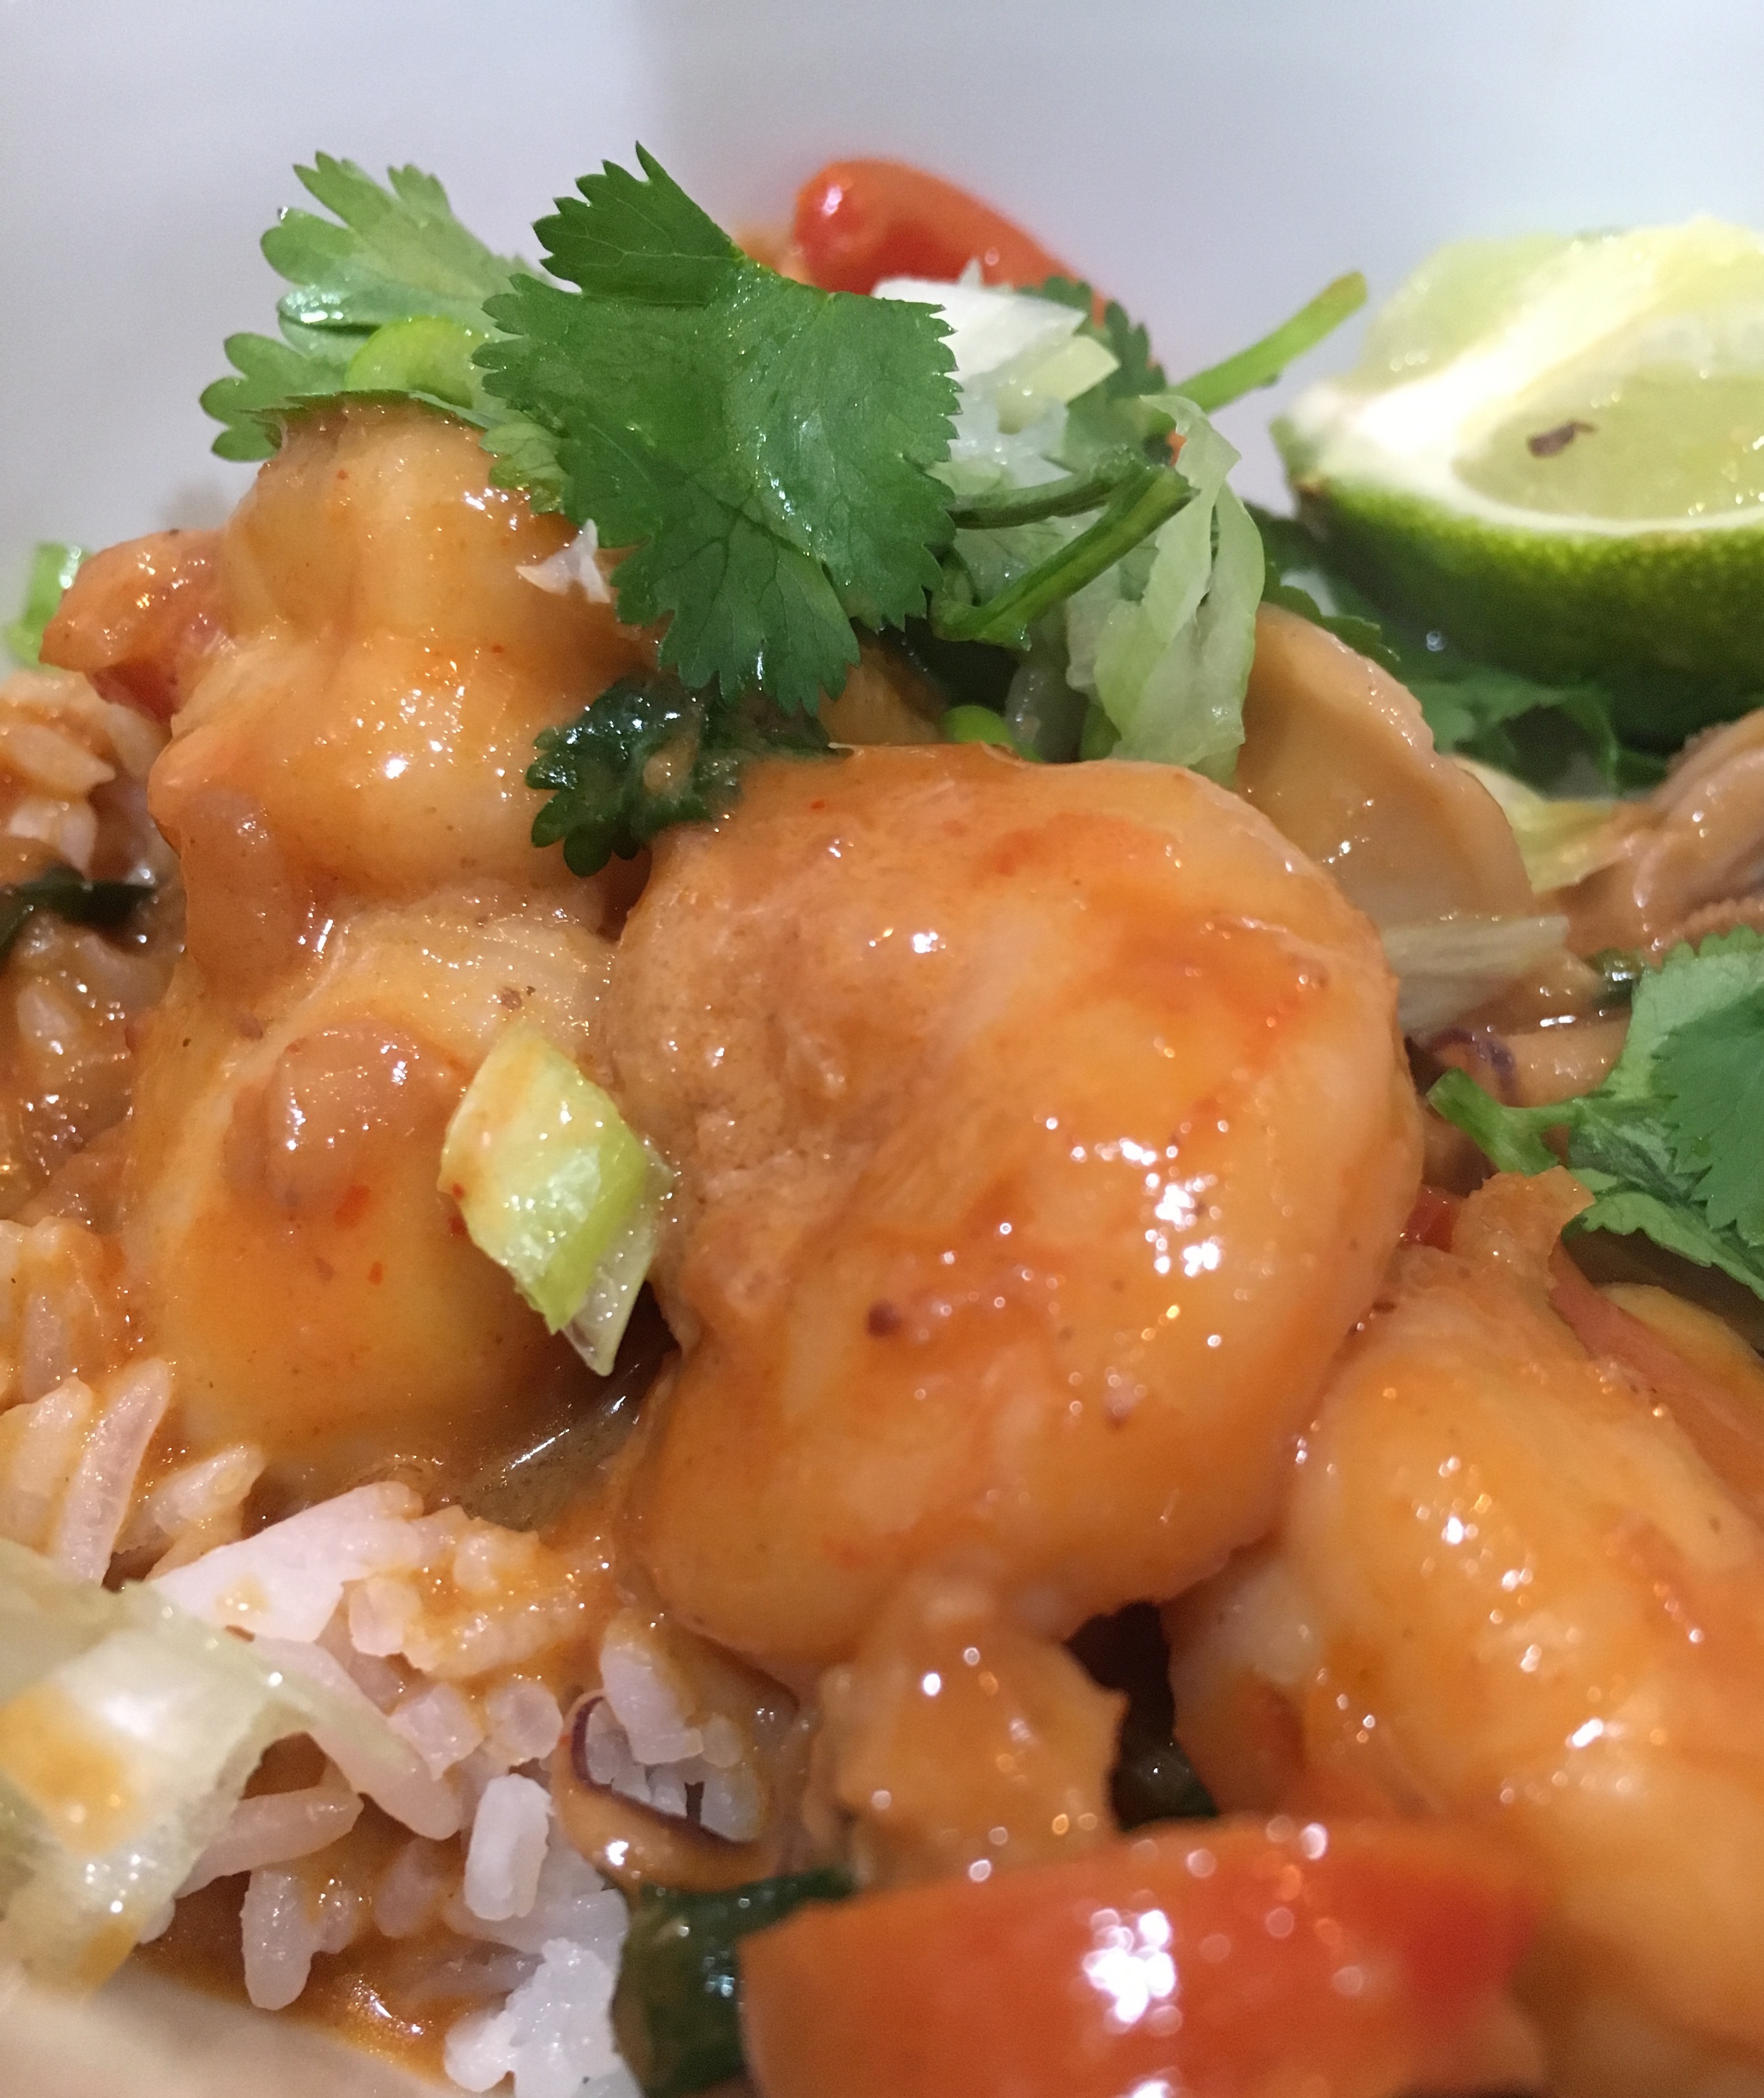
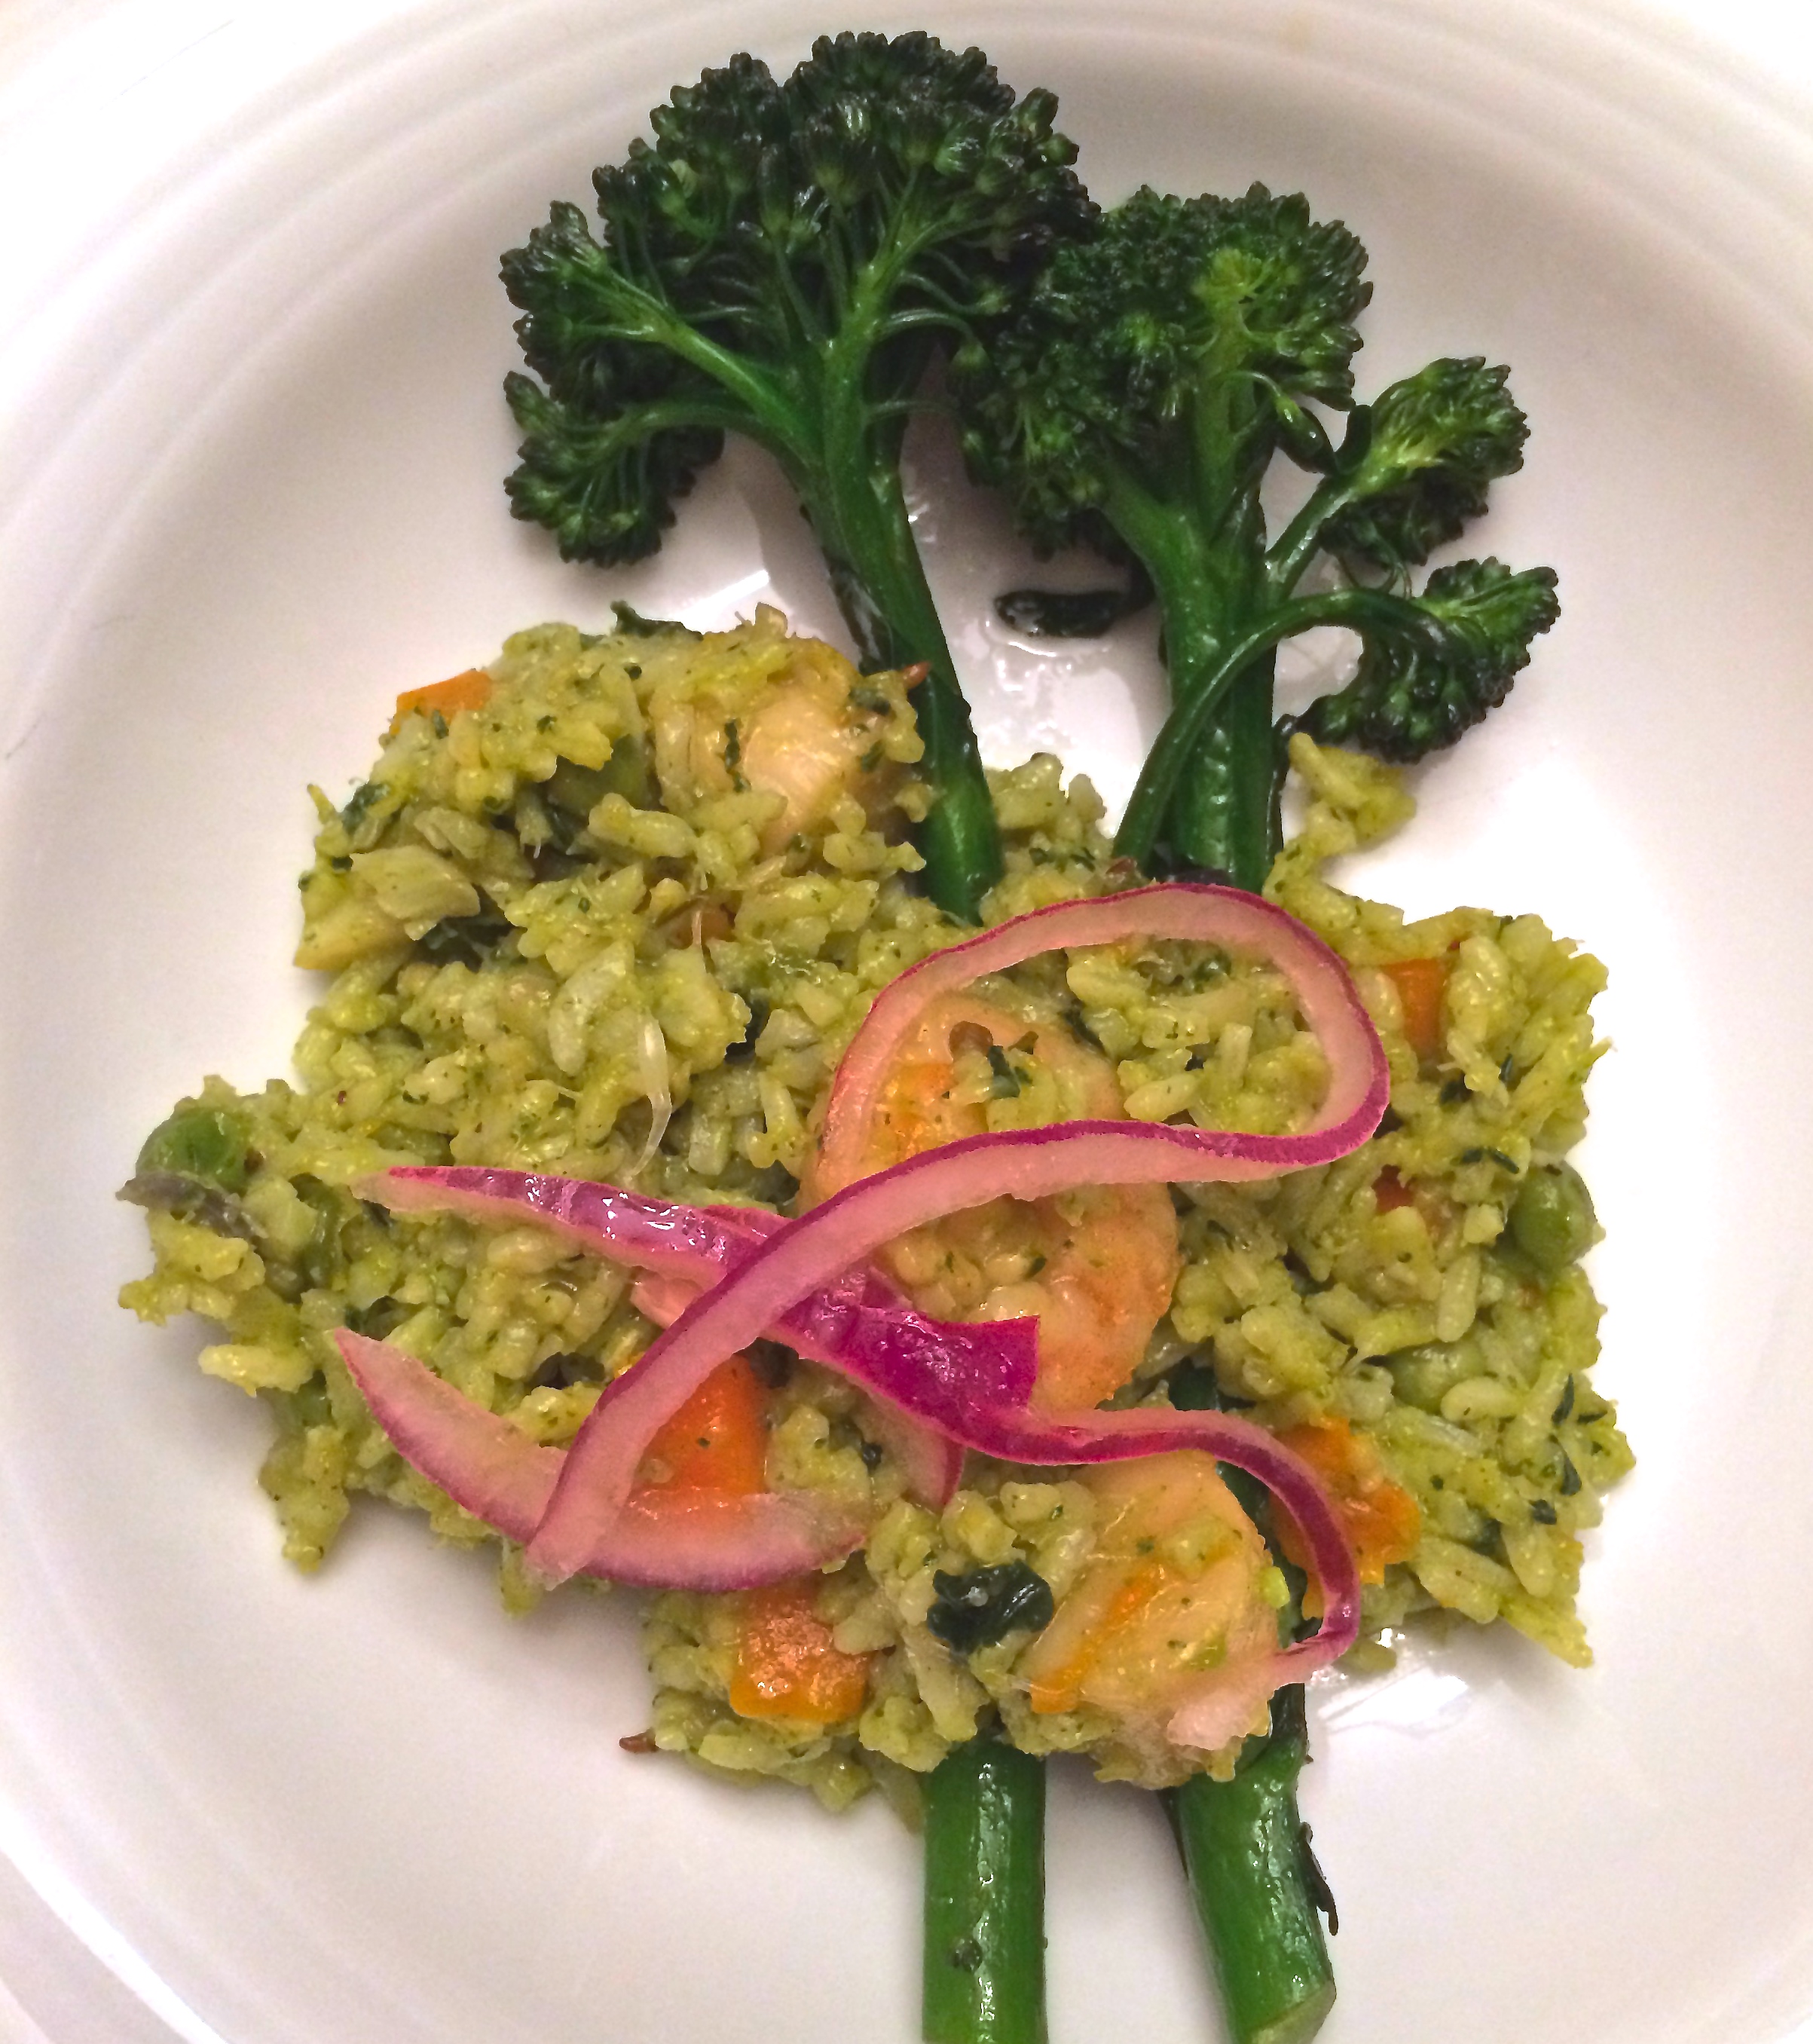
We let it simmer for about 5 minutes and served immediately over jasmine rice. My son plated and garnished it and this is what we ended up with:

Thais Shrimp Curry

No finger casualties. Only happy and spicy memories (despite the can opening moment.) Cooking with kids can be fun but here is the deal: keep it simple, cook something they like to eat, and let them do most of the work (including the cleaning!)

Cooking with kids Thai Curry

This recipe works with any protein (beef, chicken, seafood and even tofu) It's easy enough to do it with kids. Make the rice before you start the curry.
Cuisine Easy Thai

Ingredients
  

  • 1 pound shrimp seafood, chicken, beef or tofu
  • 2 tablespoons refined coconut oil can be replaced for vegetable or canola oil
  • 2 tablespoons red Thai curry paste
  • ¼ teaspoon kosher or sea salt
  • 1 stick of lemongrass chopped optional
  • ½ red/purple onion peeled and diced
  • ½ red bell pepper seeded and sliced
  • 1 cup coconut milk
  • 2 tablespoons peanut butter
  • 1 tablespoon brown sugar
  • ¼ teaspoon red chili flakes optional
  • 2 teaspoons ground ginger optional
  • 2 tablespoons basil leaves chopped
  • cilantro chopped or whole to garnish
  • 1 lime cut in quarters

Instructions
 

  • Rinse shrimp or seafood getting it ready to cook (if you using beef/chicken/tofu just cut it in 1 inch cubes.)
  • Heat the coconut oil on a skillet over medium high heat. Add the onion, peppers, lemongrass and cook until softened.
  • Add the shrimp or whatever protein of your choice. Cook it until ready (for seafood no longer then 4 minutes.)
  • Add curry paste, peanut butter and a little bit of the coconut milk mixing it until all is dissolved and combined.
  • Add the remaining coconut milk, basil, ginger, salt, sugar and pepper flakes.
  • Bring to a boil then reduce to simmer.
  • Serve over rice or noodles. Garnish with more cilantro and basil, and a splash of lime juice.


Hot weather calls for cold noodles

Oriental Cold Noodles for dealiciouscooking.com

It’s searing hot and it has been that way for a while. The kids are perpetually cranky, the dog doesn’t know what to do with himself and even my tropical self can take this weather anymore.

Cold noodles are just perfect for lunch or dinner when the last thing you want to do is stand over a hot stove. They’re easy to cook, delicious eaten straight out of the fridge and the perfect leftover to pack in the kid’s lunchboxes.

For these recipe I used the veggies I had available (spinach, celery, tomatoes and green onions) but anything goes. The noodles were regular Barilla angel hair but it can be done with any type of noodles oriental or not.

Start by chopping the veggies and mixing it in a large bowl.

Cold Oriental Noodles for dealiciouscooking.com

Prepare the dressing while the noodles are cooking.

Cold Oriental Noodles for dealiciouscooking.com

Rinse the cooked noodles with water until cold. Mix noodles, veggies and dressing. Refrigerate for at least one hour allowing the noodles suck in all the flavors. Eat it straight out of the fridge. Repeat!

Cold Oriental Noodles

Dominique for dealiciouscooking.com
Cuisine Fake Asian

Ingredients
  

  • For the noodles:
  • 4 cups chopped fresh raw vegetables: spinach celery,snow peas, bell peppers, scallions
  • 16 ounces Chinese egg noodles or long pasta like linguine or angel hair
  • For the dressing:
  • 1 small garlic clove minced or crushed
  • 2 tablespoons dark sesame oil
  • 2 tablespoons agave syrup or 1 tbsp sugar
  • 3 tablespoons soy sauce
  • 2 tablespoons of water
  • 1 teaspoon minced fresh ginger
  • 1 tablespoon rice vinegar
  • Sriracha or Tabasco sauce to taste optional

Instructions
 

  • Bring a large pot of water to a boil and salt it. Prepare the vegetables: wash, trim, peel as necessary and cut into sizes and shapes of your choice. Mix in a large bowl.
  • Cook the noodles in the boiling water until tender but not mushy. When they’re done, drain and rinse with cold water. Reserve.
  • Whisk together the dressing ingredients.
  • Toss the cold noodles and veggies; top with sauce and stir to coat.
  • Refrigerate for one hour before serving.

Notes

This dressing goes wonderfully with chopped salads too!


Slow roasted tomato relish and whipped lemon truffle ricotta crostini

Roasted Tomato Relish and whipped truffle ricotta crostini

This idea is all about the whipped ricotta. It really doesn’t matter what the topping is, because this creamy and tangy base can handle anything. I just happened to have a fresh batch of Roasted Tomato Relish and it was a dealicious topping to this easy to make appetizer. Other toppings that may work well with the whipped ricotta are: roasted pears with basil, fresh figs and walnuts, prosciutto and arugula or even smashed green peas and bacon.

This “whipped ricotta recipe” is hardly a recipe and just requires a few steps for a fluffy. I used truffle salt, lemon zest, lemon juice and  pepper with the ricotta.

Roasted Tomato Relish and whipped truffle ricotta crostini

I placed the ricotta cheese, lemon juice an truffle salt in the food processor and whipped until smooth – about 1 minute. I manually mixed the lemon zest to the whipped ricotta and started to assembled the crostini. For the crostini I used pre-sliced ciabatta bread, brushed with some olive oil and baked for 15 minutes at 380F.

Topped with the roasted tomato relish, balsamic glaze and baby basil leaves and flowers from our garden bed.

Dealiciouscooking.com

Whipped lemon truffle ricotta

Ingredients
  

  • 1 cup whole milk ricotta
  • 1/4 truffle salt
  • 1/4 lemon juice
  • dash of lemon zest

Instructions
 

  • See post for details.


Roasted Curried Cauliflower Steaks

Roasted Curried Cauliflower Steaks

Although there’s no better way to eat cauliflower than deep-fried or swimming in a creamy cheese sauce, this roasted cauliflower recipe is pretty satisfying and ‘dealicious’ (yup, this unpopular veggie is usually affordable and I’m totally surprised that it didn’t make the Gwyneth’s SNAP challenge list.)

This recipe is more of a ‘way to prepare’ than an exact recipe. If you like heat, I recommend using a hot curry powder like Madras. Try it with a splash of lime juice. The citrus highlights all the flavors and adds the perfect zing!

Start by preheating the oven at 400F. Wash the cauliflower and remove some or all of the leaves. Slice the cauliflower into 1/2 inch thick slices. And yes, you’re seeing right, I didn’t core the cauliflower and you don’t have to do it either. The core holds the florets together and tastes as good as the rest of the cauliflower to me.

Cauliflower Steaks

In a small bowl, mix the curry powder, turmeric, cardamom and salt.

Cauliflower Steaks

Place the cauliflower steaks on a non-stick baking sheet (or a baking sheet lined with foil.) Coat the steaks with refined coconut oil (it can be substituted with olive oil or any oil of your choice) on both sides. Sprinkle the spice mix on both sides.

Cauliflower Steaks

Roast it 15-20 minutes each side. I broiled each side an additional 2 minutes just to give the florets a bit of a sexy tan. This step is totally optional.

Roasted Curried Cauliflower Steaks

Dominique Fry

Ingredients
  

  • 2 tablespoons refined coconut oil
  • 1 tablespoon mild curry powder
  • 1/2 teaspoons salt
  • 1/2 teaspoon cardamom
  • 1/4 teaspoon turmeric
  • 1 large head cauliflower

Instructions
 

  • Preheat oven to 400°. Wash the cauliflower and shake it dry.
  • Cut the cauliflower in long slices, about 1/2 inch thick.
  • In a small bowl, whisk together the spices.
  • Spread steaks in a single layer in a large non stick baking sheet or a baking sheet lined with foil.
  • Coat the cauliflower steaks with the coconut oil on both sides and sprinkle the spice mix generously also on both sides.
  • Bake until cauliflower 20 to 30 minutes. Stir after 15 minutes, flipping the slices over.

Notes

Served with a splash of lime.


Citrus Chipotle Chicken Salad Sandwich

You're going to want to try this chicken salad

This is no ordinary, boring, mayo loaded chicken salad sandwich. I love all the different flavors and textures in this chicken salad.  Best of all, it’s actually half of the guilty! Use greek yogurt in addition to mayo and you get an extra creamy and tangy flavor without the extra calories. Then, add a trio of spices– cumin, chipotle powder and plenty of fresh chopped cilantro – along with sweet onions and lime juice for a sweet, spicy and tangy flavor. Piled high on top of a croissant with some radish slices, or just mounded on top of of greens, this chicken salad is anything but boring.

Start by roasting or boiling the chicken breasts. I used leftover chicken I roasted in the slow cocker.

dealiciouscooking.com

Chop the sweet onion and place it in a large bowl that gives you enough room to mix all ingredients thoroughly.

dealiciouscooking.com

Chop the cilantro really really fine and place it in the bowl.

dealiciouscooking.com

Get your hand all over the chicken breasts and start shredding it. To the bowl it goes. Add the Greek yogurt and mayo.

dealiciouscooking.com

Finish by adding the cumin, paprika, chipotle, salt and lime juice.

dealiciouscooking.com

Mix it well and give it a try. Adjust the flavors to taste by adding more yogurt. mayo or spices. It’s always a good idea to start with less and add more as you go. You can ditch the mayo all together and go full yogurt for even less guilt.

Citrus Chipotle Chicken Salad Sandwich

Ingredients
  

  • 2 shredded chicken breasts roasted or boiled chicken bone in preferable
  • 1/2 cup of mayonnaise
  • 1/4 cup of greek yogurt
  • 1/2 sweet onion chopped
  • 1/2 bunch cilantro chopped
  • 1/4 tsp cumin
  • 1/4 tsp paprika
  • 1/2 tsp chipotle powder
  • 1/4 tsp salt
  • some lime zests no more than 1/4 tsp
  • Juice of one lime approximately 2 tbsp

Instructions
 

  • In a large bowl, combine all ingredients.
  • Serve the salad on croissants, or on your favorite kind of bread. For a fun fix, try rolling it in a tortilla.


Quick Arroz con Mariscos with lime-pickled onions

Arroz con Mariscos
It just means rice with seafood and a whole lotta of cilantro and cumin!
Arroz con Mariscos is a popular dish of rice and seafood in Peru and also Portugal. This quick version is perfect with shrimp and/or scallops. The convenient thing about seafood is that it’s quick and simple to prepare and the juices that are released add a lot of flavor to the dish. Our local Sprouts has a ‘dealicious’ sale on both this week. Add frozen or fresh veggies to this recipe. This time I added extra cilantro (one large bunch) and some chopped spinach. The greener the better, right?!

Quick Arroz con Mariscos with lime-pickled onions

Ingredients
  

  • 3 to 4 cups of cooked/steamed white rice long grain
  • 1 ½ to 2 lb of seafood I used defrost shrimp and scallops
  • 1 bunch of fresh cilantro chopped
  • 1 medium red/purple onion 1/2 chopped and ½ cut in thin slices
  • 3 garlic cloves chopped
  • 1 small lemon juice
  • 1 tablespoon cumin powder
  • 2 tsp turmeric
  • ½ tsp of oregano
  • ½ cup of chicken stock or chicken broth save another ½ cup in case rice looks dry after all ingredients are mixed
  • ½ cup of peas frozen it’s fine
  • ½ cup of diced carrots
  • ½ red yellow or green bell pepper diced
  • 3 tbsp lime juice
  • 2 tbsp olive oil
  • “To taste” ingredients
  • salt about 1 tbsp but it depends on how salty the chicken broth you are using is
  • cayenne pepper 1 tsp

Instructions
 

  • Before starting on the “Arroz con Mariscos” marinade the thin onion slices in the lime juice and set aside.
  • On a big pan sauté diced onions on the OOil. Add bell pepper+peas+carrots or any other veggies you like (green beans, corn, etc.) Saute for a couple of minutes and add the chicken stock, lemon juice and spices (including chopped cilantro). Add the seafood and cook it for 5 minutes (Note: if you’re using frozen seafood use less chicken broth. If seafood is still frozen cooked for 8 minutes or so).
  • Taste the broth before adding the rice. It should be on the salty side. Add more salt/pepper/cumin or anything your taste buds tell you. Add the cooked rice. Make sure you gently smash the rice clusters so it will absorb the broth evenly. Add more chicken broth if the rice looks dry. The rice should look pretty moist.
  • Let it sit for 5 minutes before serving allowing the rice to absorb all the juices.
  • Serve with the marinade onions on the side.

Notes

You can add any vegetable to this recipe (green beans, lima beans and even chopped kale will taste good). I added chopped spinach on this batch. Also there’s no rule for the amount of cilantro you can use here. If you are a cilantro lover this is the time to abuse it!

Raw Almond Butter Bites

Raw Almond Butter Bites

I love no bake treats because…well…I don’t like baking. This is another quick treat that doesn’t require baking and it’s a super healthy bite for those mid-day sweet cravings. Healthy enough for a snack and delicious enough for dessert. It goes really good with a cup of coffee. These bites are also the perfect boost for a pre-workout or a great pos-workout snack due to the natural sugars from the maple syrup, plus carbs from the oats and a dose of healthy fats from the almond butter and coconut oil. 

These recipe can also be made with raw almond butter or any kind of all natural nut butter. The oilier the butter the better. You can add more milk or more ground oats depending on how thick or thin the mixture turns out. Contrary to baking, it’ll be hard to screw this recipe up!

If you make them, please be sure to pop back and leave a comment with your thoughts!

Raw Almond Butter Bites

Dominique for dealiciouscooking.com

Ingredients
  

  • cup oats ground slightly (measure before grinding)
  • ½ cup roasted almond butter
  • 3 tsp coconut oil melted
  • 3 tsp maple syrup
  • ¼ tsp sea salt
  • ½ tsp vanilla extract
  • ½ tsp cinnamon
  • 1 tbsp almond milk

Instructions
 

  • Mix everything but the ground oats until smooth.
  • Stir in the ground oats until a thick batter forms.
  • Make small balls with the mixture (or any shape you like)
  • Place in the refrigerator and let it sit for at least one hour until the bites are somewhat hard to the touch.