Fresh Peach Crumb Cake

Fresh Peach Crumb Cake for dealiciouscooking.com

Every summer, we get a good amount of peaches from our peach tree in the backyard. Peach size, sweetness and juiciness are unpredictable. Last year, we had sweet and perfectly plump peaches through summer so we enjoyed them as they came. This year, however, we got most of our peaches at once. So…I made my way through the load of peaches! I grilled and added them to salads. I roasted them with brown sugar, butter and cinnamon and ate them with vanilla yogurt. But the real winner of all things peach was this scrumptious crumb cake. What you see here in the picture is exactly what you get. Light and fluffy cake in the bottom, slightly sweet peach pure in the middle, and crunchy crumbs on top.  Perfection!

The Deal: Peach season is almost over and our peach tree is bare. Luckily, Vons-Pavillions has local California peaches on sale this week for $1.99 lb.
Fresh Peach Crumb Cake

Dominique for dealiciouscooking.com

Ingredients
  

  • For the peach filling:
  • 4 large peaches if small use one or 2 more
  • 1/2 cup of sugar
  • 1 tbsp water
  • pinch of cinnamon
  • pinch of salt
  • For the cake:
  • 1 cup flour
  • 1/2 cup sugar
  • 2 tsp baking powder
  • pinch salt
  • 1 tsp vanilla extract
  • 4 tbsp melted butter 1/2 stick
  • 1/2 cup milk
  • 1 egg
  • For the crumbs:
  • 4 tbsp melted butter the other half of the stick
  • 1/4 up brown sugar
  • 1/2 cup sugar
  • 1/2 tsp cinnamon
  • 1 cup of flour I used whole wheat flour for the crumbles but reg flour can be used too

Instructions
 

  • For the filling:Peal and slice the peaches. Place peaches and filling ingredients on a small pan. Cook it for about 10 minutes or until liquid is reduced. Puree the peach with a hand mixer directly in the pan OR in a blender.
  • Butter or spray an 8'' cake pan and preheat the oven to 380.
  • For the cake: Whisk dry ingredients over the wet until JUST combined (don't over mix.) Pour into cake pan and dot with the peach puree.
  • Mix crumb ingredients and crumble over the cake.
  • Bake 25-30 minutes.

Notes

The peach puree can be replaced for any kind of jam and even Nutella.


Summer favorites

June came and went and July is melting its way into August. We’re certainly enjoying the beautiful SoCal weather and all the great things that come with summer-including the lack of time for blog posts. We’ve been eating our summer favorite foods, creating new ice cream flavors, exploring refreshing cocktails and bubblies and gardening. Of all things we’ve made and tried this summer these are my favorites so far:

Dealicious Cooking Grilled Pizzas

GRILLED PIZZAS. I do dream with a built-in italian brick wood oven where I’ll make ridiculous amounts of pizza and breads. For now, grilling is by far the easiest way for a ‘dealicious’ homemade pizza.

Gronomics Raised Garden for dealiciouscooking.com

GARDENING: I can’t raive enough about our Gronomics raised garden. I literally L-O-V-E it! It’s a fun project to do with the kids and it’s a great investment. I use lots of fresh herbs in cooking and anyone who has bought herbs from the grocery knows they aren’t cheap!

Bepin de Eto for dealiciouscooking.com

BUBBLY ITALIAN WINE. As much as I love red wines, there’s nothing like a crisp and refreshing bubbly wine to go with light summer dishes. I’ve to admit that I totally bought this Spumante for the looks. I mean, look at this bottle! I was so surprised to find that the inside is as delicious as the outside. Not too dry, not too sweet and extremely easy to drink. Bepin De Eto is relatively new in the US market but you can find it (if you haven’t already) at Costco under $20.00. Now, that’s ‘dealicious’!

Ice cream maker for dealicouscooking.com

HOMEMADE ICE CREAM. So far, our ice cream maker has been the most used appliance this summer. I wouldn’t have guessed how much fun it’s to make our own flavors. I’m NOT a big fan of ice cream but I love creating different flavors with the kids. The small batches are perfect for us, ice cream maker beginners, looking for unique flavors. Banilla, salted caramel banana and roasted balsamic strawberry made it to the favorite flavor list. I’ve a feeling we’ll be making ice cream throughout the year no matter how cold the weather may be.


Disclaimers:  

  • I did not use affiliate link advertising in my blog.  I did not receive compensation for links in my posts.  
  • English is not my first language and even after 15 years of English speaking I’m still learning. I ran Microsoft Word’s spelling and grammar check on this blog entry. If it is not grammatically correct, it is MW fault. 


Summer and Pickled Radishes

Pickled Radishes Dealiciouscooking.com

Summer is here! We don’t have big plans other than lots of beach time, gatherings with friends, and eating lots of summer dishes. The grill will be in full force and my new ice-cream maker is just one of the best things I could hope for this summer. So far we’ve made banilla and also strawberry ice cream. I can’t wait to unleash the not so ‘kid friendly’ flavors.

Our first and probably only summer project is this vegetable garden raised bed. No, I did not built it. I got it from my hubby and kids for my birthday. This one is made by Gronomics and hubby got it online at Crate&Barrel but there are many different elevated garden beds available online. Our green thumbs have been challenged and we’re waiting patiently for our eggplants, hot chili peppers, okra, kale, and mustard greens (still seedling.)

Vegetable Garden Raised Bed dealiciouscooking.com

Lately, I’ve been seeing a lot of posts and Instagrams of  pickled radishes. I’ve never made it before and I was just curious about all the hype.

I was planning to add them to tacos but after letting it rest for a day in the fridge I tried one, and another, and one more…and I’ve been snacking on them since them. It was love at first bite for sure, but let me tell you, it smells like fart every time I open that jar. But I don’t care. They are radishes after all.

These batch never made it to see a taco, but I added the pickled radishes to this horseradish mustard potato salad. They added a special sweet and sour crunchiness to it. So good!

Potato Salad with Pickled Radishes dealiciouscooking.com

And if you ever get to make these pickled radishes try them on top of smashed avocado toast or crackers. I’m hooked on these so bad!

Smashed avocado on Ritz cracker topped with pickled radishes dealiciouscooking.com

Happy summer to all!

Pickled Radishes

Dominique for DealiciousCooking.com

Ingredients
  

  • 1 bunch radishes
  • 1 cup vinegar I used 1/2 apple cider and 1/2 rice vinegar
  • 1/2 cup cold water
  • 1-2 tablespoons honey or granulated sugar
  • 2 teaspoons sea salt
  • 1 clove garlic sliced
  • 4 peppercorn smashed
  • 4-8 coriander seeds whole optional

Instructions
 

  • Thinly slice the radish bulbs and place them in a jar. In a small saucepan combine the vinegar, cold water, honey/sugar, sea salt, peppercorn, coriander seeds, and the garlic. Stir to combine, bring to a boil, and then remove from the heat.
  • Pour the vinegar mix into the jar. Place the lid on the jar. Allow the radishes to sit until cool. Refrigerate until ready to use, up to 10 days.


100% Whole Wheat Blueberry Muffins

Whole Wheat Blueberry Muffins from DealiciousCooking.com

You should know by now that I have serious baking issues. I won’t bother to repeat again everything I find so challenging about baking. Simply put, baking is a pain and I can only get it right occasionally. One of the rarest occasions happened over the weekend.  I made the most delicious, moist, and fluffy 100% whole wheat blueberry muffins. Now, 100 % whole wheat does not always go with adjectives like these, but this recipe is PERFECT and I’m so happy that I haven’t gave up baking just yet!

Here is one handy baking tip for muffins I’ve learned from a pastry chef; do NOT over mix the ingredients or you end up with rubbery and chewy muffins. The wet ingredients for this recipe should look like this after being mixed:

Secret for the perfect muffin

And it’s totally fine to have a few streaks of flour after adding the dry ingredients.

Whole Wheat Blueberry Muffins DealiciousCooking.com

100% Whole Wheat Blueberry Muffins with Kefir

Dominique for DealiciousCooking

Ingredients
  

  • In a large bow whisk together:
  • 2/3 cup sugar
  • 2.5 oz butter cut into pieces at room temperature
  • 1/2 cup of milk 1 or 2%
  • 1/2 of blueberry or vanilla kefir
  • 2 eggs
  • In a medium bowl whisk together"
  • 1-1/3 cup whole wheat flour
  • 2 tsp baking powder
  • 1/4 tsp salt
  • 1/2 cup blueberries

Instructions
 

  • Whisk the wet ingredients until the butter just form tiny pebbles.
  • Pour the dry ingredients over the wet and mix JUST until combined. Do NOT overmix.
  • Spoon into muffin tins (half way) or paper pannetone cups.
  • Sprinkle with coarse sugar.
  • Bake at 375F for 20 minutes or until golden all over.

Notes

It makes 12 small muffins.


Arugula and Grape Salad with Black Forbidden Rice and Blue Cheese

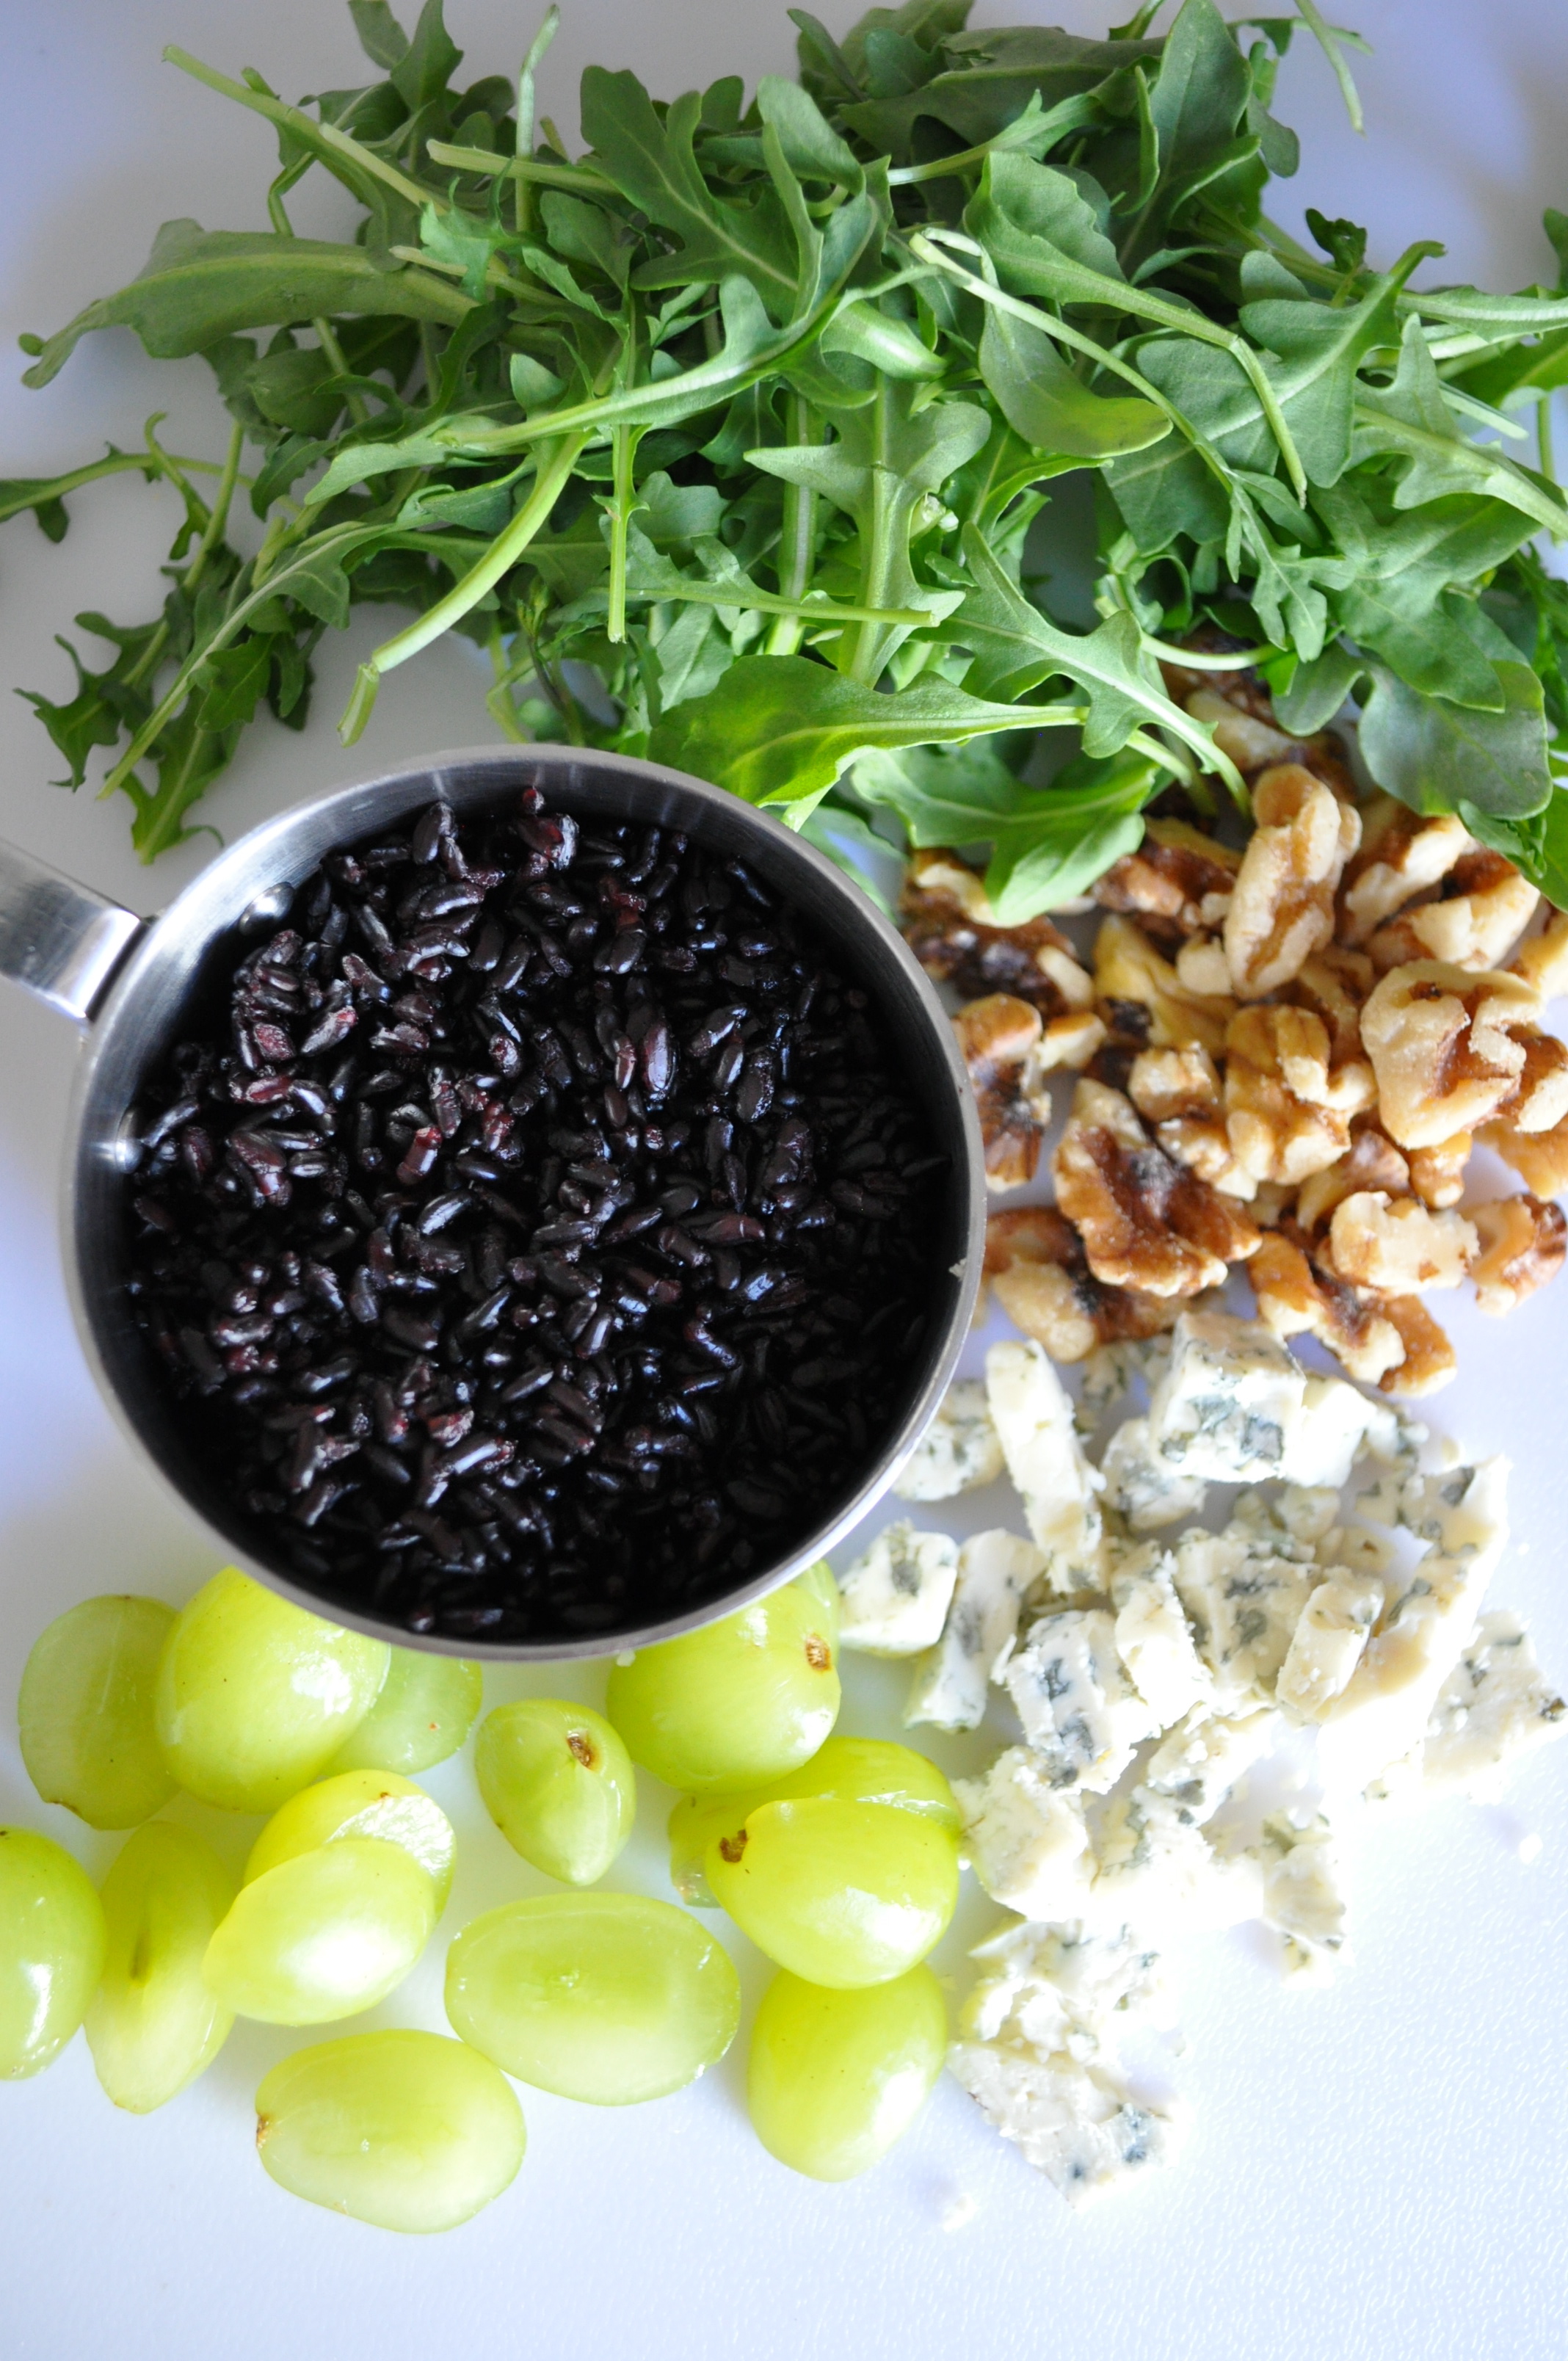
Arugula and Grape Salad with Black Rice and Bluecjeese dealiciouscooking.com

Black rice is the new brown and my family is officially converted to black rice. The benefits of black rice are endless and I blogged about it here but if you missed here is the scoop. Like brown rice, black rice is full of antioxidants, which is found in the outer layer that gets removed during the milling process to make white rice. But only black-rice contains the antioxidants known as anthocyanins, (also found in blueberries, grapes, and acai) that have been linked to a decreased risk of heart disease and cancer, improvements in memory, and other health benefits.

I was really surprise when my 8-year-old picky eater chose black rice over brown rice today. I’m pretty sure that she would’ve chosen white rice if it was an option, but black rice was her choice…and ‘that’ made my day!

I put this lovely salad together with the  leftover black rice for hubs and me. It was delicious and it took less than 10 minutes to make.

Arugula and Grape Salad with Black Rice and Bluecjeese dealiciouscooking.com

The deal: Sprouts has Lotus Organic Black Forbidden Rice for $3.99 (15oz bag) this week, which it’s definitely a great price!

DSC_0749

Arugula and Grape Salad with Black Forbidden Rice and Bluecheese

Dominique for DealiciousCooking.com

Ingredients
  

  • For the Salad:
  • 7 oz bag of wild arugula I used Trader Joe’s Organic Wild Arugula
  • 1/2 cup of green or red grapes cut in halves
  • 1/2 cup of steamed black rice I used Lotus-Org Forbidden Black Rice
  • 1/4 cup of blue cheese feta cheese and goat cheese works too
  • 1/8 cup chopped walnuts
  • For the Vinaigrette
  • 1/8 cup minced onion or shallot
  • 2 tablespoons olive oil
  • 2 tablespoons water
  • 2 tablespoons honey
  • ½ tablespoon apple cider vinegar
  • ½ teaspoon of liquid aminos or ½ teaspoon salt
  • 1 orange squeezed

Instructions
 

  • Combine salad ingredients. Mix the vinaigrette ingredients well and drizzle over salad. Toss salad to coat. Add fresh cracked black pepper to taste.

Apple Honey Cake

Whole Wheat Honey Olive Oil Apple Cake

I just love this recipe so much. For somebody that hates baking, this is a very easy to make cake and it never fails. I’ve made it about a dozen times, and it’s one of my favorite cakes.  It’s easy to bake, super moist, semi-chunky and perfect with a cup of coffee.

I found the recipe at one of my favorite food blogs Pinch of Yum. Their recipe includes a frosting that I never bother to make because the cake is so delicious as it is and we usually start devouring it before it even has a chance to cool off. I know, we are monster!

I’m still taking baby steps on the whole blogging thing, and I may suck at blogging as much as I suck at baking. But I’m trying. I love having my recipes documented and trying other bloggers recipes.

So many recipes to create, to try and to share…So little time.

The Deal: This week @Sprouts Gala, Granny Smith or Red Delicious Apples are 98cents lb. I’ve used Granny Smith and Gala apples for this recipe before and they are both great.

Whole Wheat Apple Cake from DealiciousCooking.com

Apple Honey Cake

Pinchofyum.com

Ingredients
  

  • ¾ cup white sugar
  • ½ cup olive oil
  • 2 large eggs
  • ½ cup honey
  • 1 teaspoon vanilla extract
  • 1 cup whole wheat flour
  • 1 cup all purpose flour
  • 1 teaspoon baking powder
  • 1 teaspoon baking soda
  • 1 teaspoon salt
  • 1 teaspoon cinnamon
  • 4 minced apples I julienne it in the food processor

Instructions
 

  • Start by preheating the oven to 325 degrees. Grease a bundt pan or classic 9" tube cake pan. Core the apples and mince or julienne them in a food processor.
  • Whisk the sugar and oil together until smooth. Whisk in the eggs, honey, and vanilla.
  • In a separate bowl, combine the flours, baking powder, baking soda, salt, and cinnamon. Gently stir the dry mixture into the wet mixture until just combined.
  • Fold the apples into the batter. Pour into bundt pan (I used a 1Classic 9" tube cake pan.)
  • Bake for about 45 minutes, let stand for 10 minutes, and invert onto a plate.


Blueberry Orange Chia Seed Jam

Blueberry Orange Chia Seed Jam

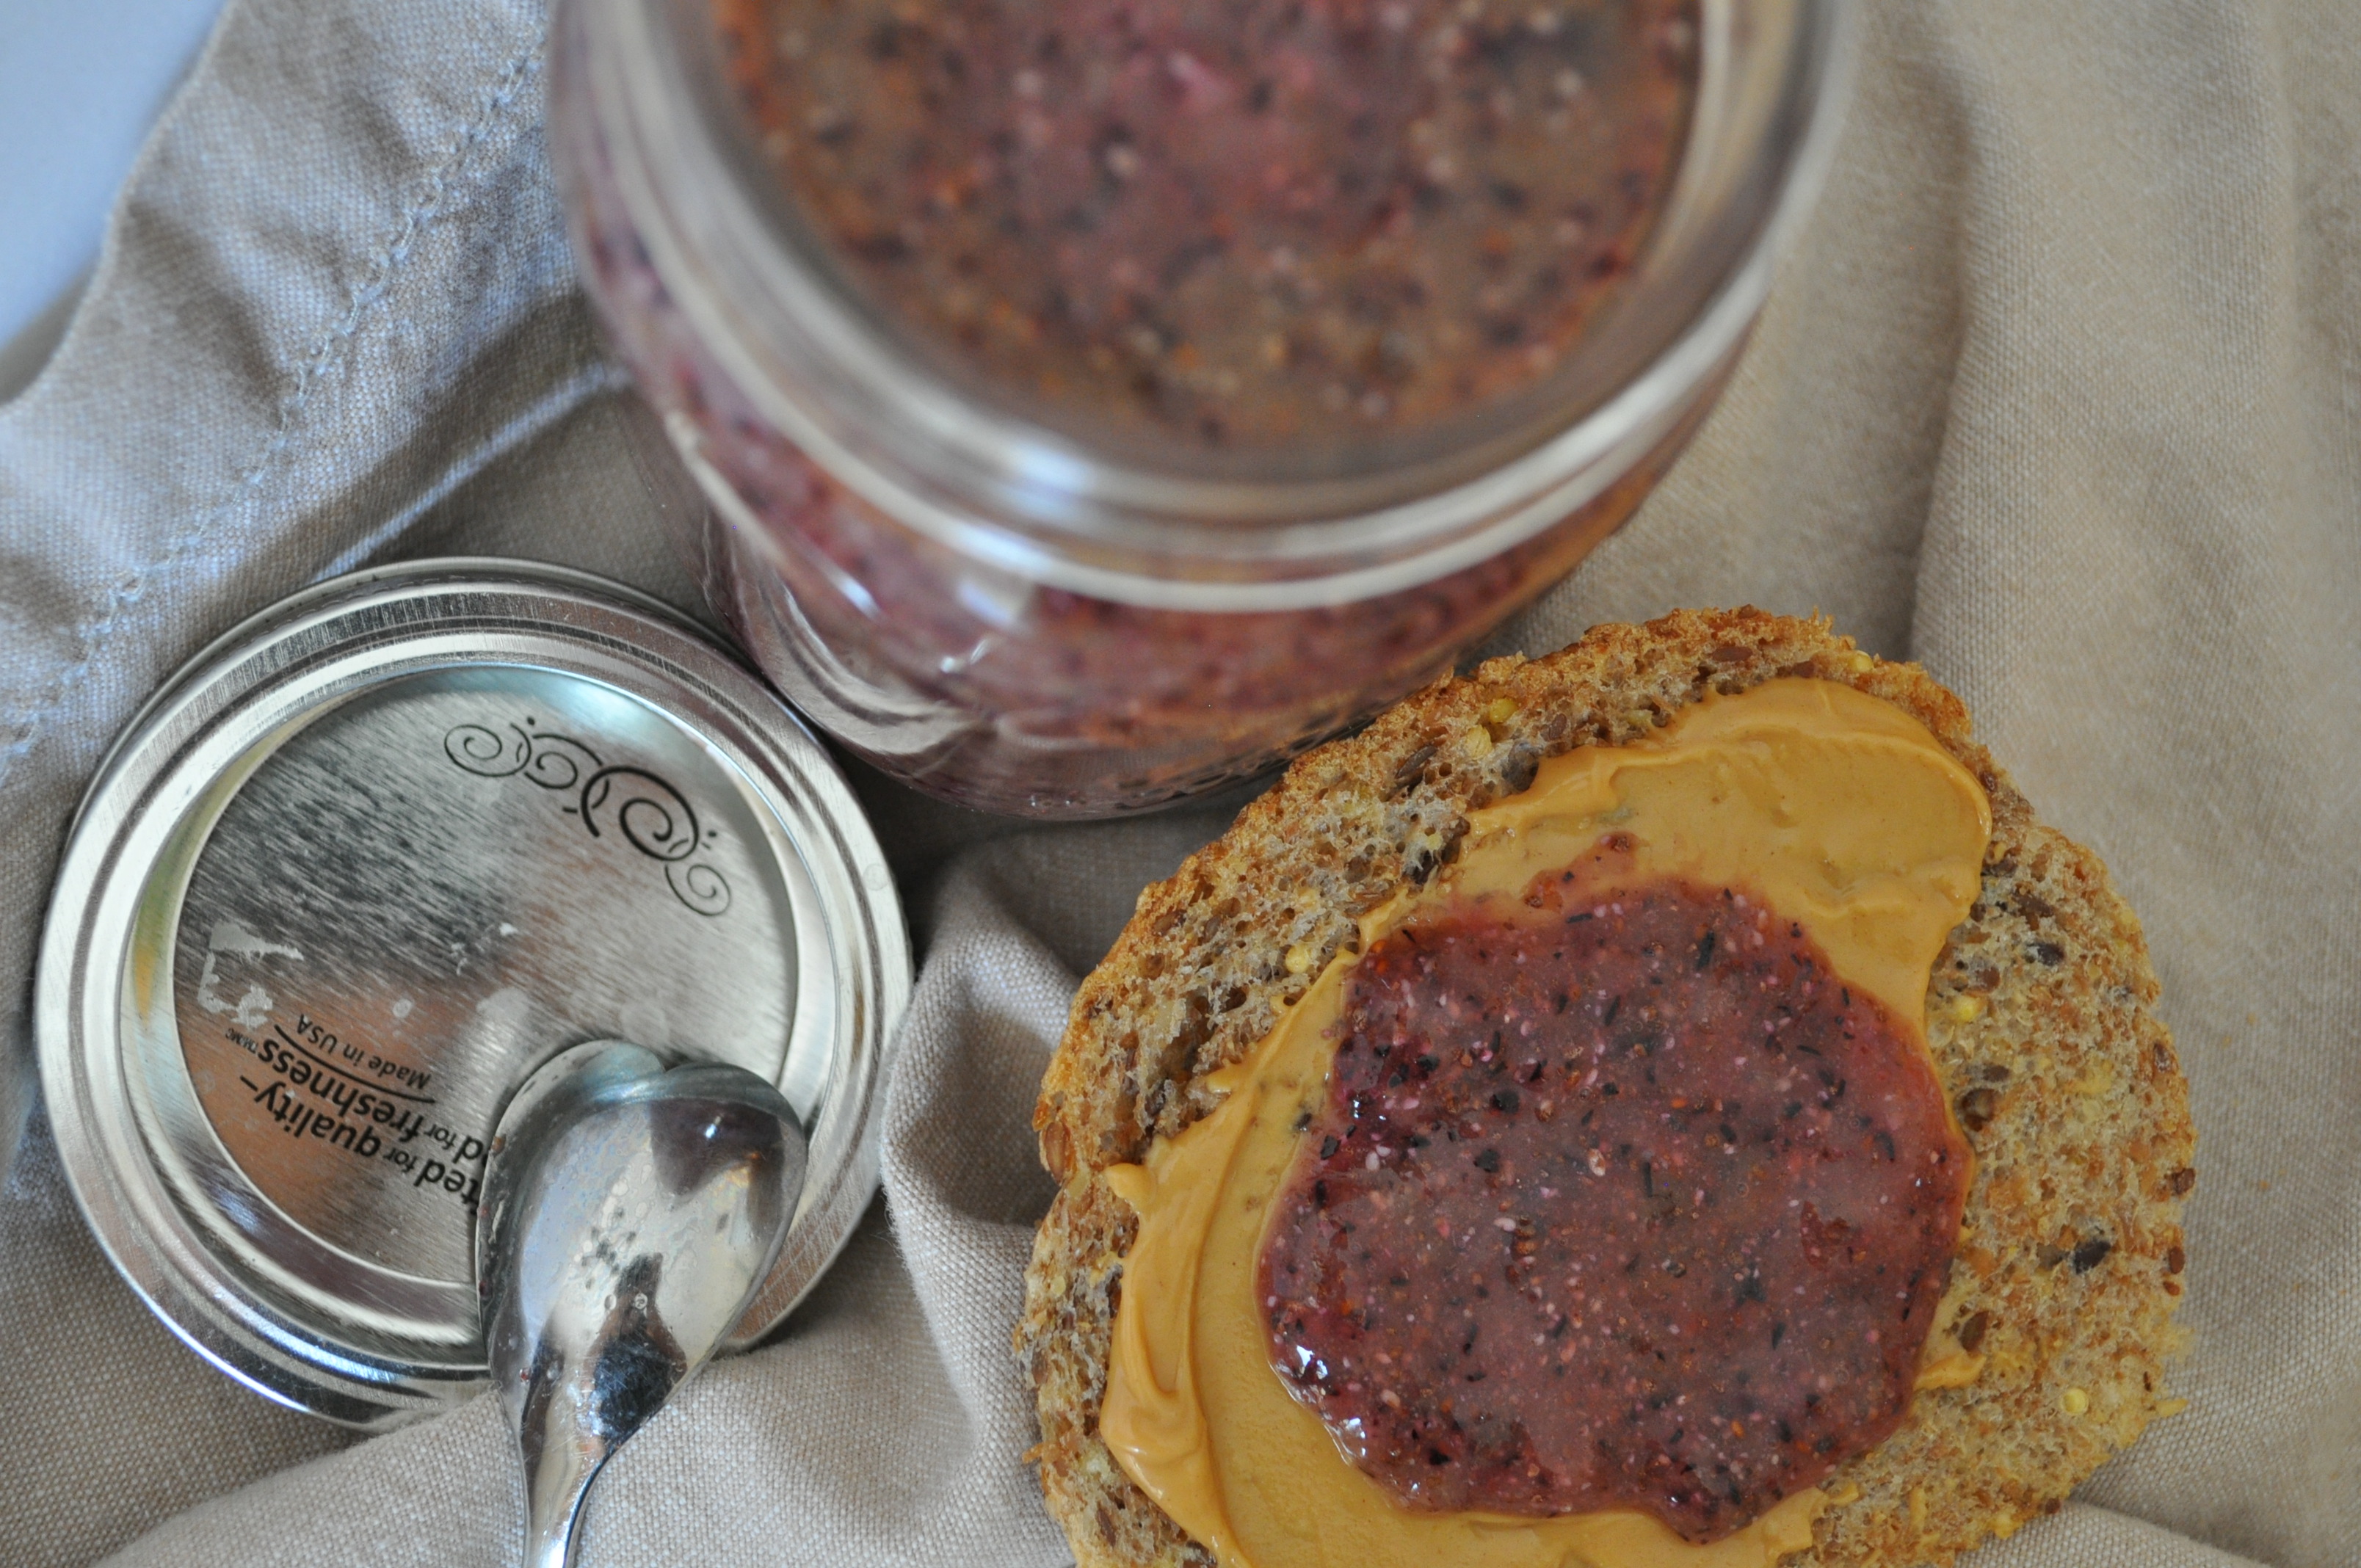
This easy jam is a lot better for you than jams or jellies that are loaded with sugar.  Blueberries, orange juice, chia seeds and maple syrup, each of these ingredients carry their own benefits. I usually have it with toast, but it’s also delicious over Greek yogurt and oatmeal.  

The deal: Blueberries are $0.98 at Sprouts starting today!

Happy jamming!!!!

Blueberry Orange Chia Seeds Jam

Blueberry Orange Chia Jam

Dominique for DealiciousCooking

Ingredients
  

  • 1 small pack of fresh blueberries 4.4oz
  • 3 tablespoons chia soaked in 1/2 cup of orange juice or water or fresh apple juice
  • 1-2 tablespoons maple syrup

Instructions
 

  • Start by soaking chia seeds in 1/2 a cup of orange juice or water or apple juice and one tablespoon of maple. Leave the chia seeds to soak until all the liquid soaks into the seeds and you have a gel (about 30 minutes)
  • Put the chia mixture, blueberries, and maple syrup in a blender and blend until smooth. Try it and add more syrup if needed.
  • The mixture will be similar to a smoothie. Refrigerated to allow it to firm up slightly. If you want the mixture thicker and more firm, stir in another tablespoon of chia seeds.

Notes

This jam is delicious on fruit bowls, toast, ice cream, or anything that will hold still. It can keep for one week in the refrigerator, but we usually finish it before that.


Roasted Chickpeas

Roasted Chickpeas

This is a healthy alternative to those “I need something crunchy and salty” cravings.  Roasting the garbanzos to a perfect crunch can be tricky, but at the right temperature and diligent supervision, you can have a deliciously addicting snack.

And here is the deal on chickpeas or garbanzo beans: They’re high in fiber,  manganese (for energy production), folate and protein and there are some studies out there that claim chickpeas even help to regulate appetite. So ‘hell yeah’ I’m going to much on these little salty crunchy bombs all day long!

Here is what you need: (If you’ve never roasted chickpeas, start with one can and see how you like it. I usually make 2 cans at the time. )

Roasted Chickpeas

Rinse it well.

Roasted Chickpeas

Lay them out on a baking sheet lined with paper towel and pat dry with another paper towel.

Roasted Chickpeas

Remove the paper towels and now drizzle a bit of olive oil (about 1tsp per can) tossing them about to even the oil out. 

Roasted Chickpeas

Oven roast them at 400F for 30-40 minutes until golden brown and crunchy. I use a convection oven at 350F for about 30 minutes. After the first 10 minutes, take the baking sheet out and toss the chickpeas around. Do that every 10 minutes to make sure they roast evenly. Try one (remember to let it cool off first) and if the center is still moist and soft, roast it a bit longer.

Once they’re done, season immediately with salt, garlic powder, paprika, cayenne or whatever you wish (even cinnamon and sugar, if it’s sweet crunch that you’re craving.)

Finally Roasted

I like them seasoned with the smoked Pacific sea salt from Trader Joe’s (told ya to keep it handy) but anything goes. I want the kids to try it, so I didn’t add cayenne pepper this time.

The biggest mistake I made? Deciding to oven roast them on one of the hottest days of spring. It’s 97 degrees outside. I should be making popsicles. Oh well, I guess I’d enjoy my crunchy chickpeas with an ice-cold beer.

Cheers!

30 minute Honey Sesame Baked Salmon

30 min sesame honey baked salmon

This is a family favorite and you only need 30 minutes to get it done. We try to eat fish once or twice a week. Salmon is the kids and ‘hubs’ favorite fish. I’ve made baked salmon all sort of ways, but this is the winner.

The ‘Deal’:  Sprouts has this delicious super fresh Chilean salmon for $9.99 lb. this week.

Start by placing the salmon skin side down on a baking sheet lined with foil. Wipe the fish gently with a paper towel, removing excess juices and scales. Sprinkle 1/2  tsp salt over it and let it sit while you mix the sauce. Note: I used smoked sea salt from Trader Joe’s for extra flavor and I recommend having this delicious and super salty salt handy.

Baked Sesame Honey Salmon

Make the sauce

Sesame Homey Baked Salmon ingredients

For each 1 lb. of salmon you’ll need the following ingredients for the sauce:

  • 1 tbsp Liquid Aminos or 1/2 tbsp of soy sauce
  • 2 tsp honey
  • 1 tsp sesame oil (I used black sesame oil)
  • 1/2 tsp onion powder

Mix all the ingredients well and pour sauce over the salmon slowly, making sure all sides are cover.

Honey Sesame Baked Salmon 30 min

Here is the “dirty little secret” for this recipe. I added 1/2 tbsp of MAYO after fish absorbed the sauce for a couple of minutes to seal the taste and add some evilness to such a clean recipe (Mayo is optional but it tastes so much better with it. It’s only 1/2 tbsp but it’s worthy! Just sayin’)

Honey Sesame Baked Salmon 30 mi

Spread the Mayo like you mean it, until the fish is covered with a brownish homogeneous coat. Sprinkle toasted sesame seeds to taste and let it bake for about 20 minutes at 400-420F. The sauce around it will burn due to the honey at high temp, but don’t panic. The salmon should be cooked through, crispy on the sides and moist in the inside.

Honey Sesame Baked Salmon 30 min

To place salmon on a serving dish, gently run a thin spatula between the fish and the skin. The salmon skin should remain stuck to the foil and the spatula should run easily under the fish.

We ate our salmon tonight with a side of jasmine brown rice and steamed broccoli but we also love it with coucous and quinoa. If you happen to have any leftover, ad it to a salad. It tastes great cold too!

Happy Healthy Eating everyone (minus the MAYO)

Gluten Free Banana Peanut Butter Muffins

Gluten Free Banana Peanut Butter Muffins

Although I don’t seem to need a gluten free diet, I love to explore the paleo/gluten-free/primal/against all grains world. As I mentioned before here, I do believe that eliminating SOME gluten makes SOME difference on my energy, mood and craving levels. Also, my belly seems to be happier and flatter when I stay away from bread and all things deliciously glutinous.

These muffins turned out delicious. They were moist and not overly sweet. I decided to obey to my 7-year-old daughter’s wisdom and I topped the muffins with peanut butter chips from Trader Joe’s (probably NOT a gluten free food.) Perfect addition!

I don’t like baking (remember?) I suck at it. Interestingly, most of the gluten free baking recipes I’ve tried have worked so far…hum…except for the minute microwave mug cake that I ate anyway. So I’m going to listen to the coconut and almond flour universe more often and keep trying new gluten-free recipes. Happy chef and happy belly!

Gluten Free Banana Peanut Butter Muffins

Gluten Free Banana Peanut Butter Muffins

Dominique for DealiciousCooking

Ingredients
  

  • 4 bananas the riper, the better
  • 4 small eggs
  • 2 tbsp of unsweetened almond milk
  • 1/2 cup peanut butter I used Trader Joe's creamy salted PB
  • 2 tbsp coconut oil melted
  • 2 tbsp agave syrup can substitute for honey
  • 1 tsp vanilla
  • 1/2 cup coconut flour
  • 2 tsp cinnamon
  • 1 tsp baking powder
  • 1 tsp baking soda

Instructions
 

  • Preheat oven to 350 degrees F. Spray a muffin tin with Pam or vegetable oil. In a large bowl, using a hand blender, blend the bananas, eggs, almond butter, almond milk, agave/honey, coconut oil, and vanilla.
  • Add in the coconut flour, cinnamon, baking powder, baking soda, and salt. Blend into the wet mixture. Place the batter evenly into the muffin tins, filling each about two-thirds of the way full.
  • Bake for 20-25 minutes, until a toothpick comes out clean (I overcooked mines a bit but they still came out moist and delicious.)

Notes

Top with chocolate and/or peanut butter chips before baking for extra sweetness.