Uncategorized
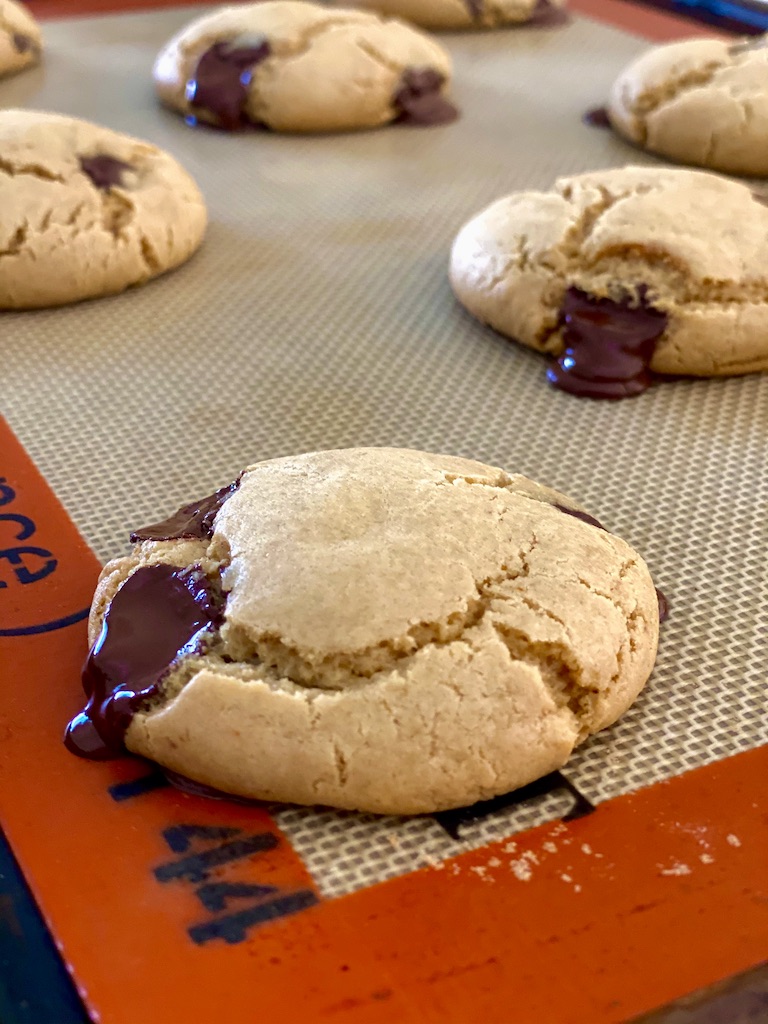
Miso chocolate chip cookies

Yes! Miso. You read that right. No! I didn’t invent it. Apparently, miso cookie recipes have been around for a while. Maybe the best ingredient ever known to the history of cookies.
Sweet-savory is my favorite kind of sweet and these Miso chocolate chip cookies fit perfectly into my cookie universe!
Before we jump into the recipe, here are a couple of notes:
- You can substitute coconut oil for unsalted butter. Just make sure it is unsalted since the miso paste is already pretty salty.
- I used dark chocolate for this recipe but I think semi-sweet or even white-chocolate chips could be good too.
- If you make this Miso chocolate chip cookies recipe please leave me a note here or on my Instagram post.
Miso Chocolate Chip Cookies
These Miso Chocolate Chip Cookies are everything perfect cookies inspire to be! Crispy ends, chewy center, and just the perfect sweet-salty-nutty balance!
Ingredients
Method
- In a large bowl mix all dry ingredients together.
- Using a stand-up mixer or hand mixer cream the coconut oil, sugars, vanilla. Once it is creamy and somewhat fluffy lower the speed and add the egg. Mix slowly until combined.
- Add the dry mixture slowly. Once combined add the chocolate chips to the cookie dough. I prefer doing this step manually with a spatula.
- Scoop up portions of the dough and roll it with your hands into balls. Place them onto a baking sheet or large plate and let it chill in the fridge for 40 minutes or freezer for 12 minutes.
- Preheat oven at 350 degrees. Line a couple of baking sheets with parchment paper or silicone pastry mat.
- Transfer the cookie dough balls to the lining baking sheets. Make sure to space them living room for spreading. Bake for 12-15 minutes or until edges are slightly brown.
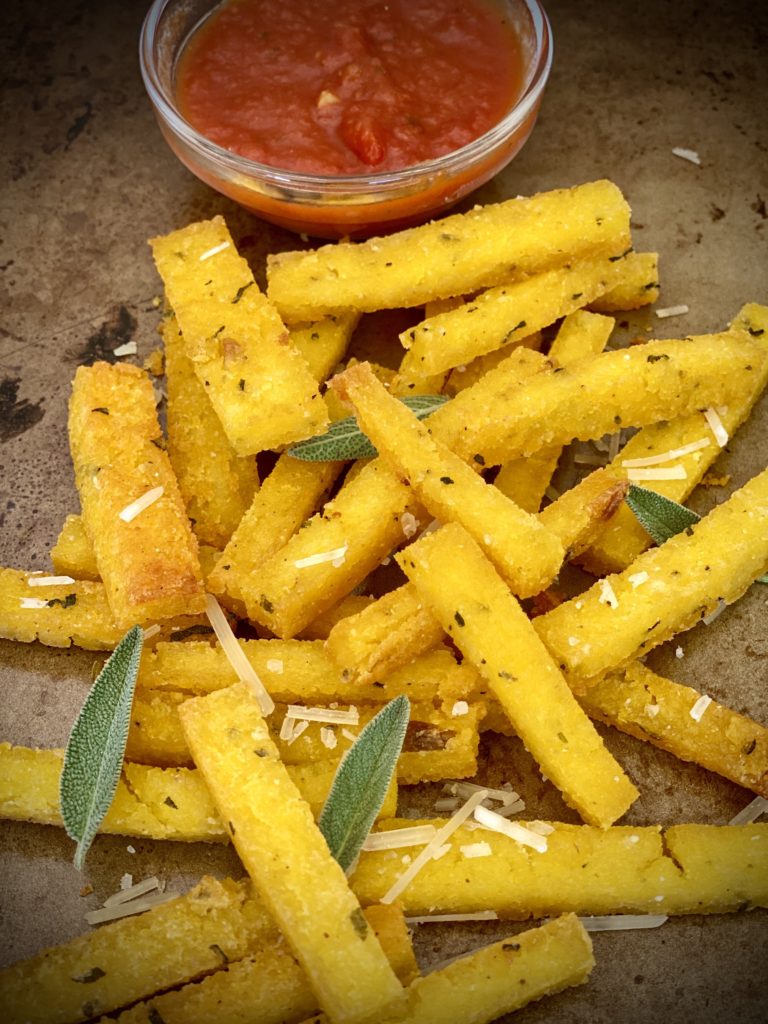
Sage Parmesan Baked Polenta Fries with a side of honesty!
Extra crispy, creamy on the inside, and cheesy all around , these Sage Parmesan Baked Polenta Fries are such a pain to make! The easiest part of this recipe is making the instant polenta. The hardest part is turn it into crispy oven-baked polenta fries. It’s an easy recipe but requires time. So I don’t make them often but when I do they disappear fast.
Here is the thing, after adding garlic, parmesan, sage, butter to the creamy cooked polenta, it needs to be spread out in a square baking dish and placed in the freezer until the polenta stiffens up. This doesn’t take long but adds more time (15-20 minutes) while tries my patience.
Then you pull the polenta out of the pan and cut it into fries. No, it’s not that that easy because cutting them evenly is challenging. Stopping my hungry self from eating the corners and edges it’s a torturous task.
Once the polenta is cut into some kind of ‘fries’ shape, you need to toss the fries with olive oil, but you have to do this gently or they may fall apart because now they have been out of the freezer for too long.
Then bake one side until crispy – 15 minutes. Don’t you dare flip them when they are not ready. They will fall apart or still be stuck to the pan. Exercise patient. Flip them over – one by one. 15 more minutes until crispy AF and now you have the most delicious and addicting Sage Parmesan Baked Polenta Fries ever!
A couple of notes:
- Make a double batch. These are laborious and it’s frustrating how fast they go.
- Omit or replace sage with whatever herb(s) your heart desires. I just happened to have a lot of sage in the garden.
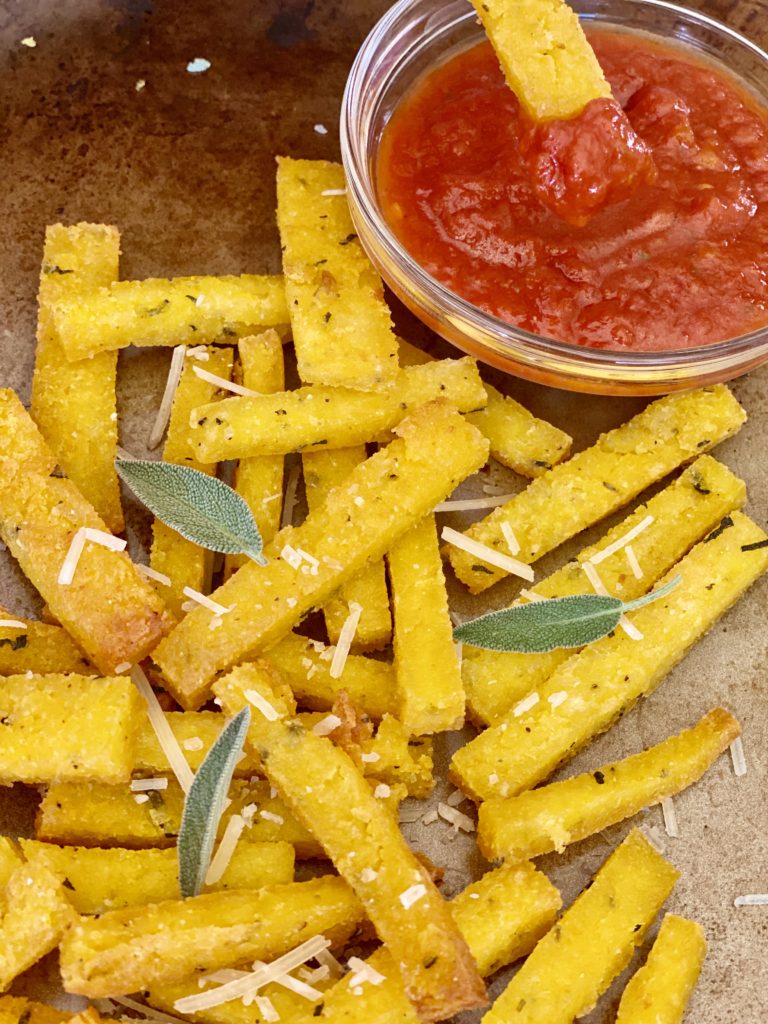
Sage Parmesan Baked Polenta Fries
Easy to make batch of instant polenta turned into crispy oven-baked polenta fries that are so delicious! Extra crispy and yet creamy inside serve them with a side of marinara sauce or just eat it plain out of the oven!
Ingredients
Method
- Bring 2 cups water to a boil in a medium saucepan. Slowly whisk in the polenta, garlic ,sage, parmesan, and season with salt and pepper. Stir until the polenta is soft and thick, about 3-5 minutes. Turn the heat off, cover the pot, and let the polenta sit 5 minutes.
- Line an 8×8 square baking dish with parchment paper. Spread the polenta in an even layer in the dish. Freeze 15-20 minutes, until set, or 1 hour in the fridge.
- Preheat the oven to 450F. Take the polenta out of the baking dish and cut into thin or thick "fries" shape. Spread some olive oil on a baking sheet. Place the fries on the prepared baking sheet and gently coat them with more olive oil. Spread the fries in an even layer. Transfer to the oven and bake for 15 minutes, then carefully flip. Bake for 15-20 minutes more until crispy.
- Season with salt, some extra parmesan, and sage. Serve with a side of marinara sauce or ketchup. ENJOY!
Can I cook yet?
We’ve finally pulled the trigger on our kitchen remodel! After so many years of dreaming, months of planning and hours of pinning ideas – the remodel is ON!

Tile countertop, painted cabinets with misaligned doors, exposed hinges, ancient ceramic cook top, no hood, no counter space, jammed drawers, tiny sink, and the worst of it all…disgusting and fugly linoleum floors. This old shoebox kitchen had it all!


Demolition was the easiest and most rewarding part. When you love cooking and do it everyday in a kitchen you have very little love for, seeing it being hammered down piece by piece is orgasmic highly enjoyable!

This kitchen was the worst part of the Fry shack and even with all the family memories we’ve made in it I was so satisfied to see it just like this…totally naked!


I’m thankful for my awesome grill and great SoCal weather which it was perfect for the first 3 weeks of the remodel. We barbecued a lot and ate in the patio. Now that the weather has cooled down, the crockpot and toaster oven have been lifesavers!
We were hoping for our kitchen to be at least useable by Thanksgiving but it looks like we’ll have to barbecue the Turkey. Keeping our fingers crossed to be able to bake cookies for Santa in our new kitchen.
Put an apron on!
I love to cook but hate to clean up. I know a lot of people identify with this statement. And I’m not only talking about the amount of clean-up I do just to prepare the meal. I’m referring to all the cleaning involved with cooking, including the clean-up waiting for me as soon as everyone has left their seats and disappeared from sight.
Cooking is messy, and splashy, sticky, and gross at times. It takes a fair amount of space, tools, planning, patience and cleaning. But then there is the flip side. Chaos precedes creation. Somehow in all the mess making I create something good. Something tasty enough to make my kids go hmmmm and that makes up for all the clean-up I did or still have to do.
Yesterday’s Chaos

The creation

Summer and Pickled Radishes

Summer is here! We don’t have big plans other than lots of beach time, gatherings with friends, and eating lots of summer dishes. The grill will be in full force and my new ice-cream maker is just one of the best things I could hope for this summer. So far we’ve made banilla and also strawberry ice cream. I can’t wait to unleash the not so ‘kid friendly’ flavors.
Our first and probably only summer project is this vegetable garden raised bed. No, I did not built it. I got it from my hubby and kids for my birthday. This one is made by Gronomics and hubby got it online at Crate&Barrel but there are many different elevated garden beds available online. Our green thumbs have been challenged and we’re waiting patiently for our eggplants, hot chili peppers, okra, kale, and mustard greens (still seedling.)

Lately, I’ve been seeing a lot of posts and Instagrams of pickled radishes. I’ve never made it before and I was just curious about all the hype.
I was planning to add them to tacos but after letting it rest for a day in the fridge I tried one, and another, and one more…and I’ve been snacking on them since them. It was love at first bite for sure, but let me tell you, it smells like fart every time I open that jar. But I don’t care. They are radishes after all.
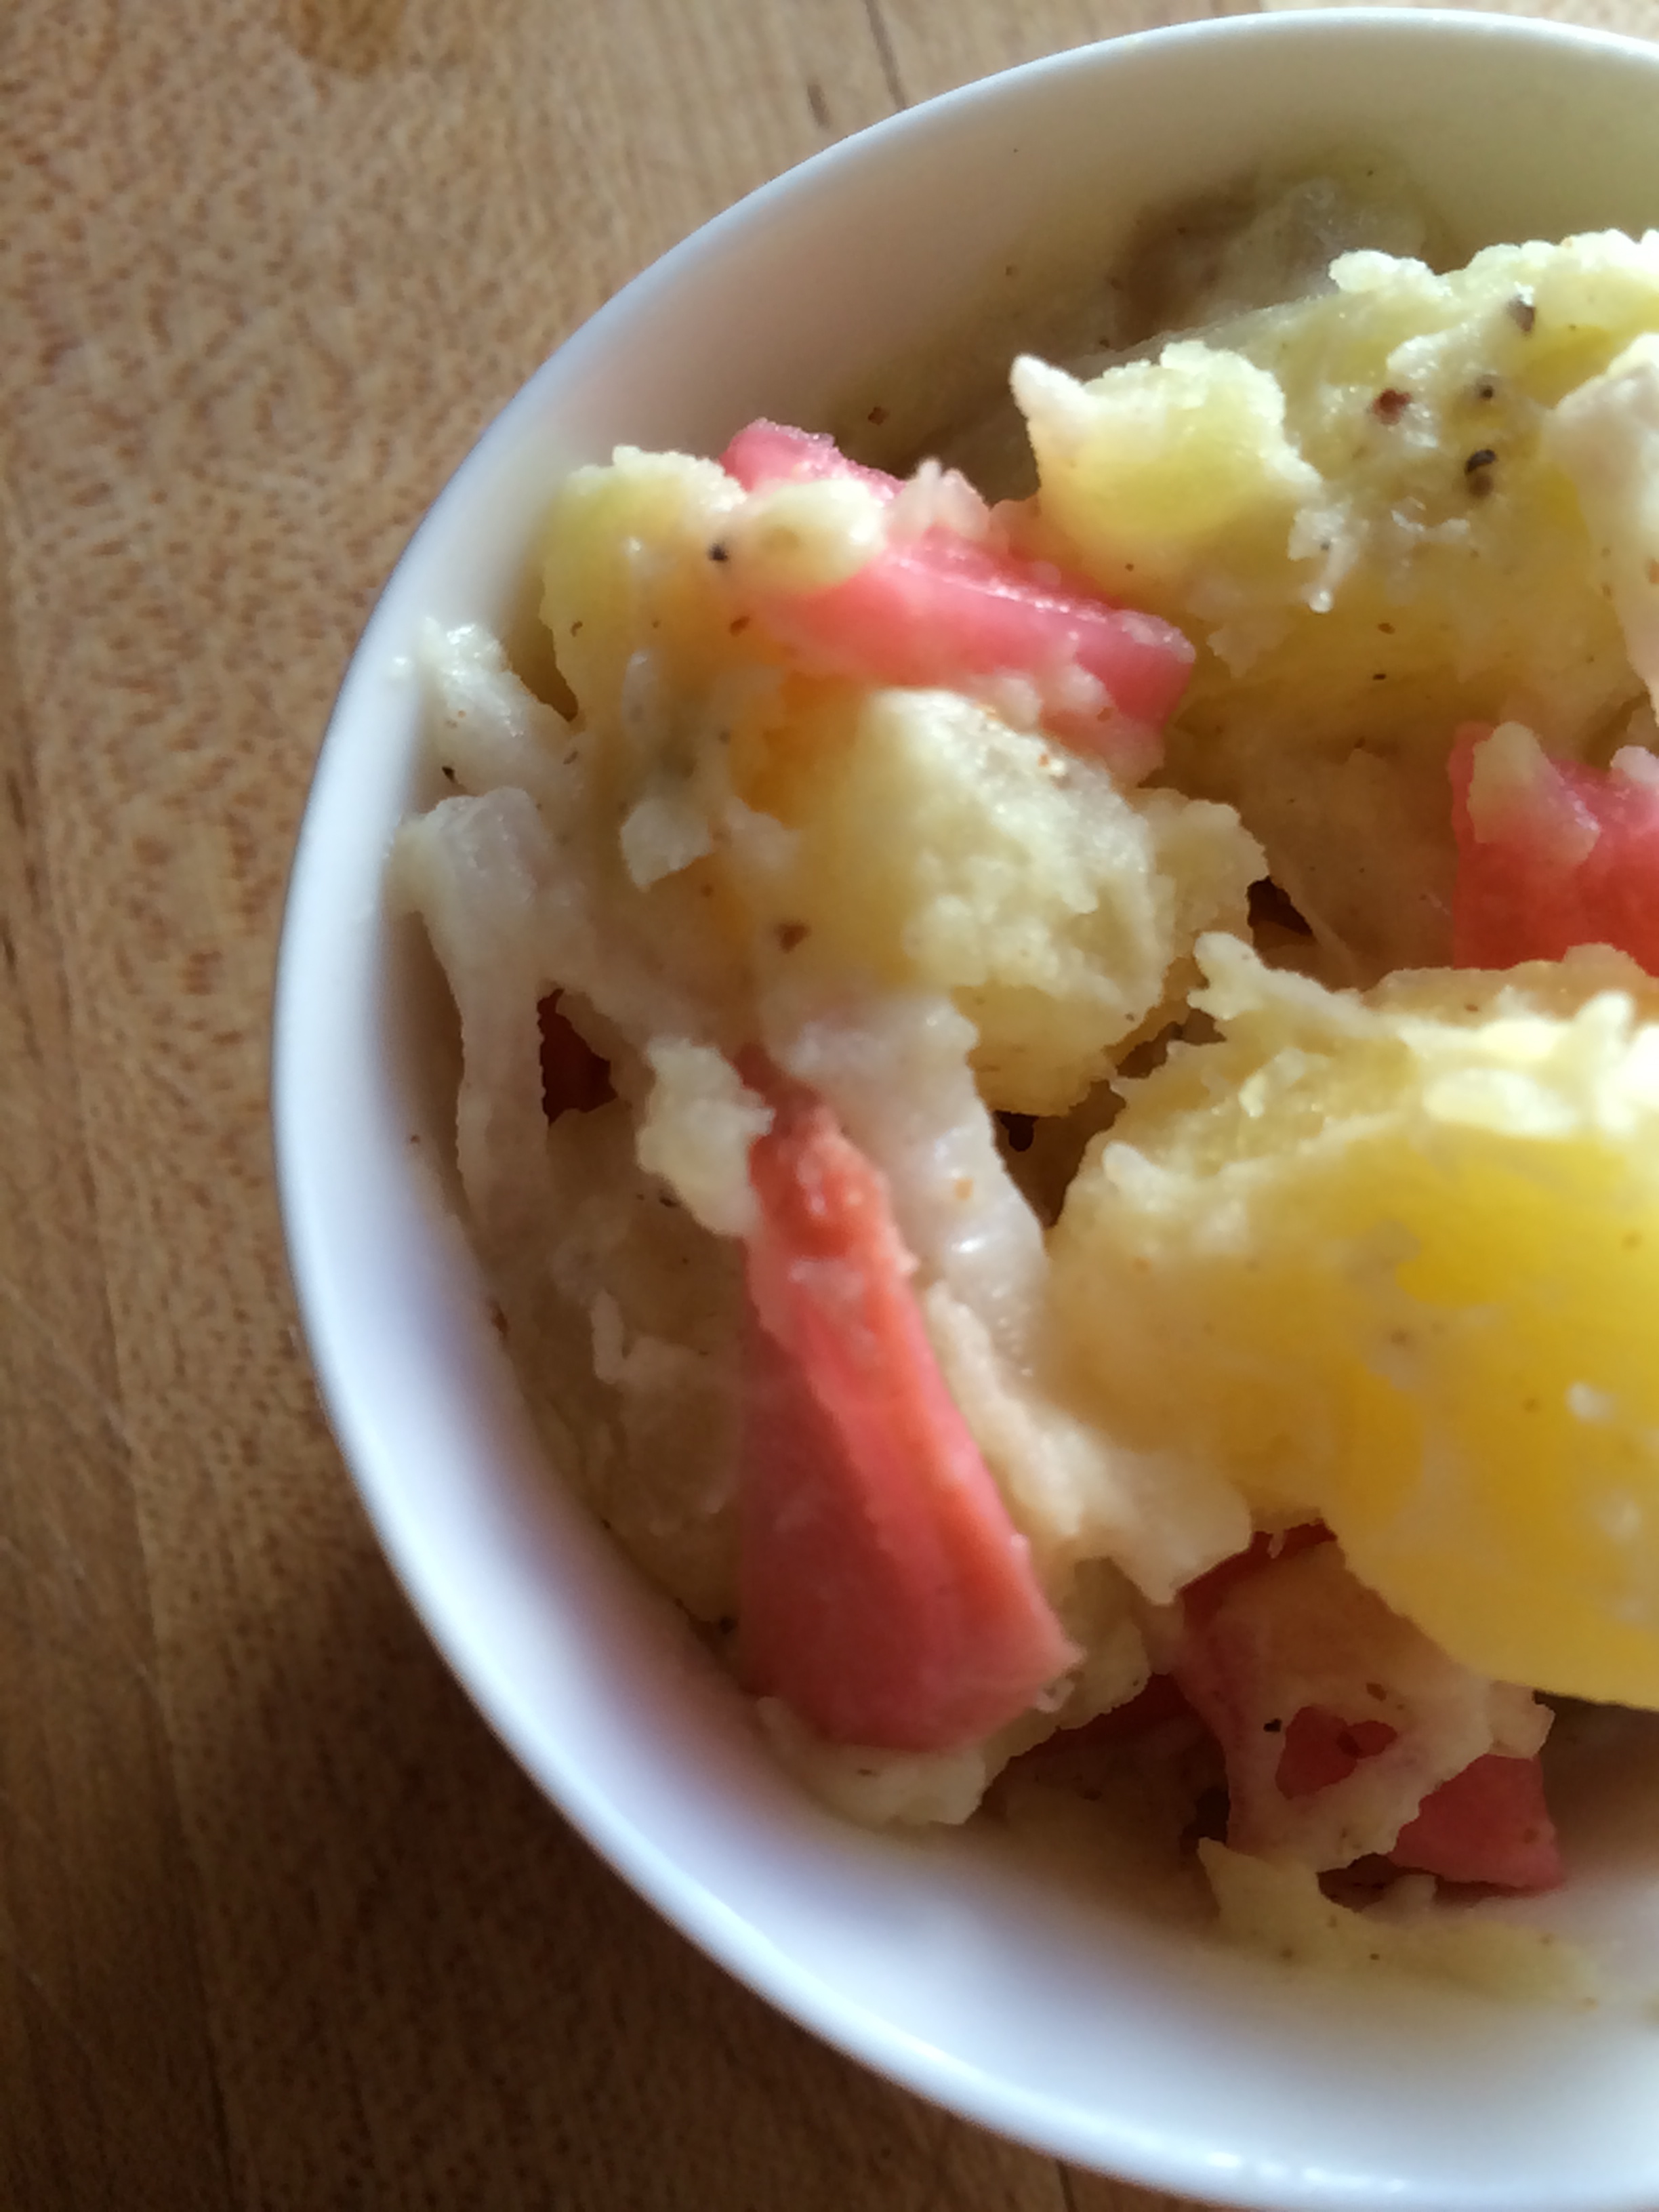
These batch never made it to see a taco, but I added the pickled radishes to this horseradish mustard potato salad. They added a special sweet and sour crunchiness to it. So good!

And if you ever get to make these pickled radishes try them on top of smashed avocado toast or crackers. I’m hooked on these so bad!

Happy summer to all!
Ingredients
Method
- Thinly slice the radish bulbs and place them in a jar. In a small saucepan combine the vinegar, cold water, honey/sugar, sea salt, peppercorn, coriander seeds, and the garlic. Stir to combine, bring to a boil, and then remove from the heat.
- Pour the vinegar mix into the jar. Place the lid on the jar. Allow the radishes to sit until cool. Refrigerate until ready to use, up to 10 days.
Saffron Pasta with Uni and Tobiko

Saffron Creme Fraiche sauce on spaghetti, Uni, frech tobiko, chili sauce
This dish was partially unplanned. A trip to the asian market for some furikake and next thing I know I’m bringing home fresh uni/sea urchin, flying fish roe/tobiko, persimmons and lots of green onions (they are consistently cheap at asian markets).
The best of spontaneous cooking like this is that dishes turn out pretty good most of the times. The worst part is that I can never replicate the flavors again. This Saffron uni pasta left us craving for more so I’ll try to document it as close as possible. This is how it went down:
- Cooked 1/2 of a spaghetti package all dente with approximately 2 tbsp of sea salt in the water
- While the pasta cooked I sauteed 2 cloves of garlic (minced) in 2 tbsp of extra virgin olive oil
- Added 1/4 of chicken broth
- Dissolved 1 sachet of pure Spanish powdered saffran (0,0044oz. Yes a little Saffran goes a long way. If powder it’s not available substitute with 4 to 6 medium Saffran threads)
- Added 2 to 3 tbsp of creme fraiche
- Drained pasta directly from pot with tongs and placed on sauce mixing well
- Divided pasta evenly into two bowls
- Placed 4 to 5 cold uni filets on top of each batch
- Topped with a dollop of creme fraiche in the middle, tobiko on top of creme, dollop of Garlic Chili Sauce (Hu Fong) on top of tobiko
- Enjoyed one of the best dishes I’ve ever made with a bottle of delicious Chablis (not bought at the asian market)
I must repeat it!
Waiting for Christmas

Nutella Hot Cocoa
We’re literally waiting for Christmas. All is ready. The Christmas tree, gifts, wrapping, spirits and, of course, the menu!
Tonight we tried Nutella hot cocoa for the first time. It’s so good!
- 1 tbsp of Nutella for each 1/2 cup of 1% milk (You can always add more Nutella if not dark enough)
- Heat it over the stove until the Nutella dissolves
- Sip!
- Reapeat!
Brazilian Style Stroganoff

Brazilian Style Stroganoff (Estrogonofe)
This originally Russian dish has adapted to the Brazilian ingredients and palate and it has become the traditional Brazilian ‘Estrogonofe’.
Although the Brazilian recipe calls for “Creme de Leite” (heavy Brazilian cream) and mushrooms, the recipe has also evolved in my kitchen over the years. My kids don’t like mushrooms and I prefer the lightness of Creme Fraiche over heavy cream.
The recipe can be made with a smaller amount of file mignon or chicken breast. Other less expensive cuts of beef can be substituted, but don’t choose a cut that requires a long cooking period to become tender.
Here are the steps:
- 2 lb filé mignon or other cut of lean beef, cut into thin 1-2 inch strips. Season the strips of meat with salt and pepper to taste. In a heavy frying pan add 1 Tbsp. of canola oil, and fry the meat until well-browned. Reserve the meat.
- In the same pan, heat 1 Tbsp. oil, then add one large white onions chopped and cook for 5-10 minutes, or until the onion is transparent but not browned. Add 2 cloves of minced garlic and cook it for 2 minutes. Return the meat to the pan, add 1/3 cup of ketchup and 1 cup of Creme Fraiche. Cook for five minutes in low heat to allow the flavors to mix.
- Serve with white rice and top it with ‘mandatory’ shoestring potatoes (it adds a welcoming crunch to these creamy and hardy dish).
- Best enjoyed with some Brazilian Bossa Nova music in the background and a bottle of Pinot Noir.
Bom apetite!
Quinoa salad

Quinoa Salad with mango and cilantro lime dressing
For the salad all you need is cooked quinoa (I usually follow the package directions and replace water for chicken broth) and whatever veggies and/or fruits you have available. The combination for the batch in the picture was grape tomatoes, mango, purple cabbage, purple onions and corn. I wish I’ve added avocados. It would’ve made this already good salad even better.
Here are the steps for the Cilantro lime dressing:
Dice or pure in the blender:
- 1/2 cup cilantro (go up to 1 cup if you really love cilantro)
- 1 clove garlic
- 1/2 cup lime juice (about 3 limes)
- 1 tbsp agave syrup (or honey)
- 1/4 tsp cayenne pepper
- 1/2 cup extra virgin olive oil
- 1/4 tsp salt
- 1/4 cumin